You've likely encountered Witches' Fingers at Halloween parties, their eerie appearance both intriguing and unsettling. These creepy confections have become a staple of spooky season festivities, but there's more to them than meets the eye. Beyond their ghoulish exterior lies a rich history and a surprisingly simple recipe that you can easily master. As you explore the origins and creation of these devilishly delightful treats, you'll discover why they've captured the imaginations of Halloween enthusiasts for decades. But what makes these cookies so enduringly popular, and how can you elevate your own batch to new heights of horror?
Key Takeaways
- Witches' Fingers are Halloween-themed cookies designed to resemble gnarled fingers with almond "fingernails."
- The recipe typically includes butter, sugar, flour, and almond extract, with whole almonds for decoration.
- These cookies gained popularity in the late 20th century as Halloween celebrations became more elaborate.
- Baking involves shaping dough into finger-like forms, adding almonds as nails, and baking until lightly golden.
- Decoration techniques include using food coloring for a witch-like appearance and creating realistic textures for a spooky effect.
History
While the exact origins of Witches' Fingers cookies aren't precisely known, they've become a Halloween staple in recent decades. You'll find that these spooky treats gained popularity in the late 20th century as Halloween celebrations became more elaborate and creative. The concept likely evolved from traditional shortbread or sugar cookies, with bakers adding a macabre twist to suit the holiday's theme.
As you explore the history of these eerie delights, you'll discover that they're part of a broader trend of Halloween-themed foods that emerged in the 1970s and 1980s. This period saw an increase in home baking and a growing interest in creating visually striking party foods. Witches' Fingers perfectly captured this spirit, combining a simple cookie recipe with a ghoulish appearance.
You'll notice that the recipe has remained relatively consistent over the years, with variations mainly in decorative techniques and flavor additions. The enduring popularity of Witches' Fingers speaks to their appeal as a fun, interactive treat that allows bakers to showcase their creativity while delighting party guests with a dose of Halloween horror.
Recipe
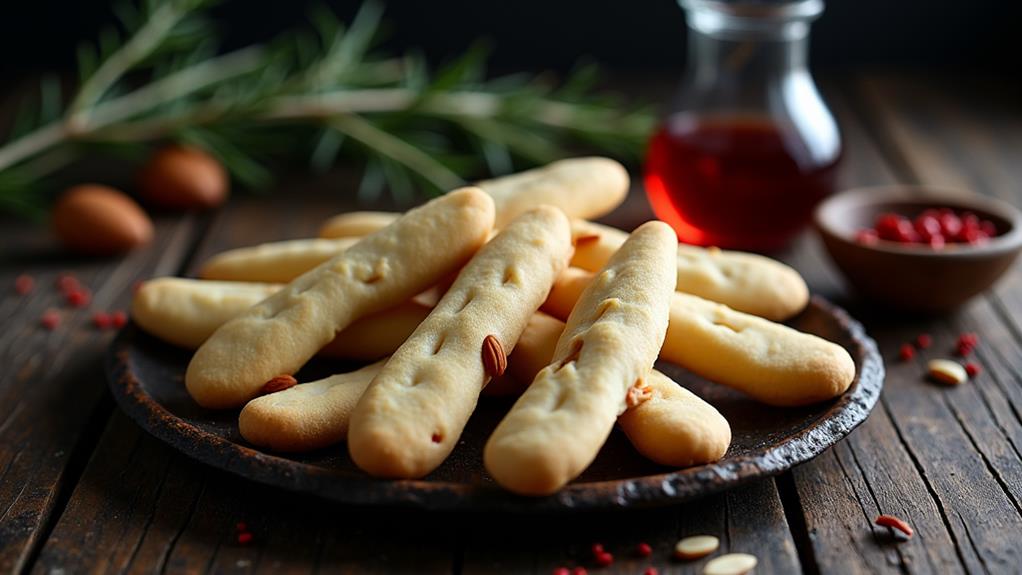
Witches' Fingers are a delightfully spooky treat perfect for Halloween parties and gatherings. These eerie cookies are designed to look like crooked, gnarled fingers, complete with almond "fingernails" that add to their creepy charm.
Despite their ghoulish appearance, these treats are surprisingly delicious, with a buttery, almond-flavored taste that appeals to both children and adults alike.
Creating these bewitching cookies is simpler than you might think. With just a handful of common ingredients and some basic baking skills, you can conjure up a batch of these spine-chilling treats in no time.
The dough is easy to work with, allowing you to shape and mold it into convincing finger shapes, complete with knuckles and creases. Once baked, these cookies maintain their shape, resulting in a platter of deliciously disturbing digits that are sure to be the talk of any Halloween celebration.
Ingredients:
- 1 cup (240 ml) unsalted butter, softened
- 1 cup (200 g) granulated sugar
- 2 ½ cups (315 g) all-purpose flour
- 1 teaspoon (5 ml) almond extract
- ½ cup (70 g) whole almonds
To prepare the Witches' Fingers, start by creaming together the softened butter and sugar in a large mixing bowl until light and fluffy.
Gradually add the flour and almond extract, mixing until a dough forms. Preheat your oven to 350°F (175°C) and line a baking sheet with parchment paper.
Take small portions of dough and roll them into finger-like shapes, tapering one end to create a pointed tip.
Press an almond into the top of each cookie to represent a fingernail, then use a knife to make indentations for knuckles.
Bake for 15-20 minutes until the edges are lightly golden.
For an extra spooky touch, consider adding a few drops of green food coloring to the dough before shaping it into fingers.
This will give your cookies a sickly, witch-like hue. You can also use red gel food coloring to create "bloody" effects around the fingernails or knuckles.
To store these cookies, keep them in an airtight container at room temperature for up to a week.
If you want to prepare them in advance, the dough can be made and refrigerated for up to 3 days before baking.
Cooking Steps
Begin by creaming together the softened butter and sugar until light and fluffy.
Then gradually mix in the flour and almond extract to form a dough.
Next, shape the dough into finger-like forms, tapering one end to create a pointed tip, and press an almond onto each to represent a fingernail.
Step 1. Cream Butter and Sugar
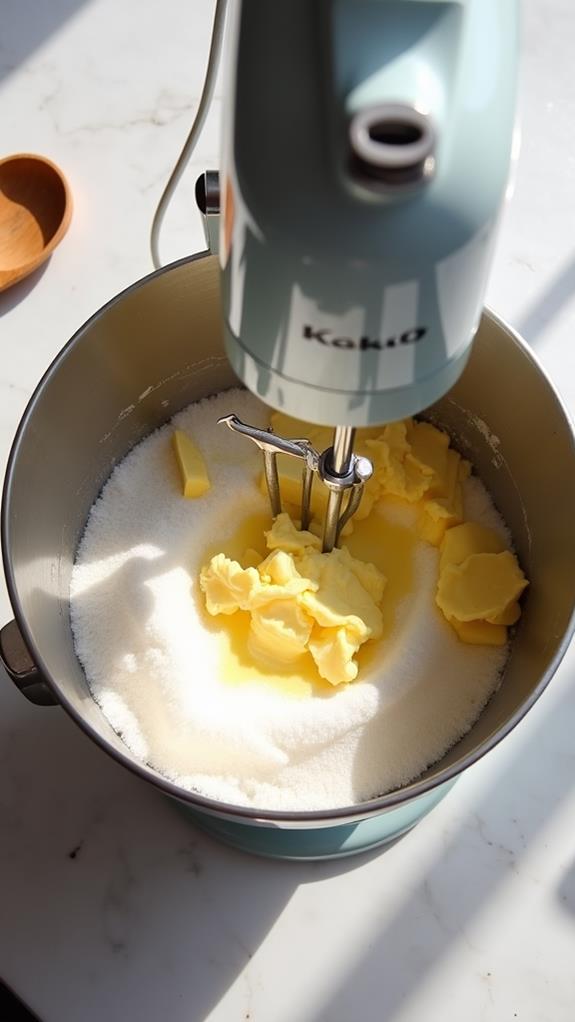
The first step in creating these spooky treats is to cream the butter and sugar together. You'll want to start with softened butter, which should be at room temperature for easy mixing.
In a large bowl, combine 1 cup of unsalted butter with 1 cup of granulated sugar. Using an electric mixer or a sturdy wooden spoon, beat the ingredients vigorously until they're well combined and the mixture becomes light and fluffy.
This process, known as creaming, is crucial for achieving the right texture in your Witches' Fingers cookies. As you mix, you're incorporating tiny air bubbles into the butter-sugar mixture, which will help your cookies rise slightly and maintain their shape during baking.
You'll know you've creamed the butter and sugar properly when the color lightens to a pale yellow and the texture becomes smooth and creamy. This should take about 3-5 minutes with an electric mixer, or 5-7 minutes if you're mixing by hand.
Don't rush this step, as it sets the foundation for your cookies' structure and texture.
Step 2. Add Flour and Extract

After creaming the butter and sugar, it's time to incorporate the dry ingredients and flavoring. Gradually add the all-purpose flour to your butter and sugar mixture, about a half cup at a time. This slow addition allows for better incorporation and prevents flour from flying everywhere.
As you add the flour, mix it in gently but thoroughly, ensuring no dry pockets remain. Once you've added all the flour, it's time to introduce the almond extract. This key ingredient will give your Witches' Fingers their distinctive flavor.
Measure out one teaspoon of almond extract and pour it into the bowl. Mix it in thoroughly, distributing the flavor evenly throughout the dough. You'll notice the aroma of almonds permeating your kitchen as you work.
Continue mixing until the dough comes together and forms a cohesive mass. It should be firm enough to hold its shape when rolled but still pliable. If the dough seems too sticky, you can add a little more flour, a tablespoon at a time.
Conversely, if it's too dry, a few drops of water can help bring it together.
Step 3. Shape Dough Into Fingers
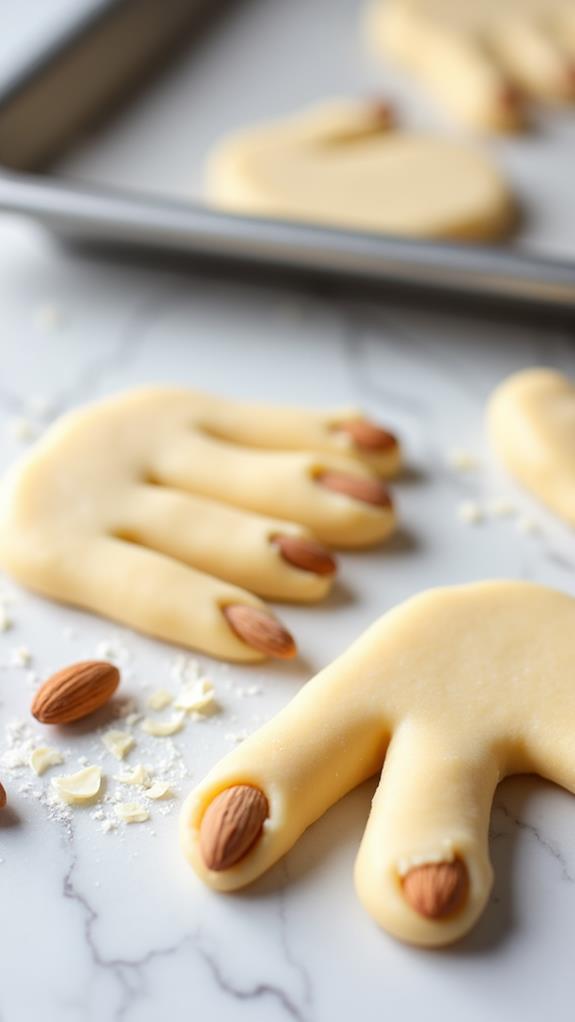
Now that your dough is ready, it's time to bring those creepy fingers to life. Start by taking small portions of the dough, about a tablespoon each, and roll them between your palms to create finger-like shapes. As you form each finger, taper one end to resemble a pointed tip, giving it a more realistic appearance. Don't worry about making them perfect; slight irregularities will add to their eerie charm.
Next, gently press an almond onto the wider end of each finger to represent the fingernail. Make sure it's firmly attached but not completely embedded in the dough.
To enhance the finger-like appearance, use a butter knife to create shallow indentations along the length of each cookie, mimicking the look of knuckles. You can also pinch the dough slightly at these points to create more defined joints. If you want to add an extra touch of realism, consider using the back of the knife to create subtle wrinkles on the fingers' surface.
Once you've shaped all your fingers, carefully arrange them on your prepared baking sheet, leaving some space between each cookie for expansion during baking.
Step 4. Add Almonds as Fingernails
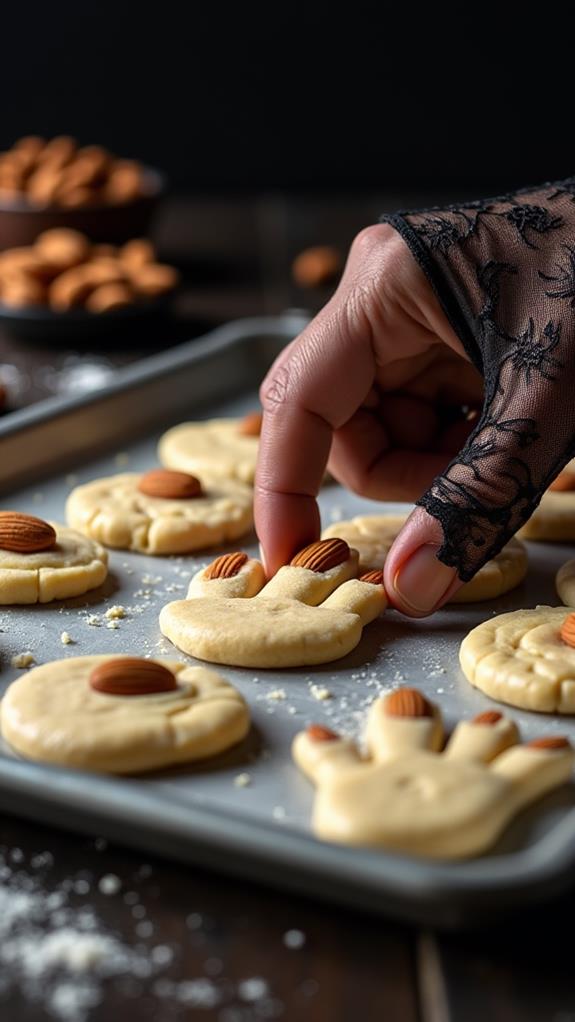
With your witch finger cookies shaped and ready, it's time to add the final touch – the fingernails. Take your whole almonds and gently press one into the tip of each cookie. You'll want to nestle it snugly into the dough, ensuring it's secure but not completely submerged. This positioning will give your cookies that realistic, creepy appearance once baked.
For added realism, you can angle the almond slightly or even use sliced almonds for a more jagged, broken nail effect. If you're feeling particularly creative, consider blanching and peeling some of the almonds for a paler nail color, or use different nuts like peanuts or cashews for varied textures.
Don't forget to leave a few fingers "nail-less" for a more ghoulish look. Once you've added the almonds, take a moment to adjust the shape of the finger if needed, pinching the dough around the "nail" to create a more natural appearance. This small detail will elevate your witch fingers from simple cookies to spine-chilling treats that are sure to impress your Halloween guests.
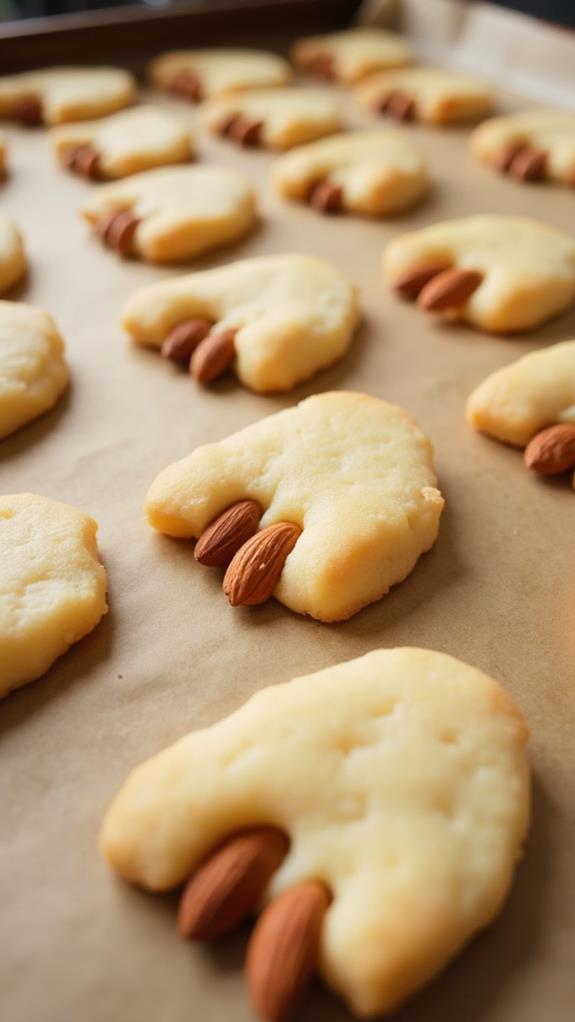
Step 5. Bake Until Lightly Golden
Once you've added the almond fingernails, it's time to bake your witches' fingers to perfection.
Place the shaped cookies on your prepared baking sheet, ensuring they're evenly spaced to allow for slight expansion during baking.
Slide the sheet into your preheated oven, set at 350°F (175°C).
Keep a close eye on your cookies as they bake. You'll want to achieve a light golden color around the edges, which typically takes between 15 to 20 minutes. The exact time may vary depending on your oven's characteristics, so it's essential to monitor them closely, especially towards the end of the baking time.
As the cookies bake, you'll notice a delightful almond aroma filling your kitchen. This is a good sign that they're progressing well.
Once the edges have turned a light golden hue, carefully remove the baking sheet from the oven. Allow the cookies to cool on the sheet for a few minutes before transferring them to a wire rack to cool completely.
This cooling process is crucial as it allows the cookies to firm up, ensuring they maintain their finger-like shape when handled.
Final Thoughts
Excitement builds as you prepare these spooky Witches' Fingers for your Halloween gathering. As you arrange them on a platter, you'll notice how their eerie appearance adds a perfect touch of whimsy to your dessert table.
Remember, presentation is key to enhancing the overall effect. Consider placing them on a dark-colored plate or tray to make the pale cookies stand out, and surround them with other Halloween-themed treats for a cohesive display.
Don't forget to enjoy the process of making these unique cookies. It's an opportunity to get creative and have fun with your baking. As you shape each finger, you're not just making a treat; you're crafting a memorable experience for your guests.
These Witches' Fingers are sure to be a conversation starter and may even become a yearly tradition. With their delightful almond flavor and striking appearance, they're bound to disappear quickly.