To achieve irresistibly crispy chicken skin, start with bone-dry chicken by patting it thoroughly and refrigerating uncovered. Master seasoning by using dry rubs or herb-spice combinations, and salt strategically. Crank up the heat, cooking at high temperatures (400°F-425°F) to promote browning and fat rendering. Perfect your basting technique, starting about 10 minutes into cooking for even flavor distribution. Ensure proper air circulation by using a roasting rack or layering vegetables beneath the chicken. Allow adequate spacing in cooking vessels to promote efficient fat rendering and steam escape. These techniques will transform your ordinary poultry into a golden, crispy delight that'll have everyone asking for your secret.
Start With Bone-Dry Chicken
Moisture is the enemy of crispy chicken skin. To achieve that irresistible crunch, you'll need to start with bone-dry chicken. After removing your chicken from its packaging, pat it thoroughly with paper towels.
This crucial step eliminates surface moisture, setting the stage for optimal crispiness. Don't forget to dry the inside cavity of whole chickens, preventing unwanted steam during cooking.
Take your preparation a step further by refrigerating the chicken uncovered for at least an hour, or ideally overnight. This technique further dehydrates the skin, maximizing its potential for crunchiness.
Remember, a dry surface is essential for the crisping process, enhancing both texture and flavor.
Avoid the common mistake of rinsing chicken skin before cooking. Added moisture will sabotage your efforts to achieve that perfect crackle. Instead, focus on maintaining a bone-dry exterior throughout your preparation.
Master the Art of Seasoning
To master the art of seasoning for crispy chicken skin, you'll want to focus on creating flavorful dry rubs and exploring various herb and spice combinations.
You can experiment with classic blends like garlic powder, paprika, and thyme, or try more adventurous mixes incorporating ingredients such as smoked paprika, cumin, or even a touch of cinnamon.
Don't forget to consider salt timing techniques, as salting your chicken too early can draw out moisture, while salting just before cooking can help create that coveted crispy exterior.
Dry Rubs for Flavor
Mastering the art of seasoning is crucial for achieving crispy chicken skin, and dry rubs are your secret weapon. These potent blends of salt, spices, and herbs elevate your chicken's flavor profile while promoting that coveted golden-brown crust. To maximize their impact, apply your dry rub at least a few hours before cooking, allowing the spices to penetrate the meat deeply.
For optimal results, ensure your chicken skin is thoroughly dry before applying the rub. Moisture is the enemy of crispiness, so pat the skin down with paper towels first.
When crafting your rub, consider ingredients like paprika, garlic powder, and brown sugar, which contribute to caramelization and help create that irresistible crispy exterior.
Don't be afraid to experiment with different spice combinations. This innovative approach allows you to create unique flavor experiences without resorting to messy marinades.
Herbs and Spices Combinations
Frequently overlooked, the perfect combination of herbs and spices can elevate your crispy chicken skin from good to extraordinary. To unlock the full potential of your seasoning, consider blending classic herbs like rosemary, thyme, and parsley with bold spices such as paprika, garlic powder, and black pepper. This combination will enhance the flavor profile of your chicken while complementing the crispy texture of the skin.
Incorporating a touch of honey can also harmonize with the spices, echoing the balanced flavor profile found in dishes like honey mustard chicken thighs.
For a savory and aromatic blend, mix equal parts dried oregano, garlic powder, and onion powder. This balanced seasoning harmonizes with the natural flavors of chicken skin, promoting a golden-brown finish through the Maillard reaction. To add depth and complexity, introduce a pinch of cayenne pepper or chili powder, creating a subtle heat that contrasts beautifully with the caramelized sweetness of the skin.
Don't forget the power of fresh herbs. While dill and cilantro can infuse vibrant flavors, add them after the initial cooking to preserve their delicate notes.
Salt Timing Techniques
While many cooks focus on the amount of salt used, the timing of when you apply it's equally crucial for achieving crispy chicken skin.
Mastering salt timing techniques can revolutionize your cooking, enhancing both flavor and texture. To unlock the secret of perfectly crispy chicken skin, consider these innovative approaches:
- Last-minute seasoning: Apply a light salt rub just before cooking to enhance flavor without drawing out excess moisture. This method preserves the skin's dryness, promoting better crisping during cooking.
- Dry brine method: Salt the chicken skin and let it rest uncovered in the refrigerator for several hours or overnight. This technique not only deepens flavor absorption but also aids in achieving that coveted golden brown color through the Maillard reaction.
- Strategic salting: For optimal results, salt within an hour before cooking. This timing strikes a balance between flavor enhancement and moisture retention, ensuring your chicken skin remains crispy.
Crank Up the Heat
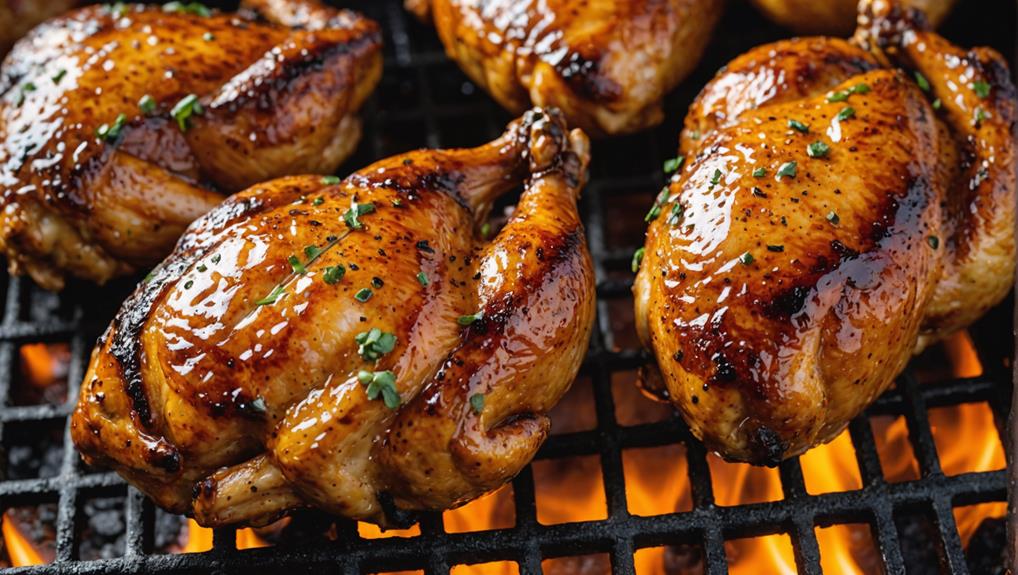
To achieve that coveted crispy chicken skin, you'll need to crank up the heat and master high-temperature searing techniques.
For oven cooking, start with a temperature between 400°F and 450°F to quickly establish a crust that promotes crispiness.
When cooking on the stovetop, heat your oil until it's almost smoking before adding the chicken, ensuring optimal searing and the development of that irresistible golden-brown exterior.
High-Temperature Searing Techniques
Achieving crispy chicken skin requires cranking up the heat. Whether you're using a stovetop or oven, high temperatures are crucial for that irresistible golden brown exterior.
For stovetop cooking, preheat your pan over medium-high heat until it's sizzling hot. Use a high-heat oil like canola or vegetable, heating it until it's almost smoking before placing your chicken skin side down.
When roasting chicken in the oven, set the temperature between 400°F and 425°F. This intense heat promotes even browning and fat rendering beneath the skin.
To maximize crispiness, follow these key steps:
- Sear the chicken undisturbed for 3-5 minutes to form a golden crust
- Avoid excessive flipping to maintain moisture and texture
- Consider a final blast of high heat for an extra layer of crispiness
Optimal Oven Settings
Heat is the secret weapon for achieving irresistibly crispy chicken skin in the oven. To unlock this culinary magic, you'll need to crank up the temperature and embrace the power of high heat.
Start by preheating your oven to at least 450°F, which allows moisture to evaporate quickly from the skin-on chicken, setting the stage for optimal crispiness.
For maximum effect, position your chicken in the upper and hottest part of the oven. This strategic placement ensures the skin receives intense heat exposure, promoting that coveted golden brown color through the Maillard reaction.
If you're using a convection oven, remember to reduce the temperature by about 25°F, as its efficient air circulation compensates for the lower setting.
As you cook chicken at high temperatures, resist the urge to lower the heat. Consistency is key to rendering the fat beneath the skin and achieving that perfect crunch.
Perfect Your Basting Technique
Mastering the art of basting is crucial for achieving perfectly crispy chicken skin. To elevate your poultry game, start basting about ten minutes into the cooking process. This technique enhances flavor and promotes even crisping, resulting in a golden brown crust that's irresistibly delicious.
Here's how to perfect your basting technique:
- Use a baster or spoon to apply drippings directly onto the skin, focusing on even coverage.
- Consider incorporating melted butter or flavored oils with the drippings for added flavor complexity.
- Maintain consistent oven temperature during basting to ensure the Maillard reaction continues, enhancing both color and crunchiness.
When basting, it's crucial to avoid frequent applications within the first few minutes of cooking. This allows the skin to adhere properly and form an initial crust before introducing additional moisture.
As you continue basting throughout the cooking process, you'll notice the skin developing a tantalizing golden hue while retaining its moisture.
Ensure Proper Air Circulation
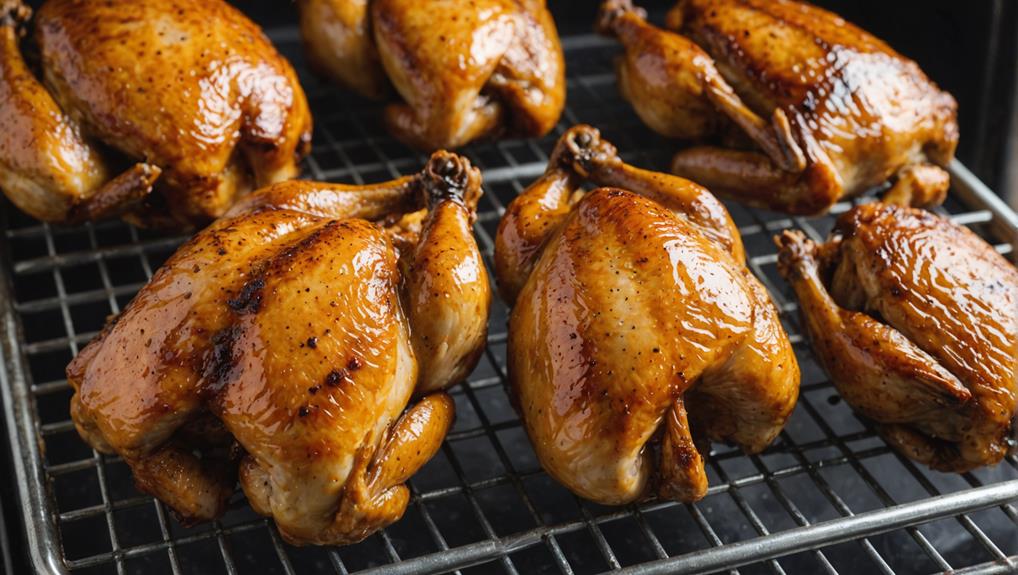
Three key factors contribute to achieving perfectly crispy chicken skin: temperature, moisture control, and proper air circulation.
When it comes to air circulation, you'll want to create an environment that allows hot air to flow freely around your chicken, ensuring even cooking and that coveted golden brown skin.
To optimize air circulation, invest in a roasting pan with a rack. This simple tool elevates your chicken, allowing hot air to circulate underneath and around the entire bird.
If you don't have a rack, don't worry! You can improvise by layering vegetables like carrots or onions under the chicken. This not only facilitates airflow but also infuses your dish with extra flavor.
Render Fat for Golden Crispness
Achieving that coveted golden crispness in chicken skin hinges on successfully rendering the fat. This process is crucial for transforming your poultry from ordinary to extraordinary.
To master the art of fat rendering, you'll need to focus on three key elements:
- Temperature control: Cook your chicken at high heat, typically between 400°F to 425°F. This range promotes optimal fat rendering, leading to that irresistible crunch and golden-brown coloration.
- Moisture management: Start with dry chicken skin. Excess moisture hinders the fat rendering process, preventing your skin from achieving peak crispiness. Pat the skin dry thoroughly before cooking.
- Space optimization: Avoid overcrowding your cooking vessel. Adequate space ensures proper air circulation, allowing steam to escape and fat to render efficiently.
Frequently Asked Questions
What Is the Trick to Crispy Chicken Skin?
You'll achieve crispy chicken skin by mastering marinated techniques, frying methods, and baking tips. Experiment with seasoning blends, temperature control, and brining solutions. Select the right oil, perfect resting periods, and you'll revolutionize your chicken game.
How Do You Make Chicken Skin Crispy Again?
To recrisp chicken skin, you'll need effective reheating techniques. Try broiling, air frying, or baking at high temperatures. Ensure the skin's dry, and consider seasoning or brushing with oil. Frying tips: avoid covering to prevent steam. Experiment with different skin types!
How Do You Keep Chicken Skin Crispy While Resting?
To maintain crispy chicken skin while resting, you'll want to focus on drying techniques, resting temperatures, and cooking methods. Avoid covering the chicken, use a cooling rack, and consider a quick high-heat blast before serving to rejuvenate the skin's texture.
Does Salting Chicken Skin Make It Crispy?
Yes, salting chicken skin does make it crispy. You'll achieve optimal results by combining brine infusion, moisture control, and dry aging. Air drying and maintaining proper skin temperature are crucial. Balance seasoning and choose the right cooking method for maximum crispiness.
Final Thoughts
You've now unlocked the secret to achieving chicken skin that's as crispy as autumn leaves underfoot. By following these steps, you'll consistently create a golden, crunchy exterior that'll have everyone at the table raving. Remember, patience is key in this process. Don't rush; let the heat work its magic. With practice, you'll master the art of crispy chicken skin, elevating your culinary skills and delighting your taste buds every time you serve this crowd-pleasing dish.