To safely store your fermented creations, maintain a consistent temperature between 60-65°F and keep humidity levels at 60-70%. Choose glass or ceramic containers with airtight lids, and label them with the ferment type and start date. Monitor pH levels regularly, aiming for below 4.6, and inspect for signs of spoilage. Ensure your ferments stay submerged in brine, and use airlocks or "burp" jars to manage gas buildup. Refrigeration can significantly extend shelf life, but remember to check for quality changes periodically. Proper sanitization of equipment is crucial for safe fermentation. By mastering these essential rules, you'll be well on your way to enjoying your ferments safely for longer periods.
Optimal Temperature for Fermented Foods
The optimal temperature for storing fermented foods plays a crucial role in preserving their quality and safety. When you're looking to maintain the perfect balance for your fermented creations, aim for a storage temperature between 60-65°F. This range is ideal for slowing down the fermentation process, allowing you to extend the shelf life of your probiotic-rich foods without compromising their flavor or nutritional value.
Consistency is key when it comes to temperature control. You'll want to avoid fluctuations, as they can lead to spoilage and negatively impact the quality of your ferments. To achieve this, consider investing in a dedicated storage space or a temperature-controlled unit specifically designed for fermented foods.
Keep your ferments away from direct sunlight and heat sources, as darkness helps maintain their quality over time.
If you're looking to preserve your ferments for extended periods, refrigeration is your best bet. The cool temperatures significantly slow down the fermentation process, allowing your creations to last for months or even years while retaining their unique flavors.
Remember to regularly check your ferments for signs of spoilage, especially if stored at room temperature, to ensure optimal quality and safety.
Controlling Humidity in Storage Areas
While temperature control is vital for preserving fermented foods, managing humidity in your storage areas is equally important.
Maintaining optimal humidity levels for fermented products is crucial to prevent mold growth and ensure their longevity. You'll want to aim for a humidity range of 60-70% in your storage spaces. To achieve this, invest in a hygrometer to monitor moisture levels regularly.
Proper ventilation is key to controlling humidity. Ensure your storage area has adequate airflow to prevent condensation and moisture buildup on jars and containers.
Dark, cool environments are ideal for fermentation storage, as they help regulate humidity levels naturally. Heat sources can increase moisture content, so keep your ferments away from warm spots.
Don't forget to seal your jars correctly. This minimizes air exposure and prevents humidity fluctuations that can negatively impact fermentation quality.
Choosing the Right Storage Containers
When selecting containers for your fermented foods, you'll need to choose between glass and ceramic options, each offering unique benefits for preserving flavors and preventing contamination.
It's crucial to opt for containers with airtight lids to protect your creations from insects and mold growth during the fermentation process.
Additionally, you'll want to consider the size and shape of your containers to ensure your ferments remain fully submerged in brine, which is essential for preventing spoilage and maintaining quality.
Glass vs. Ceramic Options
Choosing the right container for your fermented creations can make a significant difference in their quality and safety. When it comes to the fermentation process, glass containers are often the top choice. They're non-reactive, ensuring your ferments maintain their authentic flavors without any unwanted chemical interactions.
However, ceramic options can be excellent alternatives if they're glazed and non-porous.
To help you visualize the ideal storage solution, consider these key features:
- Transparency: Glass allows you to monitor your ferment's progress easily.
- Airtight seal: Both glass and ceramic containers should have lids that create a tight seal.
- Smooth interior: This prevents bacteria from hiding in crevices and ensures easy cleaning.
While glass offers the advantage of being see-through, high-quality ceramic containers can provide better insulation, which may be beneficial for certain ferments.
Whichever you choose, avoid metal containers as they can corrode and affect flavors. Remember, properly sterilized glass or ceramic jars can safely store your ferments for months, preserving both quality and safety.
Airtight Lid Importance
At the heart of successful fermentation storage lies the airtight lid. When it comes to preserving your fermented foods, this seemingly simple component plays a crucial role in maintaining quality and safety.
You'll want to prioritize containers with lids that create a secure seal, effectively minimizing oxygen exposure while allowing fermentation gases to escape. This balance is essential for preventing the growth of harmful molds and yeasts that can compromise your creations.
Glass containers with airtight lids are your best bet, as they're non-reactive and help preserve the unique flavors developed during fermentation. Avoid metal containers, which can corrode and impart unwanted tastes to your food.
As you embark on your fermentation journey, regularly inspect the seals of your containers to ensure they remain intact. A broken seal can quickly derail your efforts, potentially rendering your fermented foods unsafe for consumption.
Size and Shape Considerations
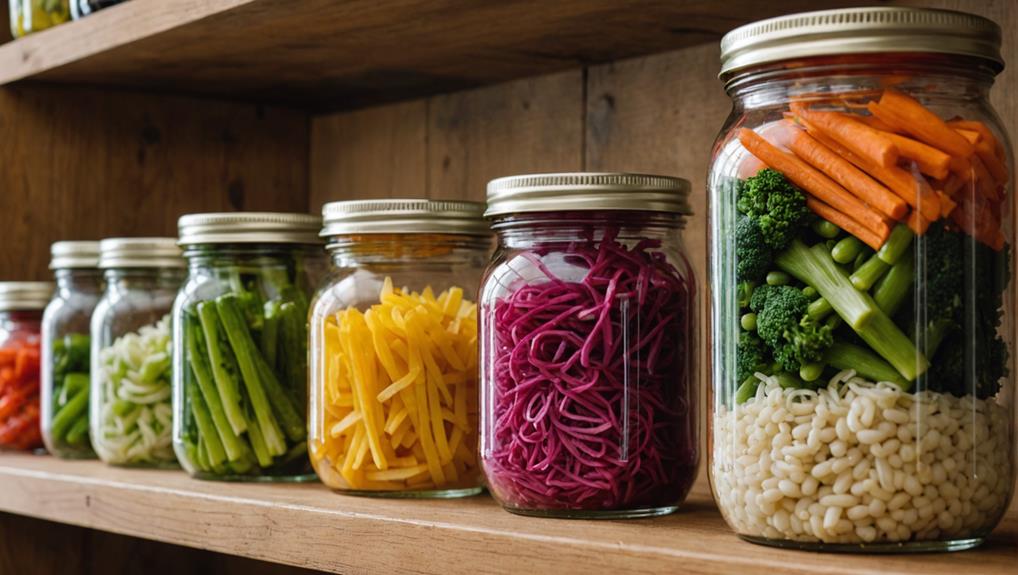
The size and shape of your storage containers can make or break your fermentation game. When you're selecting jars for your fermented creations, opt for wide-mouth glass or ceramic containers. These materials are non-reactive, preserving the authentic flavors of your ferments without any unwanted contamination.
The wide opening allows for easy packing and removal of vegetables, making your fermentation process more efficient and less messy.
Consider the quantity you're fermenting when choosing container sizes. Smaller jars are perfect for quick consumption, while larger ones suit long-term storage of bigger batches. Remember, the right size ensures optimal fermentation conditions and reduces the risk of spoilage.
To visualize the ideal fermentation container, imagine:
- A clear, wide-mouth mason jar filled with vibrant, colorful vegetables
- A large ceramic crock brimming with sauerkraut, bubbling with active fermentation
- A row of perfectly sized glass jars, each containing a different fermented creation
Proper Labeling and Dating Techniques
To ensure you can easily track and manage your fermented creations, you'll need a clear identification system and effective date tracking strategies.
Start by establishing a consistent labeling method that includes the type of ferment, start date, and any special ingredients or instructions.
You'll also want to use waterproof labels and consider noting the expected shelf life, which will help you maintain an organized and safe fermentation process.
Clear Identification System
Mastering a clear identification system is crucial for safely storing your fermented creations. Implement a consistent labeling system that provides essential information at a glance. Use waterproof labels to ensure your data remains intact, even in high-humidity environments. Include the ferment's name, preparation date, key ingredients, and estimated shelf life on each label. This approach allows you to track freshness and flavors effortlessly.
To create an effective identification system for your fermented products, follow these steps:
- Design a template that includes spaces for all necessary information.
- Choose durable, waterproof labels that can withstand condensation and spills.
- Establish a color-coding system to differentiate between ferment types or storage requirements.
Regularly check and update your labels, especially when transferring jars to different storage conditions. This practice helps maintain accurate information and ensures you're always aware of your ferments' status.
Date Tracking Strategies
For effective date tracking strategies, implement a comprehensive labeling system that goes beyond basic identification. Start by using waterproof labels to ensure your information remains legible, even in moist environments. Clearly mark each jar with the ferment type and start date, allowing you to monitor freshness and optimal consumption times easily.
To innovate your storage system, consider implementing a color-coding scheme for different ferment types. This visual cue will help you quickly identify and organize your creations. For long-term storage, include the estimated shelf life on each label, such as "sauerkraut: 6 months." This practice ensures you're always aware of when to consume or discard your ferments.
Regularly check and update your labels, especially when transferring ferments to new containers or if the product's appearance changes. This ongoing maintenance is crucial for accurate date tracking strategies.
Managing Airflow for Ferments
Fermentation's success hinges on proper airflow management. To maintain the delicate balance of gases during fermentation, you'll need to prevent excessive air exposure while allowing produced gases to escape. This is crucial for avoiding harmful mold growth and spoilage.
Employ these innovative techniques to manage airflow effectively:
- Use airtight containers with airlock lids to create an anaerobic environment.
- Regularly "burp" jars with standard lids during the first week to release gases.
- Utilize fermentation weights to keep your ferment submerged in brine.
Fermentation weights are essential tools that prevent air from entering your creation. They work by keeping the fermented ingredients below the brine level, minimizing air exposure and reducing the risk of spoilage.
Monitor your brine levels closely, and if you notice any ingredients rising above the liquid, press them back down immediately.
For those using standard lids, remember to burp your jars frequently during the initial fermentation stages. This process allows built-up gases to escape without introducing too much air, which could disrupt the fermentation process.
Sanitization Practices for Equipment
When preparing to store your fermented creations, it's crucial to start with properly sanitized equipment.
You can effectively sanitize your tools using an unscented bleach solution, ensuring a clean environment for your ferments, but remember to rinse thoroughly with clean water afterward to remove any residual chemicals.
Alternatively, you might opt for hot water sterilization, which involves using boiling water to sanitize jars and utensils, providing a simple yet effective method for maintaining cleanliness in your fermentation process.
Bleach Solution Effectiveness
Sanitizing your fermentation equipment with a bleach solution is one of the most effective ways to ensure a safe and successful fermentation process. To create an effective bleach solution, mix 1 tablespoon of unscented bleach per gallon of water. This concentration is powerful enough to eliminate bacteria and molds without leaving harmful residues.
When using a bleach solution to sanitize your equipment, follow these steps:
- Submerge your fermentation jars, lids, and tools in the solution.
- Allow them to soak for several minutes, ensuring all surfaces are exposed.
- Rinse thoroughly with clean water to remove any residual bleach.
It's crucial to rinse your equipment well after sanitizing to prevent contamination of your ferments.
While bleach is highly effective, you can also consider alternative methods like boiling water or using a hot dishwasher cycle. These options can be particularly useful if you're concerned about chemical residues.
Hot Water Sterilization
As an alternative to chemical sanitizers, hot water sterilization offers an effective and natural method for preparing your fermentation equipment. This technique harnesses the power of boiling water to eliminate harmful bacteria and molds, ensuring your jars and utensils are ready for safe fermentation.
To sanitize your equipment using hot water, you'll need to immerse all items in boiling water for at least 10 minutes. Make sure every surface comes into contact with the water to achieve thorough sterilization.
If you're looking for a more hands-off approach, your dishwasher can be a valuable ally. Running a hot cycle can effectively sanitize dishwasher-safe items, leaving them free from contaminants.
Refrigeration Guidelines for Fermented Products
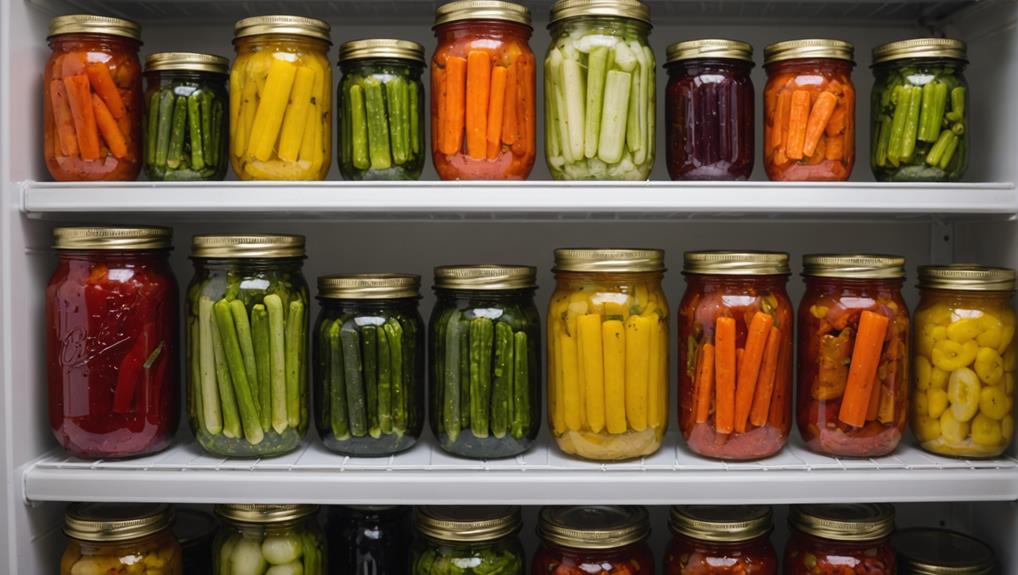
Proper refrigeration is crucial for preserving your fermented creations and extending their shelf life. Once you've achieved the desired flavor and acidity, transfer your ferments to the refrigerator to slow down the fermentation process significantly.
This cool environment helps maintain the quality of your refrigerated ferments for months or even years, depending on the specific product and storage conditions.
To ensure the longevity and safety of your fermented foods, follow these guidelines:
- Maintain a consistent cool temperature in your refrigerator to prevent spoilage and preserve flavor stability.
- Use clean utensils when serving to avoid cross-contamination and protect the product's integrity.
- Regularly inspect your ferments for signs of spoilage, such as unusual odors or discoloration.
Monitoring Ph Levels Regularly
Consistent pH monitoring is a critical step in ensuring the safety and quality of your fermented foods. By regularly checking the pH levels, you're creating a safe environment for your ferments to thrive while inhibiting harmful pathogens.
To effectively monitor pH levels, you'll need either pH strips or a digital pH meter. These tools provide quick and accurate readings, allowing you to stay on top of your fermentation process.
Make it a habit to check your ferments' pH at least once a week, especially during the initial days when fermentation is most active. You're aiming for a pH below 4.6, with the ideal range being 3.5 to 4.0.
If you notice readings above 4.6, you may need to add more salt or make other adjustments to prevent spoilage. Remember, maintaining a consistent pH throughout the fermentation process not only ensures safety but also contributes to the desired flavor and texture of your final product.
Handling Mold and Yeast Growth
Vigilance is key when it comes to handling mold and yeast growth in your fermented creations. Regularly inspect your ferments for signs of contamination, paying close attention to any unusual colors, textures, or odors.
If you spot mold, which appears as bluish, greenish, or grayish fuzz, immediately remove the affected portion in salt-brine ferments to prevent spoilage.
Don't confuse harmless kahm yeast with dangerous mold. Kahm yeast presents as a white powder on the surface and can be managed by scraping it off regularly.
To minimize the risk of mold and yeast growth, ensure your ferments are fully submerged in brine. This creates an anaerobic environment that inhibits harmful microorganisms.
To keep your ferments submerged and reduce contamination risks:
- Use fermentation weights to hold vegetables below the brine
- Employ floaties traps to create a barrier between the ferment and air
- Monitor pH levels regularly to maintain an optimal acidic environment
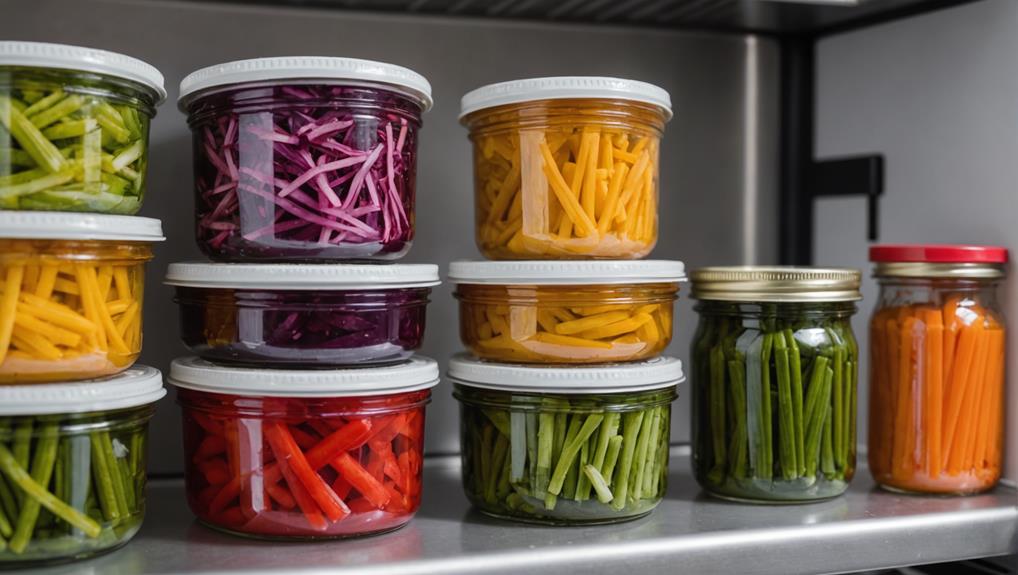
Long-Term Storage Best Practices
Now that you've mastered handling mold and yeast growth, it's time to focus on long-term storage best practices. To keep your ferments safe and flavorful for extended periods, you'll need to create an optimal environment. Start by selecting clean, sterilized glass or ceramic jars with airtight lids. These containers will protect your creations from air exposure and reduce the risk of spoilage.
Next, find a cool, dark spot for storage, ideally with temperatures between 60-65°F. This range slows fermentation and prolongs shelf life. For even longer preservation, consider refrigeration. Keeping ferments at low temperatures can extend their lifespan to months or even years.
Don't forget to label your jars with the type of ferment and preparation date. This simple step will help you track freshness and manage storage duration effectively.
Regularly inspect your stored ferments for any signs of spoilage, such as off smells or mold. By following these innovative long-term storage practices, you'll ensure your fermented creations remain safe and delicious for extended periods, allowing you to enjoy the fruits of your labor well into the future.
Frequently Asked Questions
How Do You Store Fermented Products?
Store your fermented products in airtight fermentation containers, prioritizing temperature control. Keep them cool and dark, ideally at 60-65°F. Once you've reached desired fermentation, refrigerate to slow the process. Always use clean utensils and check for spoilage regularly.
What Are the Safety Precautions During Fermentation?
Monitor fermentation temperature closely to ensure optimal conditions. You'll want to prevent contamination by sanitizing all equipment thoroughly. Keep your ferments submerged in brine, maintain proper salt concentrations, and watch for signs of spoilage. Don't hesitate to innovate, but prioritize safety.
What Is the Best Storage for Fermentation?
For optimal fermentation storage, you'll want glass or ceramic containers with airtight lids. Keep your creations in a cool, dark spot with temperature control between 60-65°F. Once they've reached peak flavor, transfer them to the refrigerator.
What Are the Regulations for Fermented Foods?
Like a compass guiding explorers, fermented food regulations steer you through safety waters. You'll need to follow labeling requirements, pH standards, and sanitation protocols. Embrace these innovative guidelines to ensure your fermented creations are both compliant and cutting-edge.
Final Thoughts
By following these essential rules, you'll ensure your fermented creations remain safe and delicious. Remember, proper storage can extend the shelf life of fermented foods by up to 400%, making your hard work last even longer. Always prioritize temperature control, use appropriate containers, and monitor your ferments regularly. With these practices in place, you'll be well-equipped to enjoy the benefits of fermentation while minimizing risks. Keep exploring and refining your fermentation techniques to unlock a world of flavors and health benefits.