You've likely encountered parfaits at brunches or upscale cafes, but you might not know that these elegant layered desserts trace their roots to 19th century France. While the original French parfait was a frozen coffee-flavored treat, today's raspberry parfait offers a fresh take that's both versatile and sophisticated. Whether you're planning a special breakfast or seeking a light dessert option, understanding the nuances of parfait assembly can transform this simple combination of raspberries, cream, and granola into a masterpiece that's worthy of a Parisian patisserie. Let's explore how you can master this classic dish.
Key Takeaways
- A raspberry parfait is a layered dessert combining fresh raspberries, whipped cream, and granola, requiring no baking and minimal preparation time.
- Essential ingredients include fresh raspberries, heavy cream, granola, honey, and vanilla, assembled in alternating layers in chilled glasses.
- The dessert originated in France during the 1890s as a frozen treat, evolving into the modern layered version popular today.
- Chilled ingredients and serving glasses are crucial for optimal texture, with granola added just before serving to maintain crunchiness.
- Parfaits can be prepared up to two hours ahead and customized with alternatives like Greek yogurt or different seasonal berries.
History
Origins of the parfait trace back to France in the 1890s, where it began as a frozen dessert made by boiling cream, eggs, sugar and syrup.
You'll find that the word "parfait" itself means "perfect" in French, reflecting the meticulous preparation and elegant presentation that characterized these early frozen treats.
As the dessert evolved, you'll notice it took different forms across cultures. In America, you'll see that parfaits transformed into the layered dessert you know today, with the frozen aspect giving way to fresh ingredients and varied textures.
The introduction of fresh fruits, particularly berries, became popular in the 1950s when refrigeration made year-round access to fresh produce more common.
You'll discover that the addition of granola came later, in the 1970s, coinciding with America's growing interest in healthier breakfast options.
Today, you'll find parfaits served in restaurants worldwide, though they've maintained their French association with refinement and careful preparation.
The raspberry parfait, in particular, has become a staple variation, combining traditional French elegance with modern convenience and nutritional awareness.
Recipe
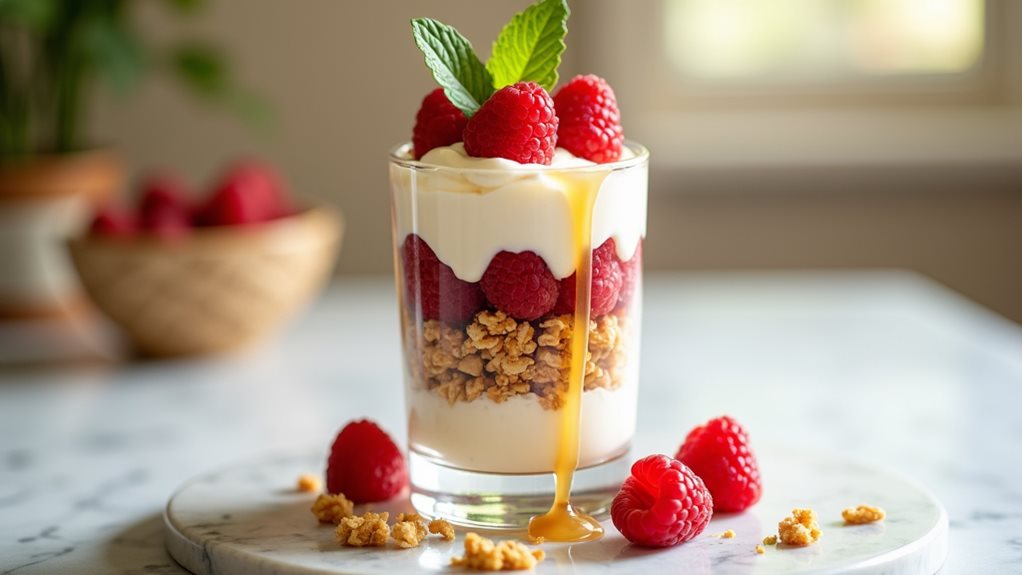
Raspberry Parfait is a stunning layered dessert that combines fresh fruit, whipped cream, and crunchy granola for a perfect balance of flavors and textures. This elegant treat can be served for breakfast, brunch, or as a sophisticated dessert option.
This simple yet impressive dish requires no baking and can be assembled in minutes. The key to a perfect parfait lies in the quality of ingredients and careful layering technique that creates visual appeal through the clear glass serving vessels.
Ingredients:
- Fresh raspberries – 2 cups (250g)
- Heavy whipping cream – 1 cup (240ml)
- Granola – 1 cup (90g)
- Honey – 2 tablespoons (30ml)
- Vanilla extract – 1 teaspoon (5ml)
In a chilled bowl, whip the heavy cream with vanilla extract until stiff peaks form.
Begin assembly by placing 2-3 tablespoons of granola at the bottom of each serving glass. Layer with whipped cream, followed by fresh raspberries. Drizzle with honey, then repeat the layering process until glasses are full. Finish with a final layer of raspberries and a honey drizzle for presentation.
For optimal results, ensure all ingredients are fresh and well-chilled before assembly. The parfaits can be prepared up to 2 hours in advance and stored in the refrigerator, but the granola will begin to soften over time.
If making ahead, consider adding the granola just before serving to maintain its crunch. Pre-chilling the serving glasses for 15 minutes before assembly will help maintain the parfait's structure and temperature.
Cooking Steps
You'll want to start by chilling your parfait glasses and whipping your cream with vanilla extract until stiff peaks form.
Once your cream is ready, begin layering the parfait by placing granola at the bottom of each glass, followed by generous spoonfuls of the whipped cream mixture.
Top each layer with fresh raspberries and a drizzle of honey, repeating the process until you've filled the glasses, making sure to crown your parfaits with a final flourish of berries and honey.
Step 1. Chill Glass Parfait Containers
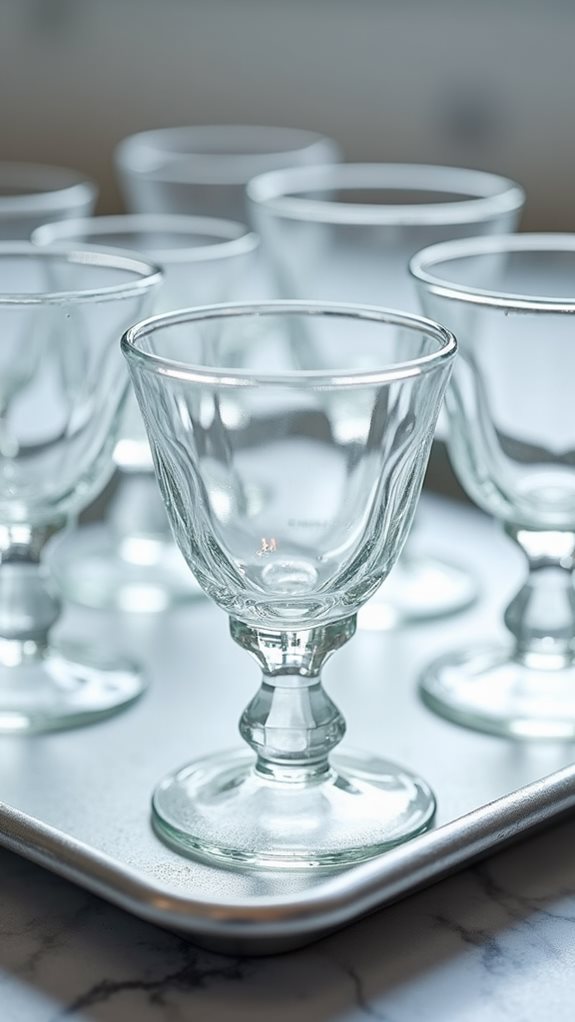
To ensure the perfect parfait assembly, place your glass serving containers in the refrigerator for 15 minutes before beginning. This crucial step helps maintain the structural integrity of your whipped cream layers and keeps the dessert at an optimal temperature throughout the assembly process.
You'll find that chilled glasses also prevent premature melting of the whipped cream, which can affect both presentation and taste.
While your glasses are chilling, you can use this time to prepare your other ingredients. You'll want to keep your heavy cream refrigerated until you're ready to whip it, as cold cream produces the best volume and texture.
If you're working in a warm kitchen, you might even consider placing your mixing bowl and whisk in the refrigerator alongside the serving glasses.
Once your glasses have properly chilled, you'll notice they've developed a slight frost. This is perfect, as it indicates they've reached the ideal temperature for assembly.
Remove them from the refrigerator only when you're ready to begin layering your parfait ingredients, ensuring that each component maintains its distinct texture and temperature.
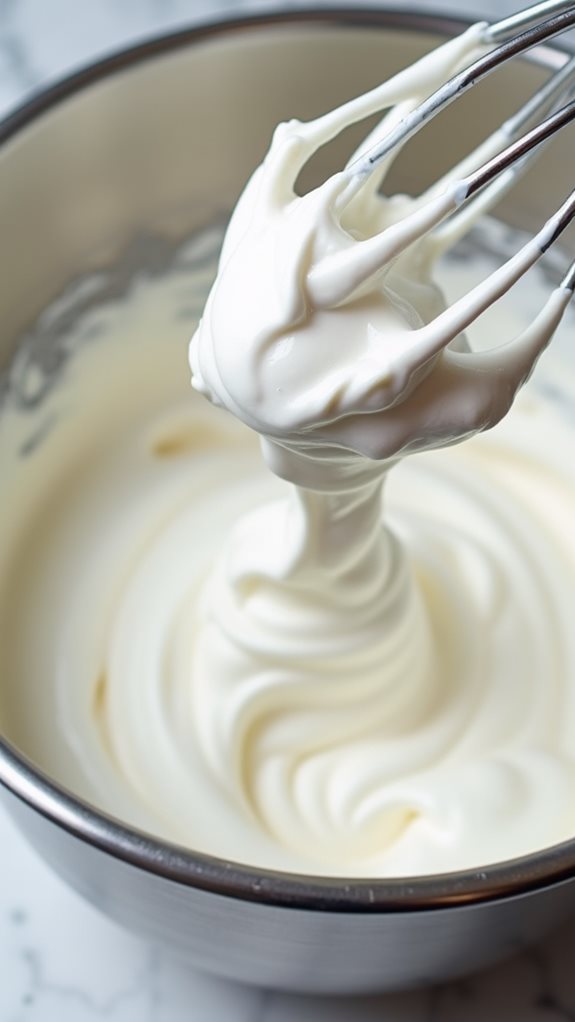
Step 2. Whip Cream Until Peaks Form
Start by pouring the cold heavy cream and vanilla extract into a chilled mixing bowl.
You'll need one cup of heavy whipping cream and one teaspoon of vanilla extract to achieve the perfect consistency for your raspberry parfait.
Using an electric mixer set to medium-high speed, begin whipping the cream and vanilla mixture.
As you whip, you'll notice the cream gradually becoming thicker and more voluminous.
Continue beating until soft peaks begin to form, which typically takes about 2-3 minutes.
You'll know you've reached soft peaks when the cream starts to hold its shape but the tips of the peaks fall over when you lift the beaters.
Keep whipping until you achieve stiff peaks, usually another 1-2 minutes.
At this stage, the cream will stand up straight when you lift the beaters, and the peaks won't fold over at the tips.
Be careful not to over-whip, as this can cause the cream to become grainy and butter-like.
Once you've reached stiff peaks, your whipped cream is ready for layering in your parfait glasses.
Step 3. Layer Granola in Glasses
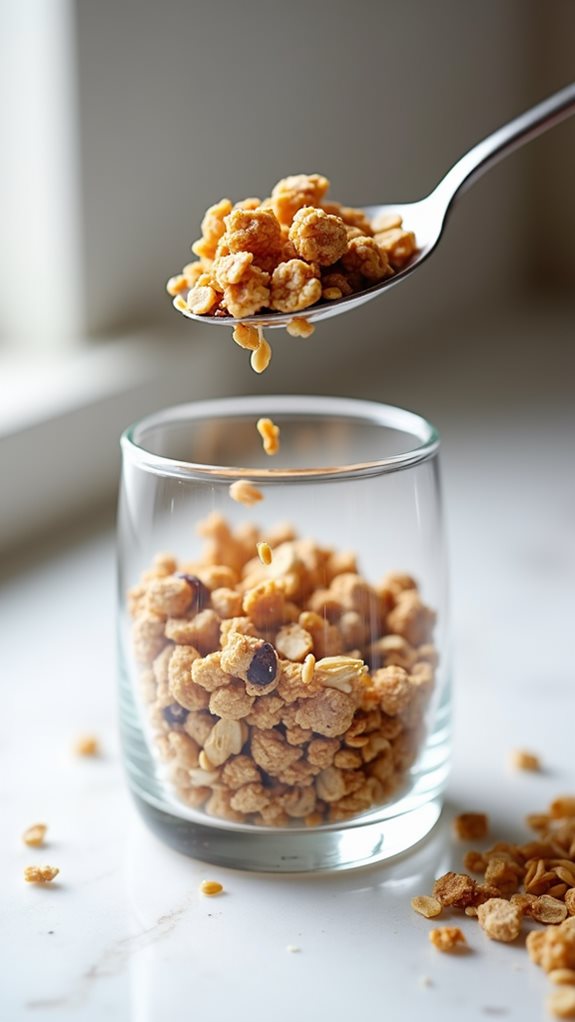
The first step involves placing an even layer of granola at the bottom of each chilled serving glass. You'll want to use approximately 2-3 tablespoons of granola per glass, ensuring it creates a solid foundation for the layers that will follow.
Distribute the granola evenly across the bottom surface, gently tapping the glass to settle the pieces into a uniform layer.
If you're working with different glass sizes, adjust the amount of granola proportionally to maintain the right balance of ingredients. For taller glasses, you might need to create multiple granola layers throughout the parfait, while shorter, wider vessels may only require a single substantial base layer.
When adding the granola, avoid pressing it down too firmly, as this can create a dense, difficult-to-eat bottom layer. Instead, let it fall naturally into place, allowing small spaces between pieces that will later capture drops of honey and cream.
Remember that timing is crucial when working with granola. If you're preparing these parfaits in advance, consider setting aside some granola to add just before serving to ensure that perfect crunch.
Step 4. Add Whipped Cream Layer
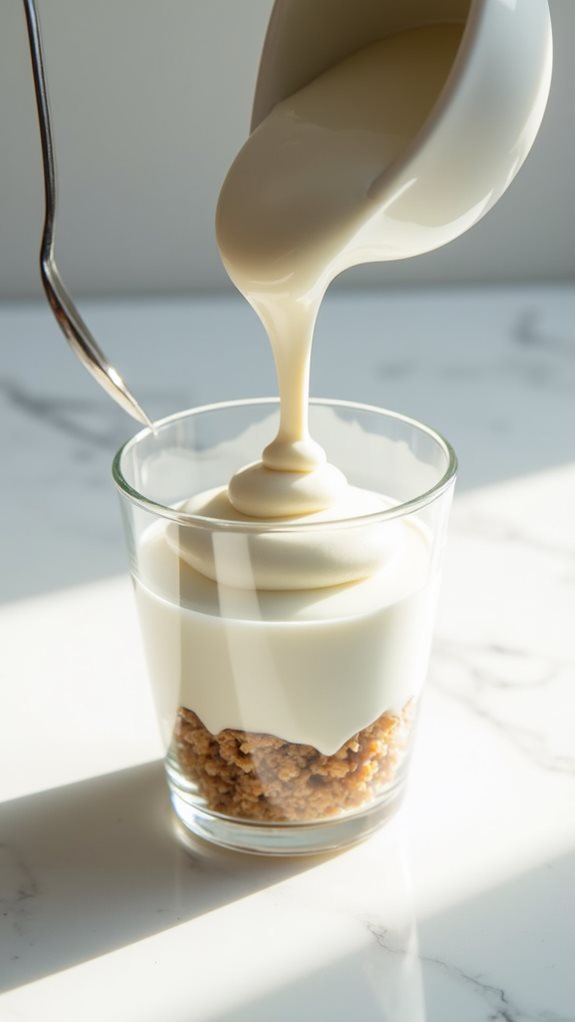
Following your granola base, creating the whipped cream layer requires a light touch and proper technique.
You'll want to spoon the freshly whipped cream mixture, which you've already prepared with vanilla extract, over the granola carefully to create a smooth, even surface. Don't rush this step, as the presentation of each layer will contribute to your parfait's final appearance.
Using the back of your spoon, gently spread the whipped cream to reach the edges of your glass, ensuring there aren't any gaps or air pockets that could disrupt the layering.
You'll need approximately 2-3 tablespoons of whipped cream for each layer, depending on the size of your serving glass. If you're working with chilled glasses, you'll find that the cream maintains its structure more effectively, making it easier to create distinct layers.
Make sure you're leaving enough room for the subsequent raspberry and granola layers – aim to use about one-fourth of your total whipped cream mixture for this first layer, as you'll need to repeat the process several times to complete your parfait.
Step 5. Add Raspberries and Honey
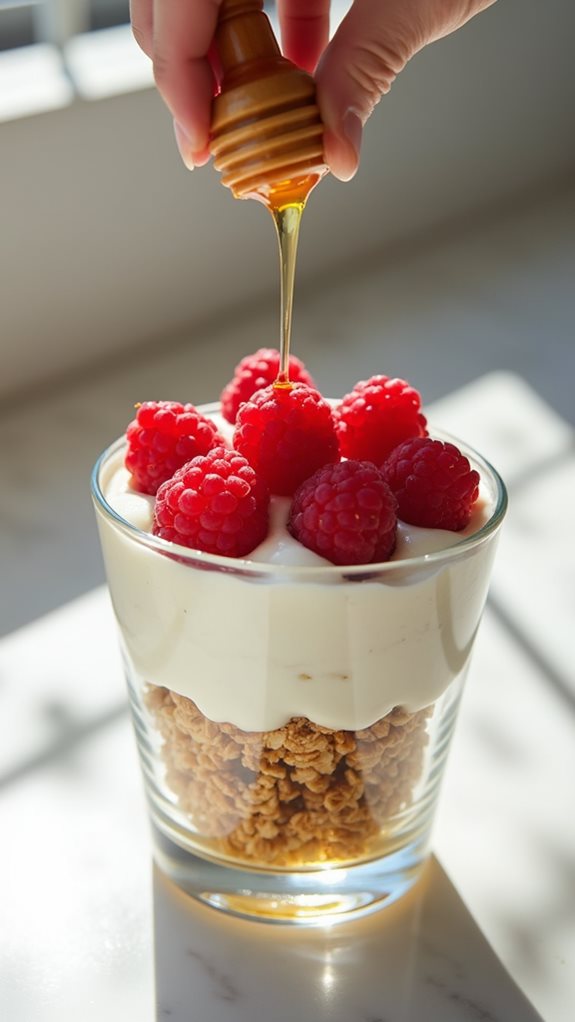
Fresh raspberries' vibrant color creates the parfait's most eye-catching layer.
You'll want to carefully place a generous portion of raspberries on top of your whipped cream layer, ensuring they're distributed evenly across the surface. If you're using larger berries, you can cut them in half to create a more stable layer and make each serving easier to eat.
Once you've positioned your raspberries, it's time to add the honey drizzle.
Hold your spoon about two inches above the berries and slowly pour a thin stream of honey in a circular motion, allowing it to naturally coat the fruit. Don't oversaturate the layer; you'll need just enough honey to enhance the berries' natural sweetness without making the dessert too heavy or cloying. The honey will gradually seep between the berries and create delicious pockets of sweetness throughout the parfait.
If you're building multiple layers, repeat this process until you reach the top of your glass, always finishing with a final layer of raspberries and a light honey drizzle for an appealing presentation.
Final Thoughts
With just a handful of quality ingredients, you'll create an impressive dessert that's both elegant and approachable. This classic raspberry parfait proves that sometimes the simplest combinations yield the most satisfying results, offering a perfect balance of textures and flavors that'll delight your guests or family members.
Don't hesitate to experiment with your parfait creation by adjusting the sweetness to your taste or incorporating seasonal variations. You might try using different types of berries, swapping out traditional granola for toasted nuts, or adding a layer of Greek yogurt for extra protein and tanginess.
While the basic recipe is foolproof, you'll find that mastering the art of layering takes practice – remember to keep your layers distinct and visible through the glass for maximum visual impact.
When you're ready to serve, you can confidently present these parfaits at any gathering, from casual brunches to formal dinner parties. They're particularly impressive when served in tall, clear glasses that showcase the carefully crafted layers you've created.