Did you know that pear consumption in the United States has increased by 50% in the last two decades? This surge in popularity has led to creative culinary applications, including the elegant pairing of pears with blue cheese and candied nuts in salads. You'll find this combination offers a perfect balance of sweet, savory, and tangy flavors that can elevate any meal. Whether you're looking for a quick weeknight dinner or an impressive dish for your next dinner party, this versatile salad might just become your new go-to recipe. But there's more to this dish than meets the eye…
Key Takeaways
- This salad combines sweet pears, tangy blue cheese, and crunchy candied nuts for a balanced flavor profile.
- It requires only five ingredients and is quick to prepare, making it an impressive starter or light meal.
- Layer sliced pears over mixed greens, then sprinkle with crumbled blue cheese and candied nuts.
- Drizzle with balsamic vinaigrette just before serving to maintain freshness and prevent wilting.
- The recipe is versatile, allowing for ingredient substitutions and adaptations to suit personal preferences or seasonal availability.
History
Throughout history, pear and cheese pairings have been a beloved combination in many cuisines. You'll find that this classic duo dates back centuries, with evidence of its popularity in ancient Roman and medieval European gastronomy. The sweet, juicy nature of pears complements the savory, often tangy profile of cheese, creating a harmonious balance that has stood the test of time.
In the 18th and 19th centuries, you'd often see pear and cheese pairings featured in formal dining settings, particularly in France and England. As culinary traditions evolved, chefs began experimenting with different cheese varieties, leading to the popularization of blue cheese in these combinations.
The addition of nuts, another historical staple, further enhanced the texture and flavor profile of these dishes.
Today, you'll encounter countless variations of pear and cheese salads in restaurants and homes worldwide. The inclusion of candied nuts represents a modern twist on this time-honored pairing, adding a touch of sweetness and crunch that elevates the dish to new heights.
This evolution demonstrates how culinary traditions can adapt while maintaining their essential appeal.
Recipe
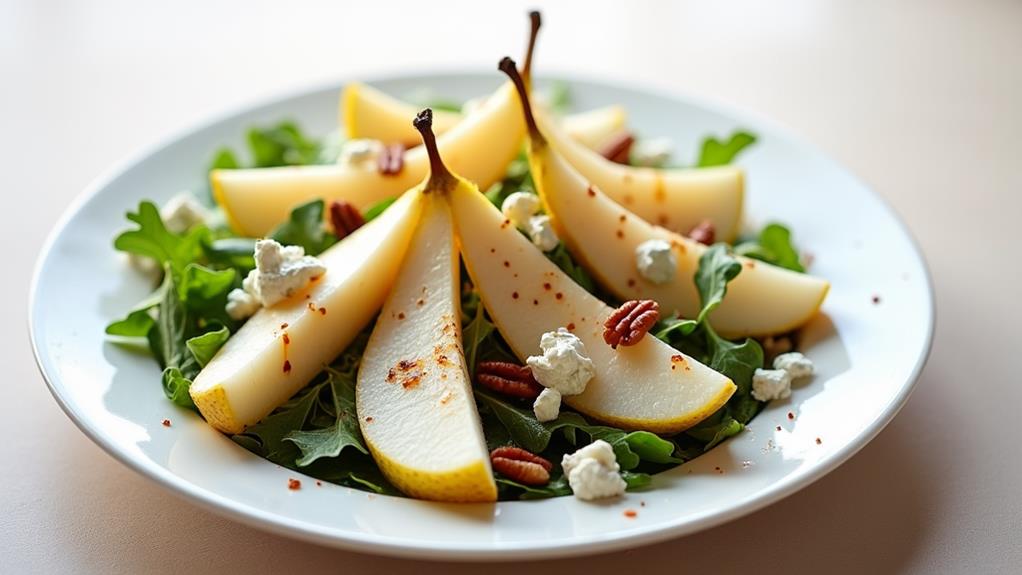
This elegant Pear Salad with Blue Cheese and Candied Nuts offers a perfect balance of sweet, savory, and tangy flavors. The crisp, juicy pears provide a refreshing base, while the creamy blue cheese adds a rich, bold taste. The candied nuts contribute a delightful crunch and a touch of sweetness to round out the dish.
With just five ingredients, this salad is quick to prepare and makes an impressive starter or light meal. The combination of textures and flavors creates a sophisticated dish that's sure to impress your guests or satisfy your own cravings for a gourmet salad experience.
- 2 ripe pears, cored and sliced (about 2 cups or 300g)
- 2 oz (60g) blue cheese, crumbled
- 1/4 cup (30g) candied nuts (pecans or walnuts)
- 2 cups (60g) mixed salad greens
- 2 tablespoons (30ml) balsamic vinaigrette
To prepare the salad, start by arranging the mixed salad greens on a large serving plate or individual salad bowls. Layer the sliced pears on top of the greens, then sprinkle the crumbled blue cheese and candied nuts evenly over the pears. Just before serving, drizzle the balsamic vinaigrette over the salad to taste.
For best results, choose pears that are ripe but still firm for easier slicing and a pleasant texture. If you prefer a milder cheese flavor, you can substitute gorgonzola or feta for the blue cheese.
To make this salad ahead of time, prepare all components separately and assemble just before serving to maintain the crispness of the greens and prevent the pears from browning.
Cooking Steps
To prepare this elegant pear salad, you'll follow a simple yet precise sequence of steps.
Begin by arranging the mixed salad greens on your serving plate or individual bowls, then carefully layer the sliced pears on top for a beautiful presentation.
Step 1. Arrange Mixed Salad Greens
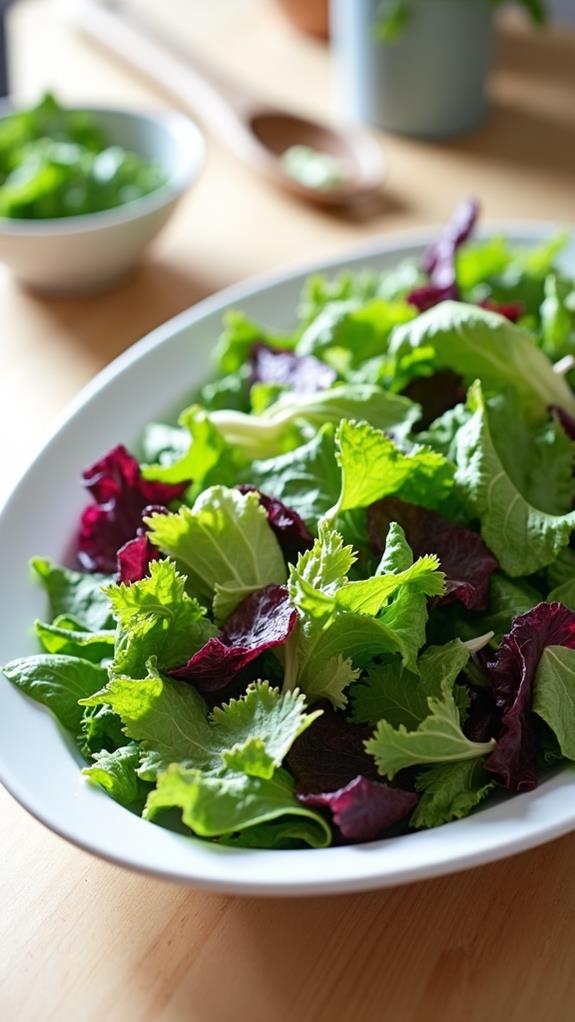
Begin by spreading a layer of mixed salad greens across the bottom of your serving plate or individual salad bowls. Ensure you're using fresh, crisp greens that have been thoroughly washed and dried.
You'll want to create a generous bed of greens, as this will serve as the foundation for your pear salad. When arranging the greens, don't just dump them onto the plate. Instead, gently place them with your hands, allowing for some height and volume. This technique creates a more visually appealing base for your salad.
If you're using a variety of greens, mix them together before placing them on the plate to ensure an even distribution of colors and textures. For added visual interest, you can tear larger leaves into bite-sized pieces.
This not only makes the salad easier to eat but also creates a more uniform appearance. Remember, the greens aren't just a backdrop; they're an integral part of the salad's flavor profile and nutritional value.
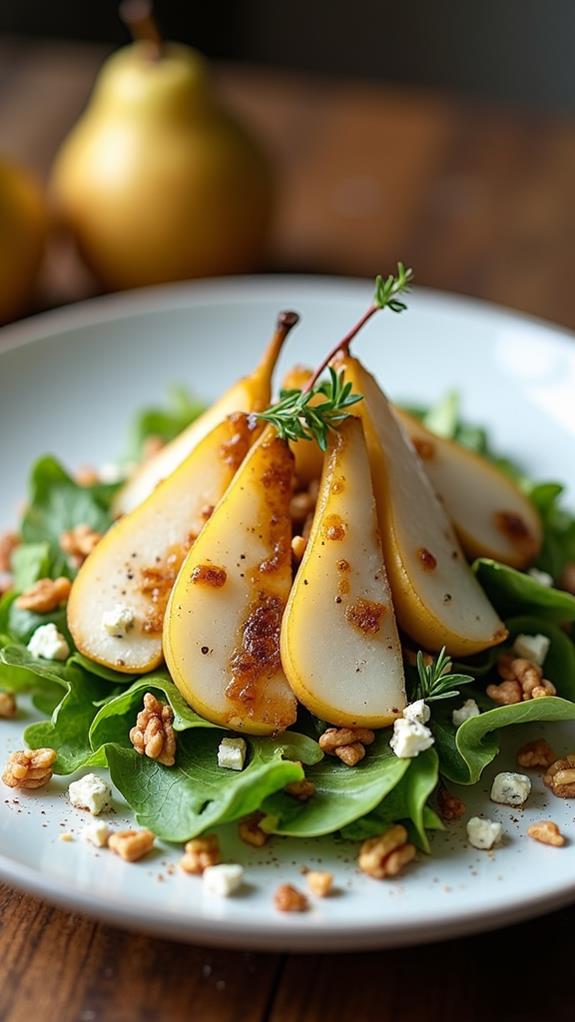
Step 2. Layer Sliced Pears

Artful arrangement is key when layering the sliced pears. Begin by selecting pears that are ripe but still firm, as they'll hold their shape better and provide a satisfying crunch.
Wash the pears thoroughly, then core them using a paring knife or melon baller. Slice the pears thinly, aiming for uniform thickness to ensure even distribution of flavor and texture throughout the salad.
As you layer the pears over the mixed greens, consider creating a visually appealing pattern. You might opt for a circular arrangement, starting from the outer edge and working your way inward, or create neat rows for a more structured look.
Alternatively, you can scatter the slices randomly for a rustic appearance. Whichever method you choose, ensure that the pear slices are evenly distributed across the greens. This will guarantee that each bite of the salad includes a perfect balance of ingredients.
Don't forget to leave some space between the pear slices to allow room for the blue cheese and candied nuts, which will be added in the next step. The careful arrangement of pears will elevate the salad's presentation and enhance the overall dining experience.
Step 3. Sprinkle Cheese and Nuts
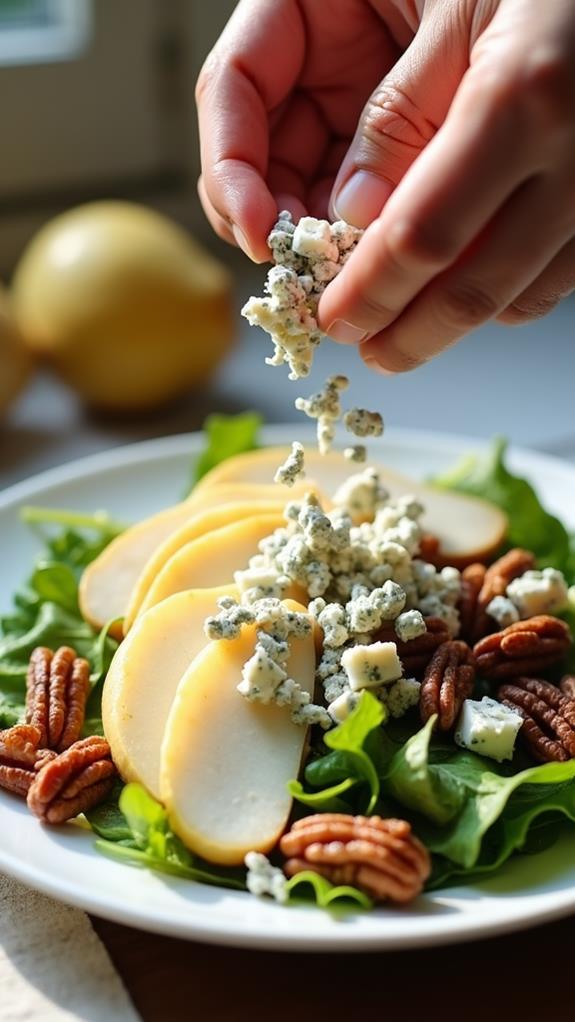
The next two steps in creating this elegant salad involve adding the blue cheese and candied nuts. Once you've arranged the sliced pears atop your bed of mixed greens, it's time to introduce these flavorful components.
Take your crumbled blue cheese and sprinkle it evenly over the pears, ensuring each bite will have a tangy surprise. Don't be shy with the cheese; its bold flavor is a key element in balancing the salad's taste profile.
Next, grab your candied nuts and distribute them across the salad. These sweet, crunchy morsels will provide a delightful textural contrast to the soft pears and creamy cheese.
Be sure to spread them out so that every forkful has a chance of including this delectable crunch. If you're using larger nut pieces, you might want to roughly chop them for easier eating.
Step 4. Drizzle Balsamic Vinaigrette
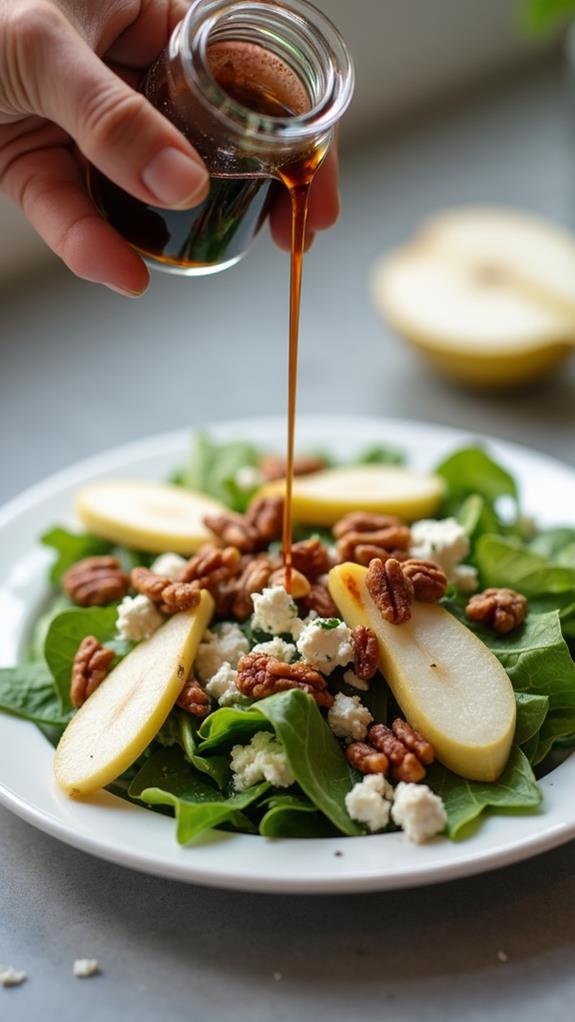
With the cheese and nuts in place, it's time to add the finishing touch: the balsamic vinaigrette.
You'll want to drizzle this dressing lightly over the salad, ensuring that every component gets a hint of its tangy flavor. Start by holding the bottle or container of vinaigrette about 6 inches above the salad. Gently squeeze or pour the dressing in a back-and-forth motion, creating a zigzag pattern across the top of the salad.
Be careful not to overdress the salad; you can always add more, but you can't take it away. Aim for about 2 tablespoons of vinaigrette for the entire salad, adjusting according to your taste preferences. The goal is to enhance the flavors of the pears, blue cheese, and candied nuts without overpowering them.
If you're serving the salad to guests, consider offering additional vinaigrette on the side, allowing them to add more if desired. Once you've drizzled the vinaigrette, your Pear Salad with Blue Cheese and Candied Nuts is ready to serve.
Enjoy the harmonious blend of sweet, tangy, and savory flavors in every bite.
Step 5. Serve Immediately
Prepared with care, your Pear Salad with Blue Cheese and Candied Nuts is now ready to be served. Present the salad on a large serving platter or individual plates, ensuring that the colorful layers are visible.
You'll want to serve this salad immediately to maintain its freshness and prevent the greens from wilting. The crisp pears and crunchy nuts are at their best when they're just assembled, providing a delightful contrast of textures.
If you're serving this as a starter, consider portioning it onto small plates for each guest. For a more casual setting, you can place the large platter in the center of the table and allow guests to serve themselves.
Don't forget to provide salad tongs or servers for easy distribution. As you're presenting the salad, you might briefly explain the components to your guests, highlighting the unique combination of flavors.
Final Thoughts
As a final note, this Pear Salad with Blue Cheese offers a delightful combination of flavors and textures that's sure to impress.
You'll find that the crisp sweetness of the pears perfectly complements the tangy blue cheese, while the candied nuts add a satisfying crunch. This salad isn't just tasty; it's also versatile. You can serve it as an elegant starter for a dinner party or enjoy it as a light lunch on its own.
Don't be afraid to experiment with this recipe. Try different types of pears or cheese to create your own unique flavor profile. If you're looking to make it more substantial, consider adding some grilled chicken or prosciutto.
Remember, the key to this salad's success lies in the quality of its ingredients. Always opt for ripe, juicy pears and a good quality blue cheese for the best results.
With its simple preparation and impressive presentation, this Pear Salad with Blue Cheese and Candied Nuts is bound to become a go-to recipe in your culinary repertoire.