You might not realize that malted milk powder, the key ingredient in these mini chocolate cupcakes, was originally developed in the 1870s as a nutritional supplement for infants. Today's use of this ingredient in baking has transformed from its medicinal origins into a sought-after flavor enhancer that adds depth and nostalgic charm to desserts. If you've ever enjoyed the distinctive taste of malted milk balls, you'll understand why these bite-sized cupcakes have become a modern favorite at parties and gatherings. Let's explore how this simple ingredient can elevate your chocolate cupcakes from ordinary to extraordinary.
Key Takeaways
- Mini chocolate cupcakes enhanced with malted milk powder create bite-sized treats that taste like malted milk balls in cake form.
- The recipe combines flour, cocoa powder, and malted milk powder with standard cake ingredients, baked at 350°F for 12-15 minutes.
- Fill mini muffin liners two-thirds full and bake until a toothpick comes out clean for perfect portion control.
- Store unfrosted cupcakes in an airtight container for three days at room temperature or freeze for up to two months.
- Allow ingredients to reach room temperature before mixing, and adjust malt powder quantity to achieve desired flavor intensity.
History
Four key developments shaped the creation of mini malt chocolate cupcakes. First, you'll find that the invention of malted milk powder by William Horlick in 1887 established the foundation for that distinctive malt flavor you've come to love.
Next, the emergence of cupcakes as individual-sized treats in the late 19th century paved the way for their miniature counterparts, which you'll now commonly see at parties and celebrations.
During the 1930s, you'll notice that chocolate malted milkshakes gained immense popularity at soda fountains across America, inspiring bakers to incorporate that beloved flavor combination into baked goods.
By the 1950s, you'd frequently find malt-flavored desserts in cookbooks and magazines, as home bakers began experimenting with malted milk powder in their recipes.
The transition to mini versions occurred in the 1990s when you'd see a growing trend toward bite-sized desserts, perfectly timed with the cupcake craze of the early 2000s.
Today, you'll discover these diminutive treats have become a staple at bakeries worldwide, combining the nostalgic taste of malt with the convenience of a miniature chocolate cupcake.
Recipe
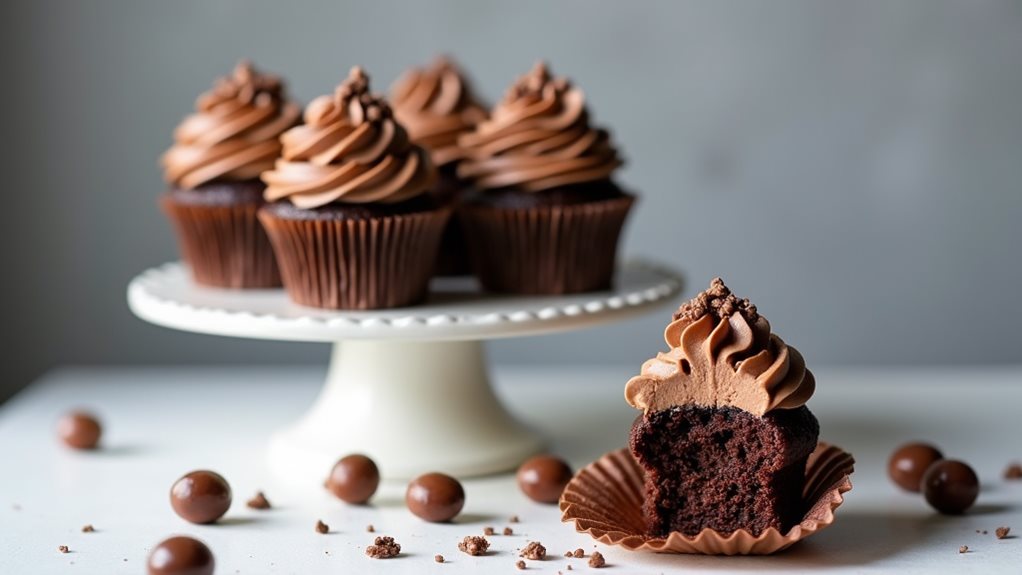
Mini Malt Chocolate Cupcakes transform the classic combination of chocolate and malt into delightful bite-sized treats. These cupcakes capture the nostalgic flavor of malted milk balls while delivering a rich, chocolatey experience that's perfect for parties, afternoon tea, or any special occasion.
The secret to these cupcakes lies in the combination of malted milk powder and premium cocoa, creating a depth of flavor that sets them apart from ordinary chocolate cupcakes. The miniature size ensures each bite delivers the perfect balance of tender cake and creamy frosting, making them an irresistible addition to any dessert table.
Ingredients:
- 1½ cups (180g) all-purpose flour
- ¾ cup (75g) malted milk powder
- ½ cup (50g) unsweetened cocoa powder
- 1½ teaspoons baking powder
- ½ teaspoon baking soda
- ¼ teaspoon salt
- ½ cup (115g) unsalted butter, softened
- 1 cup (200g) granulated sugar
- 2 large eggs
- 1 teaspoon vanilla extract
- 1 cup (240ml) whole milk
- ¼ cup (60ml) vegetable oil
- Crushed malted milk balls for decoration
Preheat oven to 350°F (175°C). Line mini muffin tins with paper liners. Sift together flour, malted milk powder, cocoa powder, baking powder, baking soda, and salt in a medium bowl.
In a separate large bowl, cream butter and sugar until light and fluffy. Beat in eggs one at a time, then vanilla. Gradually add dry ingredients to wet ingredients, alternating with milk and oil, mixing until just combined.
Fill each liner about ⅔ full and bake for 12-15 minutes until a toothpick comes out clean. Cool completely before frosting.
For best results, ensure all ingredients are at room temperature before beginning. The cupcakes can be made ahead and frozen for up to 3 months without frosting.
When measuring the malted milk powder, use a spoon to fill the measuring cup rather than scooping directly from the container to avoid overpacking. For extra malt flavor, consider adding a teaspoon of malt extract to the batter or topping the frosted cupcakes with crushed malted milk balls just before serving.
Cooking Steps
You'll start these miniature treats by preheating your oven to 350°F and thoroughly mixing the dry ingredients, including the crucial malted milk powder that gives these cupcakes their distinctive flavor.
Next, you'll need to combine your wet and dry ingredients until the batter reaches a smooth, well-incorporated consistency without overmixing.
Finally, carefully pour or spoon the batter into paper-lined mini cupcake tins, being mindful not to overfill as these small delights need room to rise properly.
Step 1. Preheat Oven to 350°F
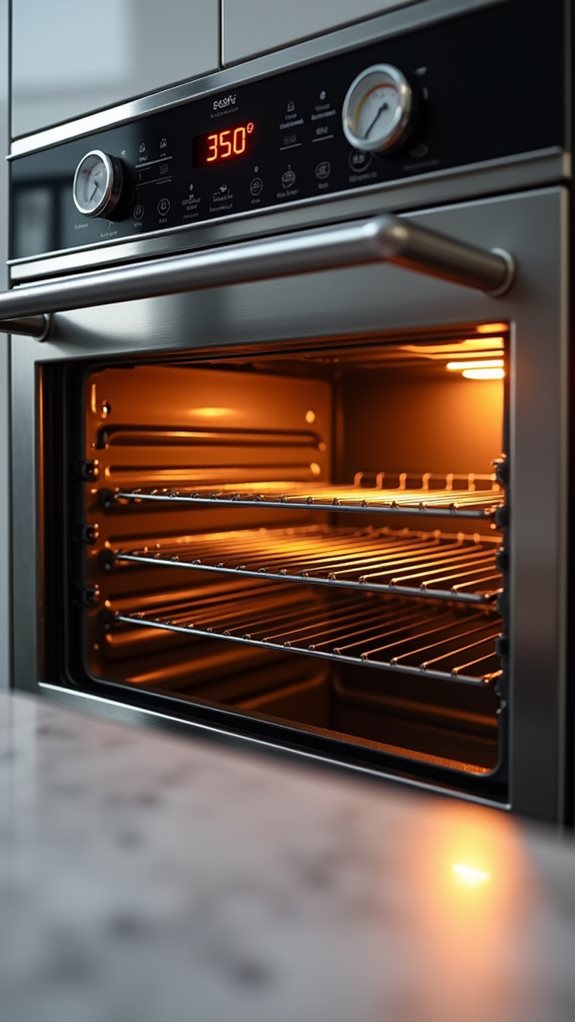
Before mixing any ingredients, preheat your oven to 350°F (177°C) and allow it to fully warm up for at least 10 minutes. While you're waiting, you'll want to verify your oven's temperature accuracy using an oven thermometer, as even a slight variance can affect your cupcakes' texture and rise.
Position your oven rack in the center position, which ensures even heat distribution and prevents your mini cupcakes from browning too quickly on top or bottom. If you're using a convection oven, you'll need to reduce the temperature by 25 degrees to 325°F (163°C), as the fan circulation intensifies the heat.
During the preheating process, you can prepare your workspace and gather your ingredients, but don't start mixing until your oven reaches the proper temperature. You'll know your oven is ready when the preheat indicator light turns off or when your oven thermometer shows a steady 350°F reading.
Remember that opening the oven door during preheating will release heat and extend the time needed to reach the target temperature.
Step 2. Mix Dry Ingredients Together
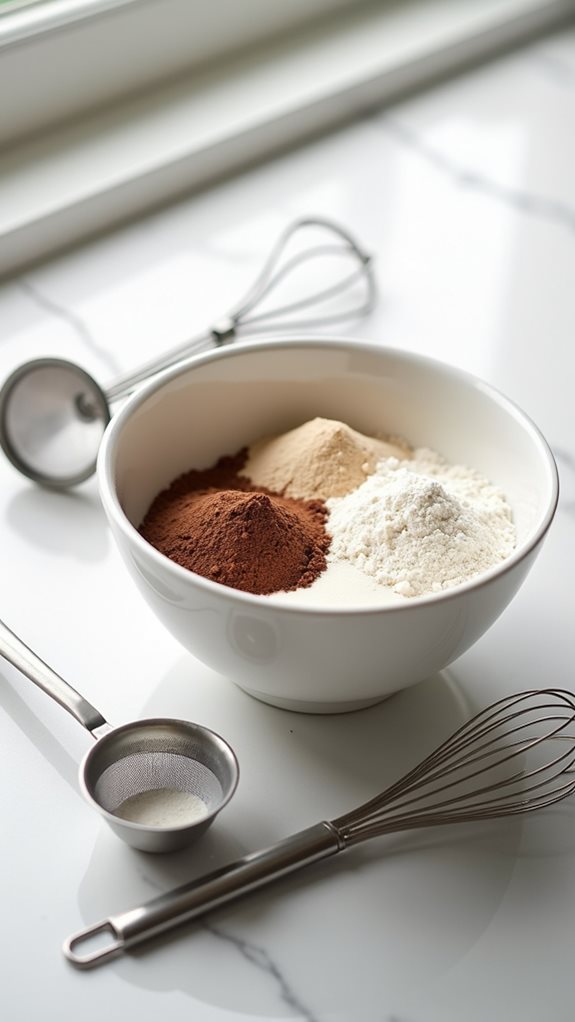
Carefully measuring and combining the dry ingredients creates the foundation for perfectly textured mini cupcakes. In a medium-sized mixing bowl, you'll need to combine 1½ cups all-purpose flour, ⅓ cup malted milk powder, ½ cup unsweetened cocoa powder, 1 teaspoon baking powder, and ½ teaspoon baking soda.
Don't forget to add ¼ teaspoon salt, which will enhance the chocolate flavor.
Using a wire whisk, break up any clumps in the dry ingredients, especially the cocoa powder and malted milk powder, which tend to form lumps. You'll want to whisk the mixture thoroughly for about 30 seconds to ensure even distribution of all components.
If you notice any stubborn lumps, press them against the side of the bowl with the back of a spoon. Once your dry ingredients are properly combined, they should have a uniform color with no streaks or patches.
This careful mixing process ensures that your mini cupcakes will rise evenly and develop the perfect chocolate-malt flavor profile. Set this bowl aside while you prepare the wet ingredients, but remember to keep it within reach for when you're ready to combine everything.
Step 3. Add Malted Milk Powder
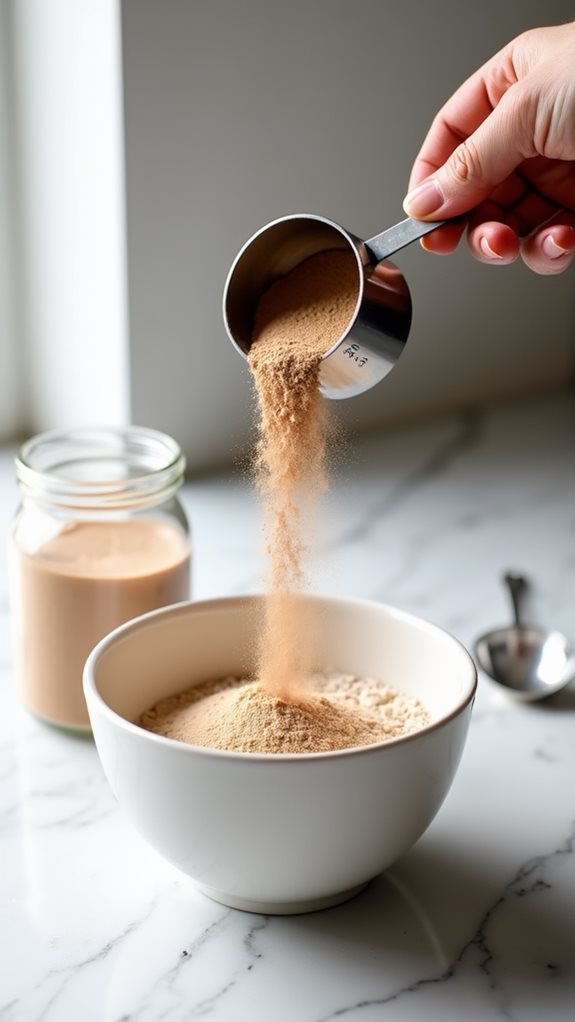
With the dry ingredients prepared, the malted milk powder introduces a distinctive, nostalgic flavor to these chocolate cupcakes. You'll want to measure out 1/3 cup of malted milk powder, making sure it's the plain variety rather than chocolate-flavored, as you're already working with cocoa powder in the base recipe.
Add the malted milk powder to your bowl of dry ingredients, and you'll notice its light beige color creating subtle streaks through the mixture.
Using your whisk, incorporate the powder thoroughly until it's evenly distributed throughout the dry ingredients. You don't want any clumps or pockets of malt powder, as these could create uneven flavor spots in your finished cupcakes.
If you're finding stubborn clumps, try pressing them gently against the side of the bowl with your whisk or passing the entire mixture through a fine-mesh sieve. The malted milk powder's unique composition means it'll integrate differently than standard dry ingredients, so take your time with this step.
When properly mixed, your dry ingredients should have a uniform color and texture, indicating they're ready for the wet ingredients.
Step 4. Combine Wet and Dry Ingredients
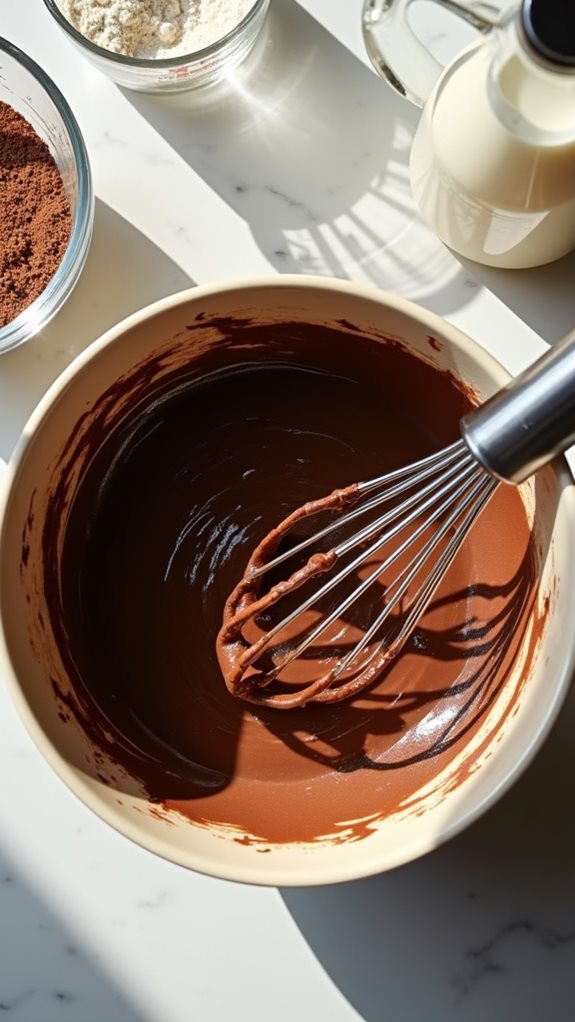
Mixing the wet and dry ingredients properly will determine your cupcakes' final texture.
You'll want to create a smooth, well-incorporated batter without overmixing, which can lead to tough, dense cupcakes. Begin by making a well in the center of your dry ingredients, then pour your wet mixture into the center.
Using a rubber spatula, fold the ingredients together with gentle, sweeping motions from the bottom up. You'll notice the batter starting to come together as streaks of flour gradually disappear.
Don't worry if you see a few small lumps – they'll work themselves out during baking. As you're combining the ingredients, scrape down the sides of the bowl to ensure everything's fully incorporated.
You'll know you're done when the batter has a uniform chocolate color and flows smoothly off your spatula.
Stop mixing as soon as you've achieved this consistency – continuing beyond this point will develop too much gluten, resulting in less-than-perfect cupcakes.
The entire mixing process shouldn't take more than 1-2 minutes if you're working efficiently with room-temperature ingredients.
Step 5. Pour Into Cupcake Liners
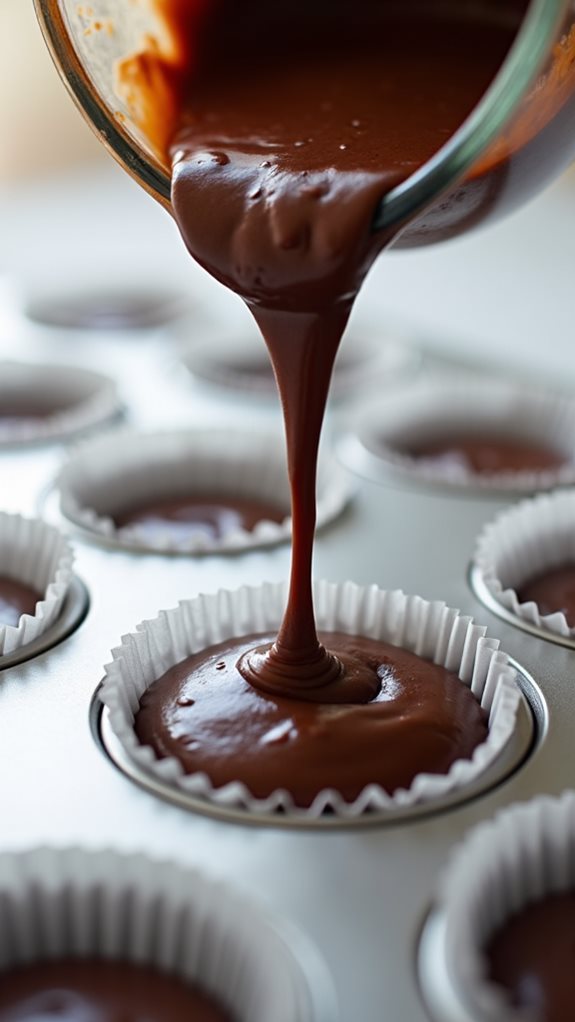
The proper filling of cupcake liners stands between you and perfectly portioned treats.
You'll need to start by placing mini paper liners into each cavity of your mini muffin tin, ensuring they're seated properly against the sides. Take care not to crush or wrinkle the liners, as this can affect the final appearance of your cupcakes.
Using a small cookie scoop or spoon, fill each liner about two-thirds full with your prepared chocolate malt batter. Don't overfill the liners, as the cupcakes will rise during baking, and you'll want to leave room for expansion. If you're working with a measuring spoon, aim for about 1½ tablespoons of batter per cup. You'll notice the batter should reach just above the first fold in the paper liner.
For consistent results, maintain the same amount of batter in each cup. You can gently tap the filled muffin tin against your counter a few times to release any air bubbles and level the batter.
If you've spilled any batter on the pan's edges, wipe it clean before baking to prevent burning.
Final Thoughts
Making these mini malt chocolate cupcakes brings a smile to anyone's dessert table.
You'll find that these bite-sized treats offer the perfect balance of chocolate and malt flavors, making them an ideal choice for parties, gatherings, or simple family celebrations. The miniature size means you can enjoy more than one without feeling overwhelmed, and they're particularly appealing to children and adults alike.
When you're storing these cupcakes, you'll want to keep them in an airtight container at room temperature for up to three days, though they're best enjoyed within the first 48 hours.
If you've made them in advance, you can freeze the unfrosted cupcakes for up to two months – just be sure to wrap them carefully. Once you're ready to serve, let them thaw completely before adding the frosting.
You'll notice that the malt flavor actually intensifies slightly after the first day, creating an even richer taste experience. Remember, you can always adjust the amount of malt powder to suit your taste preferences, making these cupcakes entirely your own.