You've probably encountered chocolate lava cakes on restaurant menus, but you might not know their fascinating origin or how simple they are to create at home. These petite desserts, with their molten chocolate centers, represent a perfect balance between precise technique and forgiving preparation. While they'll impress your dinner guests with their restaurant-quality presentation, you don't need professional culinary training to master them. The real secret lies in understanding a few key principles that transform basic pantry ingredients into an elegant dessert that's both sophisticated and comforting. Let's explore how you can achieve this irresistible combination of tender cake and flowing chocolate.
Key Takeaways
- Mini Chocolate Lava Cakes require just five ingredients: semi-sweet chocolate, butter, eggs, sugar, and flour.
- Bake at 425°F for exactly 12 minutes to achieve the signature molten center and firm exterior.
- Grease and dust ramekins with cocoa powder before filling with batter to ensure easy removal after baking.
- Look for firm edges and a slightly jiggly center as visual cues for perfect doneness.
- Serve immediately with powdered sugar, fresh berries, or vanilla ice cream for the best molten chocolate experience.
History
The accidental creation of chocolate lava cake in the 1980s revolutionized fine dining desserts. When French chef Michel Bras was experimenting with a chocolate cake recipe, he pulled it from the oven too soon, discovering that the undercooked center created a delightfully rich, molten filling that would soon become the signature element of this beloved dessert.
You'll find that the dish quickly gained popularity in upscale restaurants throughout France before spreading across Europe and eventually reaching American shores in the early 1990s.
What started as a mistake has evolved into one of the most requested desserts in fine dining establishments worldwide, with countless variations emerging over the years. While traditional recipes use dark chocolate, you'll now see versions incorporating white chocolate, peanut butter, or even matcha green tea.
Today, you can enjoy this sophisticated dessert both in high-end restaurants and in your own kitchen, as home bakers have embraced its relatively simple preparation process.
The transformation from kitchen mishap to culinary icon demonstrates how some of the most celebrated dishes in modern cuisine often come from unexpected moments of creativity or fortunate accidents.
Recipe
Mini Chocolate Lava Cakes are decadent individual desserts that showcase the perfect balance between a tender chocolate cake exterior and a warm, flowing chocolate center. These impressive treats can transform any dinner into a special occasion, yet require minimal effort to prepare.
While these cakes may seem intimidating, they're surprisingly straightforward to make with just five basic ingredients. The key to success lies in precise timing and proper preparation of the ramekins, ensuring that perfect moment when the fork breaks through the cake to reveal its molten heart.
Ingredients:
- 8 ounces (226g) semi-sweet chocolate
- 1/2 cup (113g) unsalted butter
- 3 large eggs
- 1/4 cup (50g) granulated sugar
- 2 tablespoons (16g) all-purpose flour
- Cooking spray or butter for greasing
Preheat oven to 425°F (218°C). Melt chocolate and butter together in a double boiler or microwave in 30-second intervals, stirring until smooth. In a separate bowl, whisk eggs and sugar until light and fluffy.
Fold the chocolate mixture into the egg mixture until combined, then gently fold in flour until just incorporated. Divide batter among four greased 6-ounce ramekins. Bake for 12 minutes until edges are set but centers are still soft.
For optimal results, remove cakes from the oven precisely at 12 minutes – even if they appear slightly underdone in the center. Let rest for one minute before running a knife around the edges and inverting onto serving plates.
Ramekins must be well-greased and can be dusted with cocoa powder for easier removal. These cakes can be prepared ahead and refrigerated for up to 24 hours before baking, though they may require an extra minute of baking time if chilled.
Cooking Steps
You'll want to start by thoroughly coating your ramekins with butter and dusting them with cocoa powder before combining your chocolate and butter using either a double boiler or microwave method.
Next, you'll whisk your eggs until they're light and fluffy, then carefully fold in your melted chocolate mixture until it's fully incorporated.
Finally, you'll pour the batter into your prepared ramekins and bake them at 425°F for exactly 12 minutes, or until the edges are set but the center remains wonderfully molten.
Step 1. Grease Ramekins With Butter

Preparing ramekins properly is crucial for ensuring your lava cakes release effortlessly after baking.
You'll need to start by selecting four 6-ounce ramekins and gathering softened butter for thorough greasing.
Take a pastry brush or paper towel and apply a generous layer of softened butter to every surface inside each ramekin, paying special attention to the corners and edges where the cake is most likely to stick.
Don't forget to coat the bottom thoroughly, as this is where most sticking issues occur.
After buttering, you'll want to dust the inside of each ramekin with cocoa powder, tapping out any excess. This additional step creates a barrier between the cake and the ramekin while maintaining the chocolate flavor profile.
If you're planning to refrigerate your batter before baking, it's essential to re-grease the ramekins just before use, as the initial coating may have absorbed into the ceramic.
For extra insurance against sticking, you can cut small circles of parchment paper to fit the bottom of each ramekin, but this step isn't necessary if you've greased thoroughly.
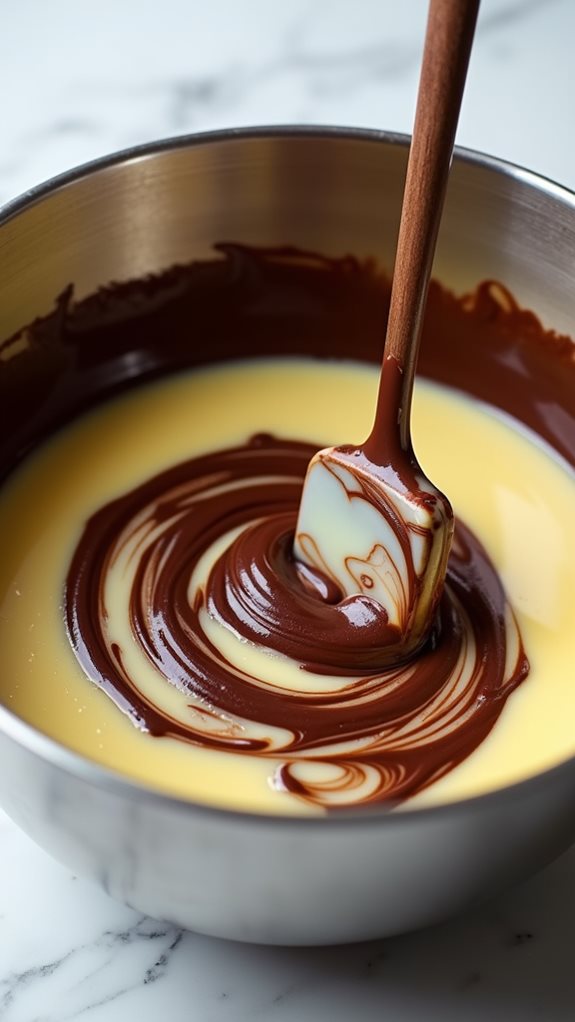
Step 2. Combine Chocolate and Butter
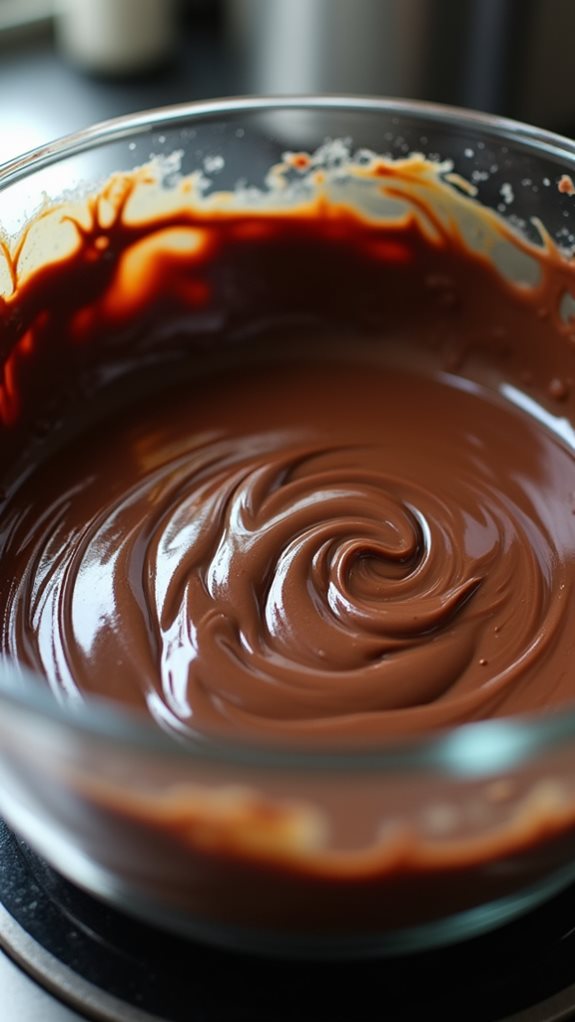
With your ramekins properly prepared, the next step focuses on creating the decadent chocolate mixture that forms the heart of these lava cakes. You'll need to melt together your 8 ounces of semi-sweet chocolate and ½ cup of unsalted butter until they're completely smooth and well combined.
Choose between two reliable melting methods for optimal results. If you're using a double boiler, place your chocolate and butter in the top bowl, ensuring it doesn't touch the simmering water below. Stir occasionally until the mixture becomes glossy and uniform.
Alternatively, you can use your microwave by combining the ingredients in a microwave-safe bowl and heating them in 30-second intervals, stirring between each interval to prevent scorching. You'll know you've achieved the right consistency when the mixture is completely smooth without any lumps or streaks.
Don't rush this process, as proper melting is crucial for achieving that perfect molten center. If you notice any small bits of unmelted chocolate, continue stirring off heat, as the residual warmth will help complete the melting process.
The final mixture should be slightly warm but not hot.
Step 3. Whisk Eggs Until Fluffy
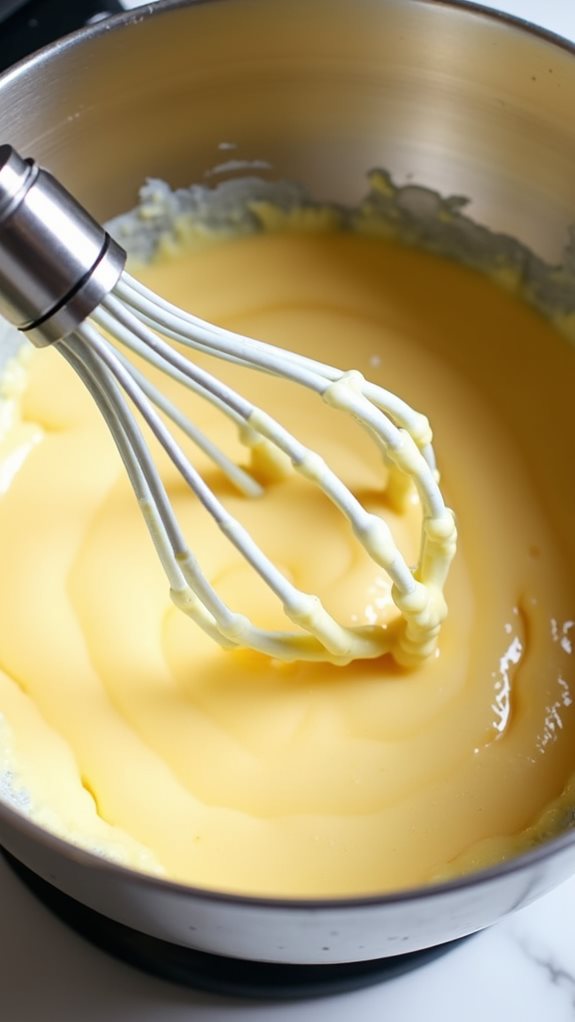
Moving on to the eggs, grab your 3 large eggs and ¼ cup of granulated sugar for one of the most crucial steps in creating perfectly textured lava cakes.
You'll want to ensure both ingredients are at room temperature before beginning, as this will help achieve the ideal consistency in your mixture.
In a medium-sized bowl, crack your eggs and add the measured sugar. Using an electric mixer on medium-high speed, or a whisk if you're working by hand, beat the mixture vigorously until it becomes noticeably lighter in color and significantly increases in volume.
You'll know you've reached the right consistency when the mixture falls back into the bowl in thick ribbons that briefly hold their shape before dissolving. This process typically takes about 3-4 minutes with an electric mixer or 5-6 minutes by hand.
Don't rush this step, as proper aeration creates the delicate structure that gives your lava cakes their characteristic texture. The tiny air bubbles you're incorporating will help create that perfect balance between the cake's firm exterior and its molten center.
Step 4. Folding Chocolate Into Eggs
This chocolate-folding stage requires a gentle touch to maintain the airy texture you've created in your egg mixture.
You'll want to begin by allowing your melted chocolate-butter mixture to cool slightly, ensuring it won't cook the eggs on contact while still remaining fluid enough to incorporate smoothly.
Using a rubber spatula, add one-third of the chocolate mixture to your whipped eggs, cutting through the center and folding the mixture over itself with smooth, deliberate motions. As you fold, rotate the bowl quarter turns, continuing until you see light streaks forming throughout.
Once this initial portion is partially incorporated, add the remaining chocolate in two more additions, maintaining the same gentle folding technique. You'll notice the mixture gradually becoming uniform in color, transforming into a rich brown batter that retains its volume.
Don't be tempted to stir vigorously, as this will deflate the air bubbles you've carefully incorporated during the egg-whipping stage. Stop folding as soon as you no longer see streaks of egg mixture, as over-mixing will compromise the final texture of your lava cakes.
Step 5. Bake Until Edges Set
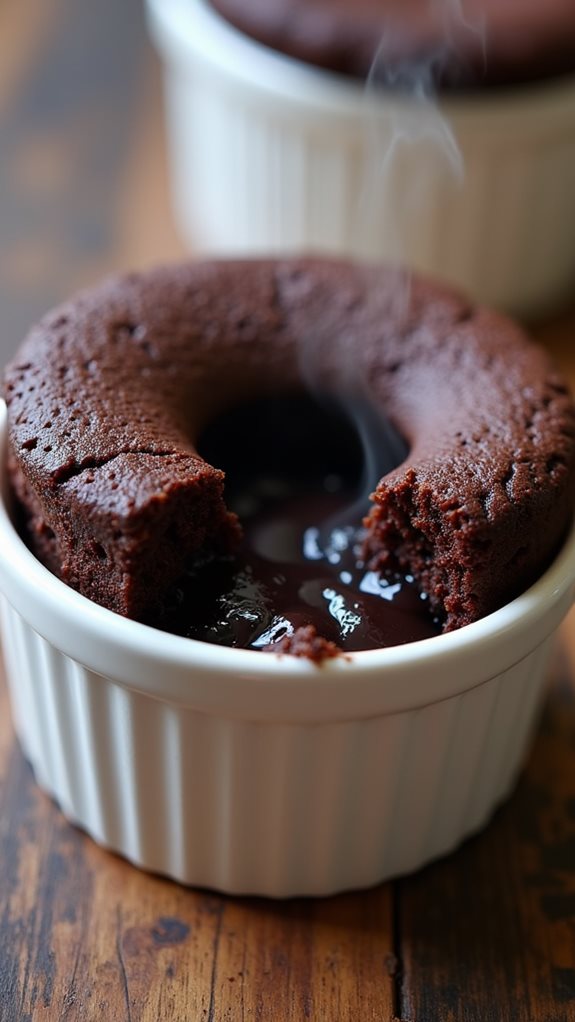
The critical baking stage of your lava cakes demands precise timing and careful attention to visual cues. You'll need to place your filled ramekins on the center rack of your preheated 425°F oven and set your timer for exactly 12 minutes.
During this time, resist the urge to open the oven door, as temperature fluctuations can affect the delicate balance between the cake's exterior and molten interior.
Watch through your oven's window as the transformation occurs. You'll notice the edges beginning to rise and set while the center remains slightly jiggly. The perfect lava cake should have a fully baked exterior that's firm to the touch, while maintaining that signature liquid center.
If you're unsure about your oven's temperature accuracy, it's wise to test one cake first. Insert a toothpick about half an inch from the edge – it should come out clean, while the center should still appear slightly underdone.
When the time's up, remove the cakes promptly to prevent carryover cooking. You'll know you've achieved success when the cakes have risen about half an inch above the ramekin's rim and have a slight dome shape.
Final Thoughts
Perfect mini chocolate lava cakes require precision and attention to detail, but you'll find they're well worth the effort. When you master this dessert, you'll have a show-stopping finale that never fails to impress dinner guests and family members alike.
Remember that success depends on several key factors: using high-quality chocolate, maintaining precise baking times, and serving the cakes immediately.
Don't be discouraged if your first attempt isn't perfect – even experienced bakers sometimes need to adjust their technique to accommodate different ovens or ramekin sizes. You'll know you've achieved the ideal result when the cake's exterior is firm but springy, while the center releases a warm, flowing chocolate center when pierced.
For added versatility, you can experiment with different chocolate varieties or incorporate subtle flavoring additions like espresso powder or orange zest.
While the classic presentation with a dusting of powdered sugar is timeless, you'll find these cakes also pair beautifully with fresh berries, vanilla ice cream, or whipped cream.
Keep in mind that practice makes perfect, and each attempt brings you closer to mastering this beloved dessert.