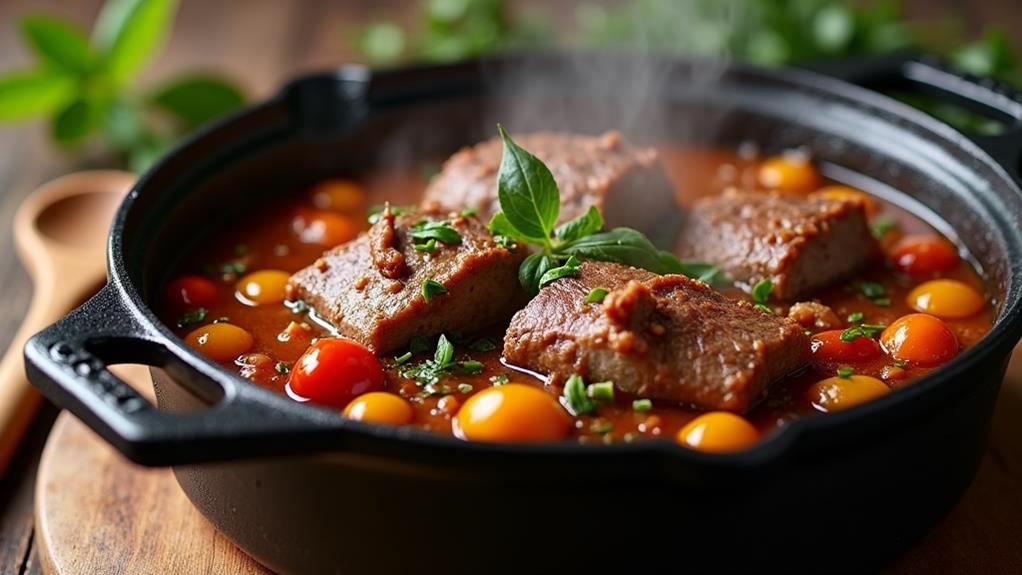
Mastering the art of braising involves a combination of techniques that elevate tough cuts of meat into tender, flavorful dishes. You'll start by selecting the right cut, like chuck roast or short ribs, and searing it to develop a rich crust. Then, you'll add aromatic vegetables and a flavorful liquid, such as wine or broth, before slow-cooking at a low temperature. This process breaks down connective tissues, resulting in melt-in-your-mouth meat and a deeply flavored sauce. Proper equipment, temperature control, and patience are key to achieving braising perfection. By understanding these fundamentals, you'll unlock the secrets to creating restaurant-quality braised dishes at home.
Understanding Braising Fundamentals
Braising, a culinary cornerstone, combines dry and moist heat cooking methods to transform tough cuts of meat into tender, flavorful dishes. This technique's braising history dates back centuries, with roots in various cultures worldwide.
You'll find it's a method that's stood the test of time, evolving to suit modern kitchens while retaining its core principles. The process of slow-cooking short ribs in wine and broth, for instance, is a delicious way to showcase braising's potential.
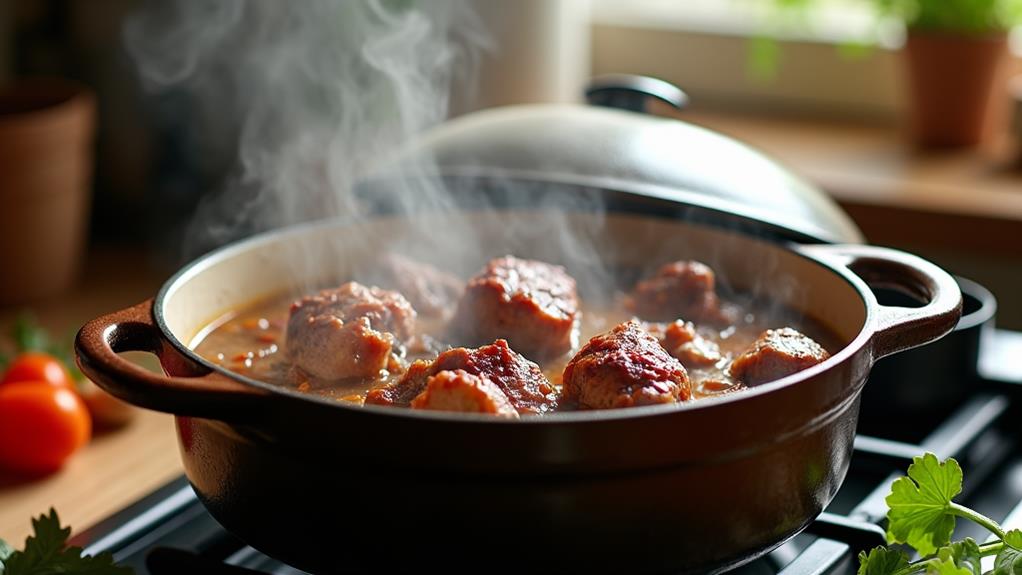
To master braising, you'll need to understand its fundamental steps. Start by searing your chosen meat in a hot pan to develop a flavorful crust. This crucial step, known as the Maillard reaction, creates complex flavors that will infuse your dish.
Next, you'll add liquid, typically broth or wine, to partially cover the meat. The cultural significance of braising is evident in the diverse range of liquids used across different cuisines.
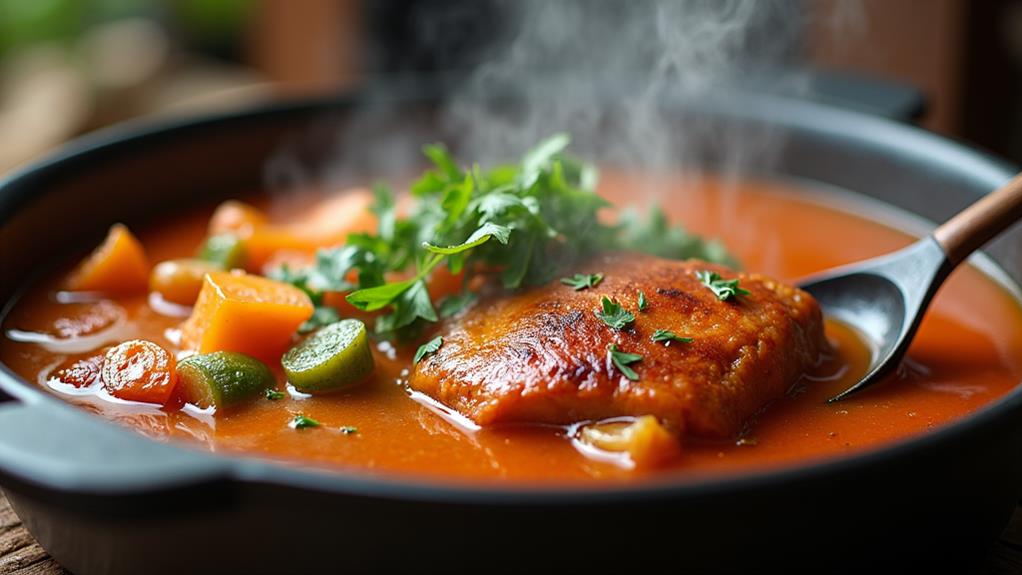
Once you've added the liquid, cover the pot and let it simmer at a low temperature. This slow cooking process breaks down tough connective tissues, resulting in incredibly tender meat.
The liquid gradually reduces, concentrating flavors and creating a rich sauce. By mastering these fundamentals, you'll unlock a world of culinary possibilities.
Selecting Ideal Cuts of Meat
When selecting meat for braising, you'll want to focus on tough, collagen-rich cuts that benefit from long, slow cooking.
These cuts, typically from the animal's well-exercised areas, include shoulder, shank, and chuck for beef; shoulder and leg for lamb; and thighs for poultry.
As the collagen breaks down during the braising process, it transforms these initially tough meats into tender, flavorful dishes that'll melt in your mouth.
Tough, Collagen-Rich Meats
The key to successful braising lies in choosing the right cuts of meat. When it comes to tough, collagen-rich meats, you'll want to focus on cuts that benefit from slow, moist cooking. These cuts, typically from well-exercised muscles, are packed with connective tissue that transforms into tender, succulent meat through the braising process.
For instance, you might think of other slow-cooked dishes, such as Slow Cooker Chili Con Carne, which also emphasizes the importance of cooking methods that ensure rich flavors.
Opt for cuts like chuck roast, brisket, or short ribs for beef. For pork, consider shoulder (Boston butt) or ribs. When braising poultry, dark meat like thighs and drumsticks work best.
The magic happens during the long, slow cooking process, where collagen breakdown occurs, leading to tenderness enhancement. As the collagen melts, it lubricates muscle fibers, resulting in a melt-in-your-mouth texture.
To maximize flavor and texture, look for cuts with visible marbling and a good amount of connective tissue. These characteristics ensure that your braised dish will be rich, flavorful, and beautifully tender.
Best Braising Choices
Now that we've explored the importance of tough, collagen-rich meats in braising, let's focus on specific cuts that yield the best results. When selecting meats for braising techniques, you'll want to consider cuts that benefit from slow, moist cooking to develop rich flavor profiles.
For a hearty selection, consider the ways in which searing enhances flavor before braising, as seen in hearty beef stew.
For beef, opt for chuck roast, short ribs, or brisket. These cuts have plenty of connective tissue that breaks down during braising, resulting in tender, flavorful meat.
Pork shoulder and pork belly are excellent choices for braising, as they're well-marbled and become succulent when cooked low and slow. If you're braising poultry, dark meat like chicken thighs or turkey legs work best, as they remain moist and tender throughout the process.
Don't overlook less common options like lamb shanks, veal cheeks, or oxtail. These cuts offer unique textures and flavors that can elevate your braised dishes.
When experimenting with different meats, remember that the key to successful braising lies in choosing cuts with enough fat and collagen to withstand long cooking times while developing deep, complex flavors.
Essential Equipment for Braising
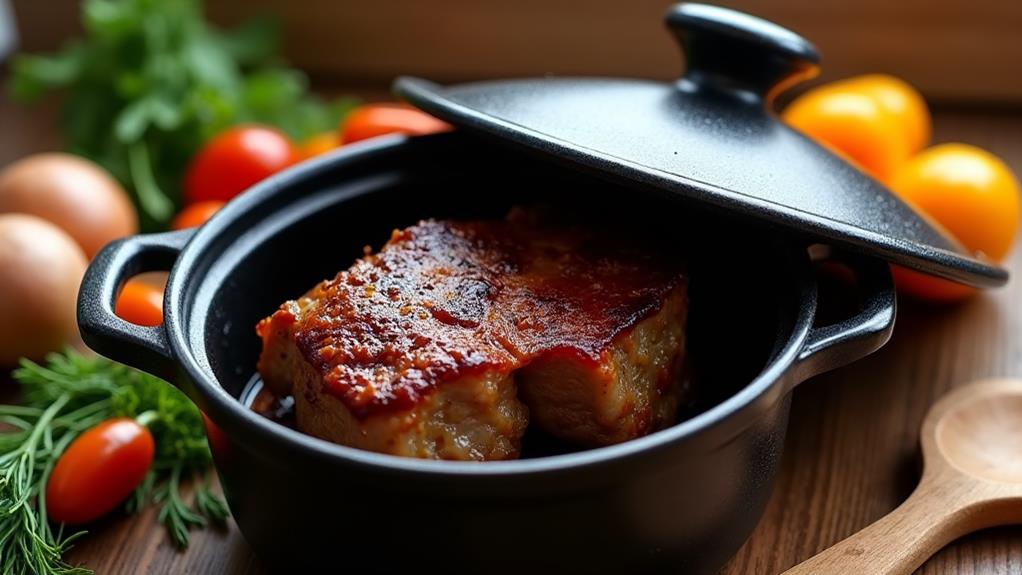
Three key pieces of equipment are essential for successful braising. First, you'll need a heavy-bottomed pot with a tight-fitting lid, such as a Dutch oven or a braiser. These versatile braising tools distribute heat evenly and retain moisture, ensuring your dishes are cooked to perfection.
Second, invest in a good quality meat thermometer to monitor internal temperatures accurately. This essential gadget helps you achieve the ideal tenderness without overcooking.
Lastly, don't underestimate the importance of a sturdy pair of tongs for easy handling of ingredients.
To elevate your braising game, consider adding a few innovative accessories to your arsenal. A silicone basting brush allows you to apply marinades and glazes evenly, enhancing flavor profiles.
An immersion blender can transform your braising liquid into a silky sauce right in the pot, saving time and dishes.
For precision cooking, a programmable slow cooker with a browning function offers convenience and control. These modern essential gadgets streamline the braising process, allowing you to experiment with new techniques and flavors while maintaining the traditional essence of this cooking method.
Mastering the Searing Technique
To master the searing technique, you'll need to start by choosing the right pan, typically a heavy-bottomed skillet or Dutch oven that can withstand high heat.
Once you've selected your pan, focus on optimal heat management, ensuring your cooking surface is hot enough to create a flavorful crust without burning.
Choosing the Right Pan
Selecting the right pan is crucial for mastering the searing technique in braising. You'll want to consider several key factors when choosing your pan.
Cast iron and stainless steel are top contenders, offering excellent heat retention and durability. Cast iron, while heavier, provides unmatched heat distribution, ensuring an even sear. Stainless steel, on the other hand, is lighter and easier to maneuver.
Avoid nonstick options for searing, as they can't withstand the high temperatures required. When it comes to pan sizes, opt for one that comfortably fits your ingredients without overcrowding. A 12-inch pan is versatile for most home cooks.
Consider price and maintenance as well. Cast iron is often more affordable but requires seasoning, while stainless steel is pricier but easier to clean. Durability factors into your decision too; both materials can last a lifetime with proper care.
Optimal Heat Management
Mastering optimal heat management is the cornerstone of a perfect sear in braising. To achieve this, you'll need to understand how different heat sources interact with your cooking vessels. Start by preheating your pan over medium-high heat, allowing it to reach the ideal temperature for searing. This ensures a quick, even browning that locks in flavor and creates a delicious crust.
As you place your ingredients in the pan, listen for that satisfying sizzle. It's your cue that you're on the right track. Resist the urge to move the food around too much; let it develop that golden-brown exterior. When it's time to flip, do so decisively and only once if possible.
Once you've achieved the desired sear, it's time to lower the heat. This transition is crucial for the braising process. Reduce the temperature to low or medium-low, depending on your heat source and cooking vessel.
This gentle heat allows for the slow, tender cooking that's characteristic of braising, transforming tough cuts into succulent, fork-tender delights.
Achieving Perfect Crust
Building on the foundation of optimal heat management, achieving a perfect crust through masterful searing is the next step in your braising journey.
To create that coveted golden-brown exterior, you'll need to focus on crust texture and crust seasoning. Start by patting your meat dry and seasoning it generously. Heat your pan until it's smoking hot, then add a thin layer of oil. Place the meat in the pan, allowing it to sear undisturbed for several minutes on each side. This process creates a flavorful Maillard reaction, enhancing the dish's overall taste and appearance.
To elevate your searing technique, consider these innovative tips:
- Use a cast-iron skillet for superior heat retention and distribution
- Experiment with unconventional seasonings like coffee grounds or cocoa powder
- Try a reverse sear method for thicker cuts of meat
- Incorporate a touch of sugar in your seasoning mix for enhanced caramelization
- Utilize a kitchen torch for hard-to-reach areas or delicate foods
Crafting Flavorful Braising Liquids
The heart of any great braise lies in its flavorful liquid. To elevate your culinary creations, you'll want to explore innovative braising liquid variations and master flavor infusion techniques.
Begin by selecting a base liquid that complements your main ingredient. While stock or wine are classic choices, don't hesitate to experiment with unconventional options like fruit juices, beer, or even coffee for unique flavor profiles.
To enhance your braising liquid, incorporate aromatics such as onions, garlic, and herbs. These ingredients will infuse your dish with complex layers of flavor as it cooks.
Consider adding umami-rich elements like tomato paste, miso, or anchovy paste to deepen the taste. For an extra punch, try including citrus zest or a splash of vinegar to brighten the overall flavor.
Aromatics and Seasoning Secrets
When braising, you'll elevate your dish by mastering the art of aromatics and seasoning.
You can create depth and complexity by layering flavors with aromatic vegetables, herbs, and spices, carefully balancing their intensity to complement your main ingredients.
As you season, pay close attention to salt timing and technique, remembering that salt added early will penetrate the meat more deeply, while salt added later will provide a brighter, more pronounced flavor on the surface.
Layering Flavors With Aromatics
At the heart of exceptional braising lies the art of layering flavors with aromatics. By strategically combining herbs, spices, and aromatic vegetables, you'll create complex flavor profiles that elevate your dish.
Start by sautéing your base aromatics, like onions, carrots, and celery, to release their essential oils and build a foundation of flavor. As you progress through the braising process, incorporate additional layers of aromatics to enhance the dish's depth and complexity.
Consider these innovative techniques for layering flavors:
- Infuse herbs into aromatic oils before adding to the braise
- Create spice balances by toasting whole spices before grinding
- Utilize fragrance layering with citrus zests and fresh herbs
- Experiment with unexpected aromatic combinations, like fennel and star anise
- Incorporate umami-rich ingredients like dried mushrooms or miso paste
To maximize flavor depth, pay attention to the timing of your aromatic additions. Robust herbs like rosemary and thyme can withstand long cooking times, while delicate herbs should be added towards the end.
Balancing Herbs and Spices
Balancing herbs and spices is an art form that can transform your braise from good to extraordinary. As you layer flavors, consider innovative herb pairings and spice ratios that will elevate your dish. Start by selecting a primary herb that complements your main ingredient, then build around it with complementary flavors. For example, rosemary pairs well with lamb, while thyme enhances chicken dishes.
When it comes to spices, less is often more. Begin with a conservative amount and adjust as you go. Remember, you can always add more, but you can't take it away. Experiment with unexpected combinations, like adding a pinch of cinnamon to beef stews or a touch of star anise to pork braises. These subtle additions can create depth and complexity without overpowering the dish.
Don't forget to consider the cooking time when adding herbs and spices. Robust herbs like rosemary and bay leaves can withstand long cooking times, while delicate herbs like parsley and cilantro should be added near the end.
Salt Timing and Technique
Three key factors determine the success of salt timing and technique in braising: when you add salt, how much you use, and the type of salt you choose.
To master this aspect of braising, you'll need to understand different salt types and seasoning methods. Begin by salting your meat before searing to enhance flavor development. As you build your braise, add salt gradually, tasting as you go to avoid overseasoning. Remember, the liquid will reduce during cooking, intensifying the saltiness.
Consider these points when refining your salt technique:
- Kosher salt's larger crystals provide better control for seasoning
- Sea salt adds subtle mineral flavors to your braise
- Table salt dissolves quickly but can easily lead to oversalting
- Finishing salts like fleur de sel can elevate the final dish
- Experiment with flavored salts for unique taste profiles
Low and Slow Cooking Process
The heart of braising lies in its low and slow cooking process. This method transforms tough cuts of meat into tender, flavorful masterpieces.
You'll want to maintain a consistent, low temperature throughout the cooking time, typically between 275°F and 325°F. This gentle heat allows collagen to break down slowly, resulting in melt-in-your-mouth textures.
Moisture retention is crucial in braising. Keep the lid on tight to create a humid environment that prevents your dish from drying out.
You'll only need to check and baste occasionally, about once every hour. This hands-off approach allows you to focus on other aspects of your meal preparation while the braise works its magic.
The cooking time for braising can vary widely, depending on the size and type of meat. Generally, you're looking at 2 to 4 hours for most cuts.
Don't rush this process; patience is key. You'll know your braise is done when the meat easily yields to a fork.
Monitoring and Adjusting Temperature
While maintaining a consistent temperature is key to successful braising, you'll need to keep a watchful eye on your dish throughout the cooking process. Temperature control is crucial for achieving tender, flavorful results.
Use a reliable thermometer to monitor the liquid's temperature, aiming for a gentle simmer rather than a rolling boil. If you notice the temperature climbing too high, reduce the heat or add a small amount of cool liquid to bring it back down. Conversely, if the temperature drops too low, gently increase the heat to maintain the desired range.
Heat distribution plays a vital role in even cooking. To ensure uniform braising:
- Rotate the pot periodically if your stove has hot spots
- Use a heavy-bottomed pot for better heat retention
- Avoid overcrowding the ingredients
- Stir occasionally to redistribute the heat
- Consider using a diffuser plate for more even heating
Perfecting Sauce Consistency
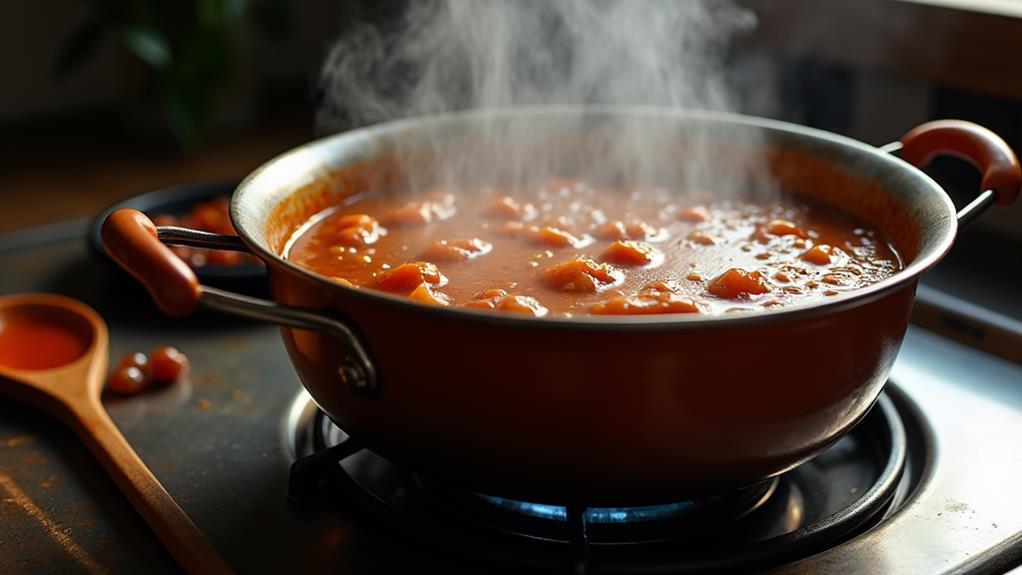
Achieving the perfect sauce consistency is a crucial step in braising. As your dish simmers, you'll need to monitor and adjust the sauce thickness to ensure optimal flavor enhancement.
Start by assessing the current consistency; if it's too thin, you can thicken it using several methods. One innovative approach is to remove the lid and increase the heat slightly, allowing excess liquid to evaporate. Alternatively, you can create a slurry by mixing equal parts cornstarch and cold water, then stirring it into the sauce.
If your sauce is too thick, don't worry. Simply add small amounts of liquid, such as stock or wine, until you reach the desired consistency. Remember, the sauce will continue to thicken as it cools, so aim for a slightly thinner consistency than your final goal.
For a silky-smooth texture, consider straining the sauce through a fine-mesh sieve. This step removes any unwanted bits and creates a more refined final product.
Elevating Presentation and Pairings
Mastering the art of braising extends beyond perfecting the cooking technique and sauce consistency.
To truly elevate your dish, you'll need to focus on presentation and pairings. Consider innovative plating styles that showcase your braised creation's visual appeal. Experiment with garnishing techniques using fresh herbs, microgreens, or edible flowers to add color and texture.
When selecting complementary sides, aim for flavor contrasts that enhance the main dish without overpowering it.
To take your braising skills to the next level, keep these key points in mind:
- Embrace seasonal ingredients to create visually striking and flavorful accompaniments
- Use negative space on the plate to draw attention to your braised masterpiece
- Incorporate varied textures through thoughtful side dish selection
- Consider temperature contrasts for a more dynamic dining experience
- Choose wine pairings that complement the rich flavors of your braised dish
Frequently Asked Questions
Can You Braise Frozen Meat, or Should It Always Be Thawed First?
You can braise frozen meat, but it's not ideal. For optimal results, thaw it first using quick thawing methods like cold water or microwave defrosting. This ensures even cooking and better flavor absorption during the braising process.
How Long Can Braised Dishes Be Safely Stored in the Refrigerator?
Like Odysseus preserving his journey's spoils, you'll want to master braising safety and refrigeration tips. You can store your innovative braised creations for up to 4 days in the fridge. Don't forget to cool them quickly before storing!
Are There Any Vegetarian or Vegan Alternatives to Traditional Meat Braising?
You'll love plant-based braising! Try hearty veggies like mushrooms, jackfruit, or seitan. Infuse flavor with robust herbs, spices, and umami-rich liquids. Experiment with innovative techniques to create mouthwatering, meat-free dishes that'll impress even the most discerning palates.
Can You Use a Slow Cooker Instead of an Oven for Braising?
Absolutely! You can revolutionize your braising techniques using a slow cooker. It's a game-changer for busy innovators. Simply adjust the slow cooker settings to mimic traditional braising temperatures, and you'll achieve tender, flavorful results with minimal effort.
What's the Best Way to Reheat Braised Dishes Without Drying Them Out?
Cold leftovers, hot flavors: you'll revolutionize reheating techniques. Gently warm your braised dish in a covered pot with a splash of liquid. This innovative moisture retention method ensures you'll savor tender, succulent bites without sacrificing the original richness.
Final Thoughts
You've now mastered the art of braising, unlocking a world of rich, tender flavors. Interestingly, braising can reduce cooking energy consumption by up to 30% compared to traditional roasting methods. As you apply these techniques, you'll transform tough cuts into melt-in-your-mouth delicacies. Remember, patience is key; the low and slow process allows flavors to develop fully. With practice, you'll confidently create restaurant-quality dishes that'll impress family and friends. Keep experimenting with different ingredients to discover your signature braise.