To cook perfect pancakes, start by whisking together flour, sugar, baking powder, and salt in a bowl. Create a well and add milk, eggs, and melted butter, mixing until just combined – small lumps are good. Heat a non-stick skillet or griddle to 375°F, pour ¼ cup batter per pancake, and cook until bubbles form. Flip once and cook until golden brown. Mastering temperature control and proper mixing techniques will elevate your pancake game to new heights.
Essential Ingredients and Equipment
Three essential categories of items will set you up for successful pancake making: basic pantry ingredients, core equipment, and optional mix-ins for customization.
Your pantry essentials include flour, sugar, baking powder, milk, and eggs, with numerous ingredient substitutions available for dietary preferences.
You’ll need essential tools like a non-stick skillet or cast iron pan, along with a reliable spatula and whisk for mixing.
Salt for flavor is a critical ingredient that enhances the overall taste of your pancakes.
For precise measurements, stock your kitchen with measuring cups, spoons, and mixing bowls to separate wet and dry ingredients.
Consider enhancing your pancakes with vanilla, fresh fruits, or nuts for added dimension.
While specialty items like buttermilk or coconut oil can elevate your pancakes, they’re not mandatory for creating delicious results.
For best results, ensure your baking powder is fresh as it’s essential for achieving the perfect fluffy texture.
Mastering the Perfect Pancake Batter
Creating the perfect pancake batter requires a delicate balance of technique and timing, as even small variations in your mixing method can greatly impact the final texture.
Mastering pancake perfection lies in precise technique and careful timing – small adjustments make the difference between good and extraordinary.
You’ll want to start by sifting your dry ingredients together, then create a well in the center before adding your pre-mixed wet ingredients. Don’t worry about a few small lumps – they’re actually beneficial for fluffy results. When combining ingredients, be sure to use all-purpose flour for the best structure and consistency.
For ideal results, try batter resting while your griddle heats up, allowing the ingredients to fully integrate. A 15-minute rest period helps achieve the perfect texture.
For ideal results, try batter resting while your griddle heats up, allowing the ingredients to fully integrate.
You can experiment with flavor variations by incorporating vanilla, cinnamon, or different flour types, but remember to maintain the proper consistency – your batter should be thick yet pourable.
If it’s too thick, add milk gradually; if too thin, incorporate small amounts of flour until balanced.
Griddle Selection and Heat Management
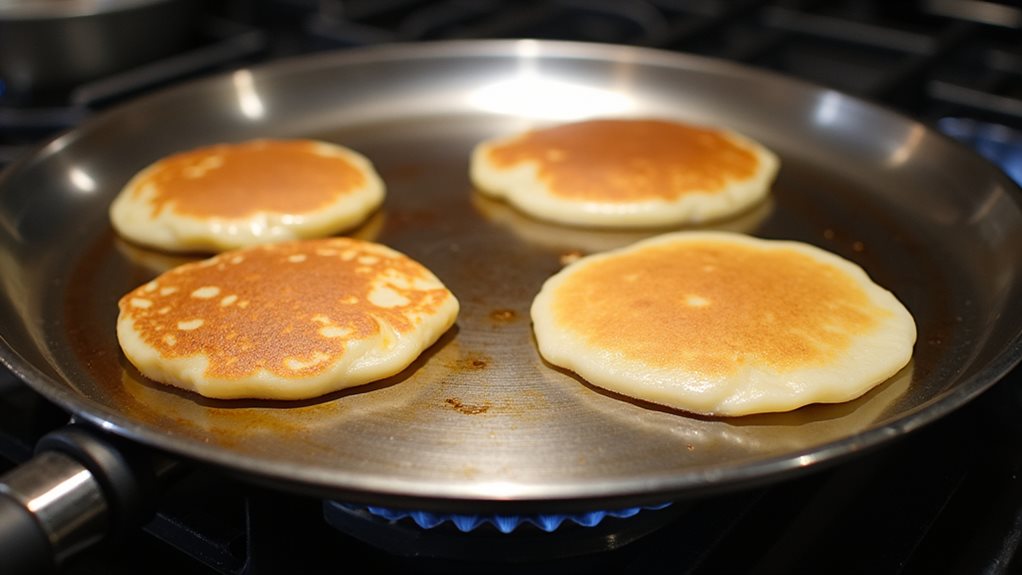
With your batter properly mixed and rested, selecting the right griddle and managing its heat will determine your pancakes’ success. Among the various griddle types available, electric models like the Zojirushi offer superior heat distribution and consistent results.
If you’re cooking for a crowd, consider a larger griddle that’ll accommodate multiple pancakes simultaneously. A stainless steel double griddle provides an ample 10.75 x 21-inch cooking surface perfect for family breakfasts. Twelve to sixteen pancakes can be cooked at once on a large griddle surface.
For ideal results, you’ll need to preheat your griddle to 375°F and maintain even heat distribution across the surface. Use a thermometer to check for temperature consistency and watch for hotspots that could lead to uneven cooking.
When selecting your griddle, prioritize features like non-stick surfaces for easier flipping and cleaning. Cast iron options provide excellent heat retention but require proper seasoning, while modern electric griddles offer precise temperature control with minimal maintenance.
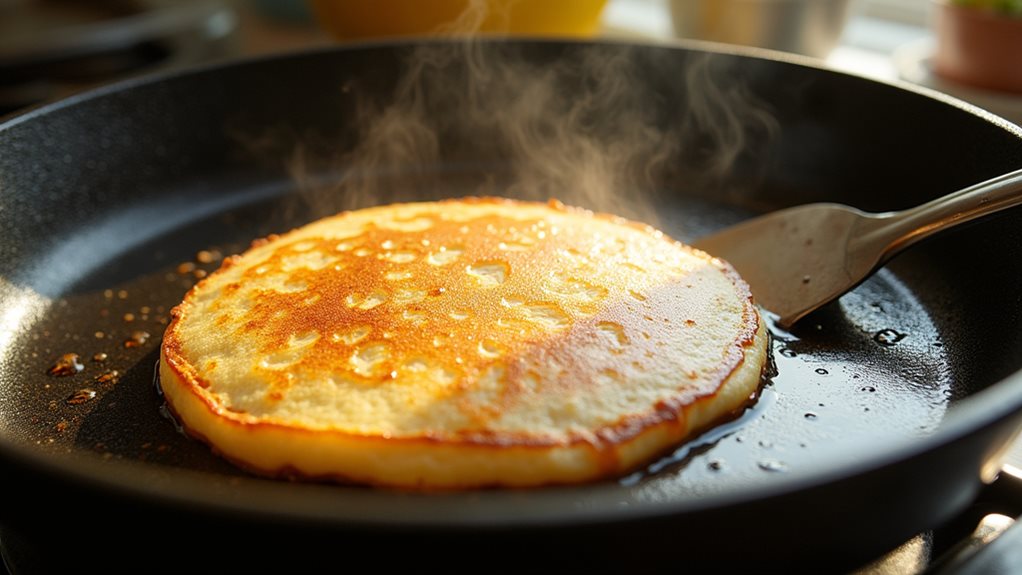
The Art of Pouring and Flipping
Achieving the perfect pancake starts with your pouring technique, where you’ll want to hold your pitcher or ladle close to the pan’s surface and steadily pour about a quarter cup of batter into the center. Start by preparing your batter in a mixing pitcher for the smoothest pouring control. Always ensure you’re working with a well-buttered pan before starting.
You’ll know it’s time to flip when bubbles form across the surface and the edges begin to dry, typically after 1-1.5 minutes of cooking.
Using a non-stick spatula, slide it completely under the pancake and flip with a confident, smooth motion to maintain that perfect round shape you’ve worked to create.
Perfect Pour Every Time
The art of pouring pancake batter perfectly combines three essential elements: precise measurements, controlled motion, and proper temperature. Master these pouring techniques by using a quarter cup measure for each pancake, guaranteeing consistent sizing every time. Adding more water is necessary when pouring directly from the package compared to spooning the mix.
Hold your pouring tool close to the pan’s surface to minimize splashing while maintaining a steady, controlled flow. Birch Benders’ design helps eliminate messy drips and spills during the pouring process.
For ideal batter measurement and control, you’ll want to mix your ingredients in a pitcher or use a liquid measuring cup with a spout. Keep the batter slightly lumpy and maintain its perfect thickness – thin enough to pour smoothly but thick enough to hold its shape.
Pour from the center, allowing the batter to spread naturally without manual intervention. Remember to heat your pan properly; the right temperature prevents excessive spreading and guarantees perfectly round pancakes.
Mastering The Pancake Flip
Successfully flipping a pancake requires mastering several critical elements that work together in perfect harmony. Your pancake flipping technique will improve dramatically when you understand the essential components of this culinary skill.
- Watch for evenly distributed bubbles across the surface and dry edges before attempting your flip – these are your primary indicators for perfect flip timing.
- Select a thin, flexible spatula with a wide surface area, gently sliding it under the pancake after checking for a golden-brown underside.
- Execute your flip with confidence using a swift, smooth motion that maintains the pancake’s shape.
- Practice your wrist movement repeatedly, as building muscle memory leads to consistently successful flips.
Remember to maintain a hot cooking surface and avoid premature flipping, which can result in torn or misshapen pancakes.
Common Mistakes to Avoid
Making perfect pancakes requires avoiding several critical mistakes that can derail your breakfast aspirations. While experimenting with pancake variations and ingredient substitutions can be exciting, you’ll need to maintain precise measurements and proper mixing techniques.
Perfect pancakes demand precision and proper technique – no room for guesswork when crafting these breakfast delights.
Don’t eyeball your ingredients or mistake baking soda for baking powder, as these errors can lead to dense, tough results.
Watch out for common pitfalls like over-mixing your batter, which develops gluten and creates chewy pancakes, or using incorrect pan temperatures that prevent even cooking.
You’ll also want to avoid overcrowding your pan with too many pancakes or mix-ins. Remember to properly grease your non-stick pan and maintain medium heat throughout cooking.
When adding toppings, be mindful of ingredients that might caramelize and stick to the surface.
Tips for Fluffy and Golden Results
To achieve perfectly golden pancakes, you’ll need to master temperature control by preheating your pan over medium heat until it’s hot but not smoking, testing with a small drop of water that should sizzle gently.
Your batter’s consistency plays an essential role in the final texture, so aim for a thickness that allows it to pour smoothly while still maintaining enough body to hold its shape on the griddle.
When you’re ready to cook, watch for the telltale signs of readiness—bubbles forming on the surface and slightly dry edges—before flipping to guarantee each pancake develops that ideal golden-brown color and fluffy interior.
Creating Easter Bunny Pancakes requires strategic batter placement to transform basic ingredients into whimsical breakfast treats that bring joy to the table.
Perfect Temperature Control
Whether you’re a novice or seasoned cook, achieving the perfect pancake depends largely on mastering temperature control. The ideal griddle temperature ranges from 350°F to 375°F, which you can achieve through careful temperature monitoring and strategic heat adjustments on medium to medium-high heat.
For consistently golden-brown results, follow these essential steps:
- Preheat your griddle for 5-15 minutes to eliminate hot spots.
- Use an infrared thermometer to verify surface temperature.
- Maintain steady heat throughout the cooking process.
- Adjust temperature slightly higher for thinner pancakes.
Watch for warning signs of improper heat: if the bottom browns before bubbles form on top, your temperature’s too high.
For electric griddles, take advantage of their precise temperature controls to maintain ideal cooking conditions throughout your pancake-making session.
Batter Consistency Matters
The secret to perfect pancakes lies in mastering your batter’s consistency. You’ll want a mixture that’s thick enough to hold its shape but still pourable, achieving the ideal batter thickness through careful ingredient ratios.
Test your batter by lifting a spoonful – it should flow smoothly without being watery.
To achieve the perfect consistency, start with room temperature ingredients and mix them gently to prevent overdeveloping the gluten. You’ll notice your batter is ready when it’s smooth with no lumps, yet still maintains some body.
If it’s too runny, gradually add small amounts of flour; if it’s too thick, incorporate liquid slowly.
Toppings and Serving Suggestions
Selecting delicious toppings for your pancakes can transform a simple breakfast into an extraordinary culinary experience. While traditional topping trends favor butter and syrup, with 62% of Americans choosing syrup as their go-to option, you’ll find endless possibilities to elevate your serving styles.
Consider these innovative approaches to topping your pancakes:
- Layer fresh fruits with a drizzle of honey for a healthier twist.
- Create a fusion experience with Nutella and crushed nuts for added texture.
- Try savory combinations like eggs and herbs for a breakfast-meets-brunch approach.
- Experiment with whole grain pancakes topped with Greek yogurt and berries.
Don’t hesitate to mix traditional and modern toppings to discover your perfect combination, as today’s pancake enthusiasts increasingly embrace both classic and unconventional choices. For a refreshing summer option, consider adding torn mint leaves to fruit-topped pancakes, similar to their use in Mediterranean dishes like watermelon feta salad.
Frequently Asked Questions
Can I Make Pancakes Without Eggs?
Yes, you can make delicious vegan pancakes using egg substitutes like mashed banana, flaxseed mixture, or chia seeds. These alternatives help bind your batter and create fluffy results just like traditional pancakes.
How Long Can I Store Leftover Pancake Batter in the Refrigerator?
Like a sleeping dragon, your pancake batter can rest in the fridge for 2-4 days. You’ll want to keep it in an airtight container below 40°F, but don’t wait too long—freshness is key!
Why Do My Pancakes Always Stick to the Spatula?
Your pancakes are sticking because you’re using the wrong spatula type. Switch to a thin, non-stick spatula, and guarantee you’ve properly greased your pan. A quick shake before flipping will also help tremendously.
Can I Freeze Cooked Pancakes for Later Use?
Yes, you can freeze pancakes! Here’s a pro tip: freeze them on a parchment-lined sheet first, then transfer to freezer bags. They’ll last 3 months and you can quickly reheat in your toaster or microwave.
What Causes Pancakes to Develop Holes in the Middle While Cooking?
Did you know 90% of pancake holes are preventable? Your pancakes develop holes when your batter consistency is too thin or when you’re cooking at too high a temperature, causing uneven heat distribution.
Final Thoughts
Like a morning sun rising to perfection, you’ll master pancake-making with practice and patience. You’ve learned the essentials: proper ingredients, batter consistency, temperature control, and flipping technique. Remember to avoid common pitfalls and focus on achieving that golden-brown exterior with a fluffy interior. Whether you prefer classic maple syrup or creative toppings, you’re now equipped to create breakfast masterpieces that’ll make any morning special.