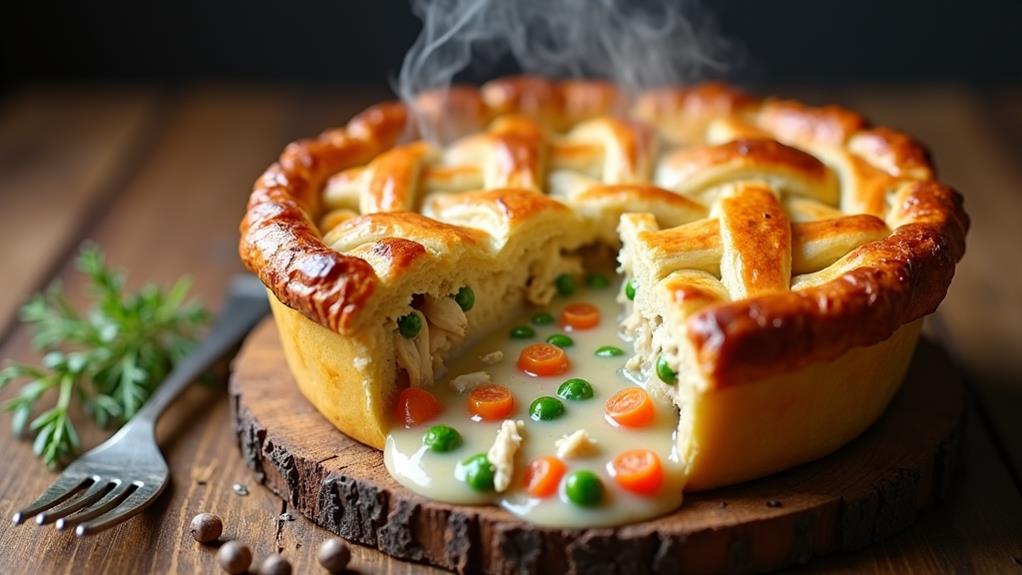
You've tasted comfort food, you've enjoyed classic recipes, and you've savored homemade dishes. Now, it's time to experience the Herby Spring Chicken Pot Pie. This modern twist on a timeless favorite combines the heartiness of traditional pot pie with the freshness of spring herbs. While its roots trace back to ancient culinary traditions, today's version offers a quick and easy preparation that doesn't compromise on flavor. As you consider your next family meal or weekend cooking project, you might wonder what makes this dish stand out from the rest. The answer lies in its perfect balance of convenience and gourmet appeal.
Key Takeaways
- Herby Spring Chicken Pot Pie features tender chicken, fresh vegetables, and aromatic herbs in a flaky crust.
- The recipe requires only five key ingredients: pie crusts, chicken, cream of chicken soup, mixed vegetables, and fresh herbs.
- Customize the dish with seasonal vegetables and various herb combinations to suit your taste preferences.
- Bake the pie at 375°F (190°C) for 45-50 minutes until the crust is golden and filling is bubbling.
- Allow the pie to cool for 10-15 minutes before serving to ensure the filling sets properly.
History
Chicken pot pie has a rich history spanning several centuries. You'll find its roots in ancient civilizations, where meat pies were a common way to preserve and serve food.
The modern chicken pot pie, as you know it, emerged in the 16th century in England. It quickly became a staple dish, appreciated for its hearty nature and ability to feed large families.
When settlers arrived in America, they brought this culinary tradition with them. The pot pie adapted to local ingredients and tastes, evolving into the comforting dish you enjoy today.
In the 19th century, chicken pot pie gained popularity as a convenient meal for farmers and laborers. Its robust filling provided the necessary energy for long days of work.
The 20th century saw the rise of frozen and ready-made versions, making pot pies more accessible to busy households. Despite these convenience options, many families still cherish homemade recipes passed down through generations.
Today, you'll find numerous variations of chicken pot pie, from traditional versions to modern twists incorporating different herbs, vegetables, and cooking methods.
Recipe
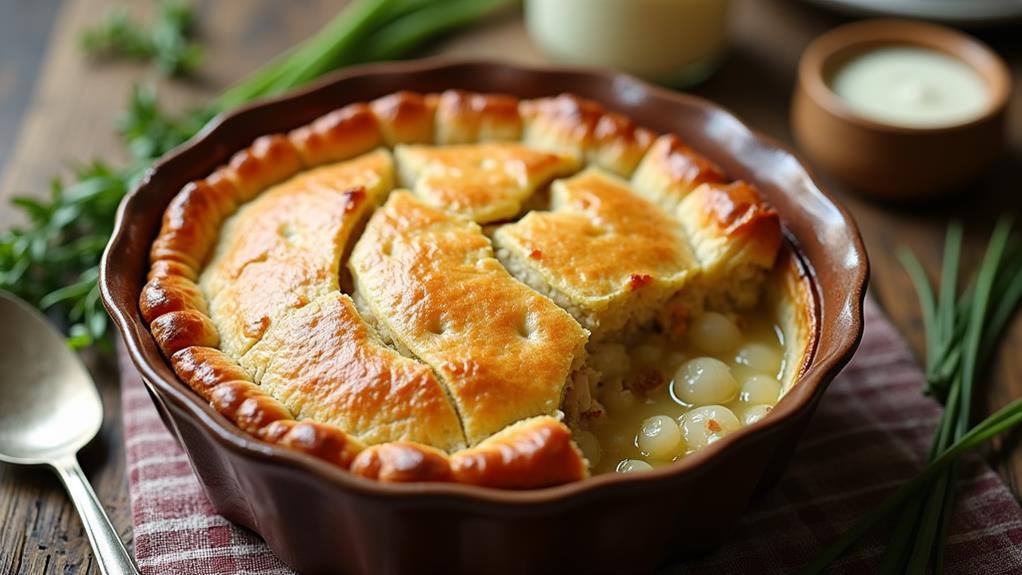
Herby Spring Chicken Pot Pie is a comforting and wholesome dish that combines tender chicken, fresh vegetables, and aromatic herbs in a flaky, golden crust. This simplified version uses just five ingredients to create a delicious and satisfying meal that's perfect for busy weeknights or lazy weekends.
This recipe streamlines the classic pot pie by using pre-made pie crust and cream of chicken soup, allowing you to focus on the star ingredients: chicken, mixed vegetables, and fresh herbs. The result is a hearty, flavorful pie that's sure to become a family favorite, while still being quick and easy to prepare.
- 2 pre-made pie crusts
- 2 cups (280g) cooked, diced chicken
- 1 can (10.5 oz or 298g) cream of chicken soup
- 2 cups (300g) frozen mixed vegetables
- 1/4 cup (15g) fresh mixed herbs (such as parsley, thyme, and chives), chopped
Preheat the oven to 375°F (190°C). In a large bowl, mix the diced chicken, cream of chicken soup, frozen mixed vegetables, and chopped herbs. Line a 9-inch pie dish with one of the pie crusts, pour in the chicken mixture, and cover with the second crust. Crimp the edges to seal, cut a few slits in the top crust for venting, and bake for 45-50 minutes or until the crust is golden brown and the filling is bubbling.
For best results, allow the pot pie to cool for 10-15 minutes before serving to let the filling set. If you prefer a glossy crust, brush the top with beaten egg before baking. To make this dish even more convenient, you can prepare the filling mixture ahead of time and store it in the refrigerator for up to 24 hours before assembling and baking the pie.
Cooking Steps
To prepare this comforting chicken pot pie, you'll start by preheating your oven to 375°F and mixing the chicken, vegetables, soup, and herbs in a large bowl.
Next, you'll line a pie dish with one crust, pour in the filling, and cover it with the second crust, making sure to crimp the edges and cut vents in the top.
Once assembled, you'll bake the pie for 45-50 minutes until the crust is golden and the filling is bubbling.
Step 1. Preheat Oven to 375°F

Before diving into the recipe, you'll need to preheat your oven to 375°F (190°C). This step is crucial for ensuring your Herby Spring Chicken Pot Pie cooks evenly and achieves that perfect golden-brown crust. Turn on your oven and set the temperature dial or digital display to 375°F.
If you're using a convection oven, you might want to reduce the temperature by 25°F, as these ovens tend to cook food more quickly and evenly.
While your oven is heating up, you can start preparing the other ingredients. This preheating process usually takes about 10-15 minutes, depending on your oven model.
It's a good idea to use an oven thermometer to verify that your oven has reached the correct temperature, as some ovens may not be accurately calibrated.
Step 2. Mix Chicken and Ingredients

Now that your oven is preheating, it's time to mix the main ingredients for your pot pie. In a large mixing bowl, combine the diced chicken, cream of chicken soup, and frozen mixed vegetables.
You'll want to ensure that the chicken is evenly distributed throughout the mixture, so give it a good stir with a spatula or wooden spoon.
Next, add your freshly chopped herbs to the bowl. The combination of parsley, thyme, and chives will infuse your pot pie with a delightful spring flavor.
Mix everything thoroughly, making sure the herbs are well incorporated into the chicken and vegetable mixture.
Don't worry if the frozen vegetables are still a bit frosty; they'll thaw and cook perfectly in the oven.
As you're mixing, you might notice that the cream of chicken soup acts as a binding agent, helping to hold all the ingredients together. This will create a rich, creamy filling for your pot pie.
Once everything is evenly combined, your mixture is ready to be poured into the prepared pie crust.
Step 3. Line Pie Dish With Crust
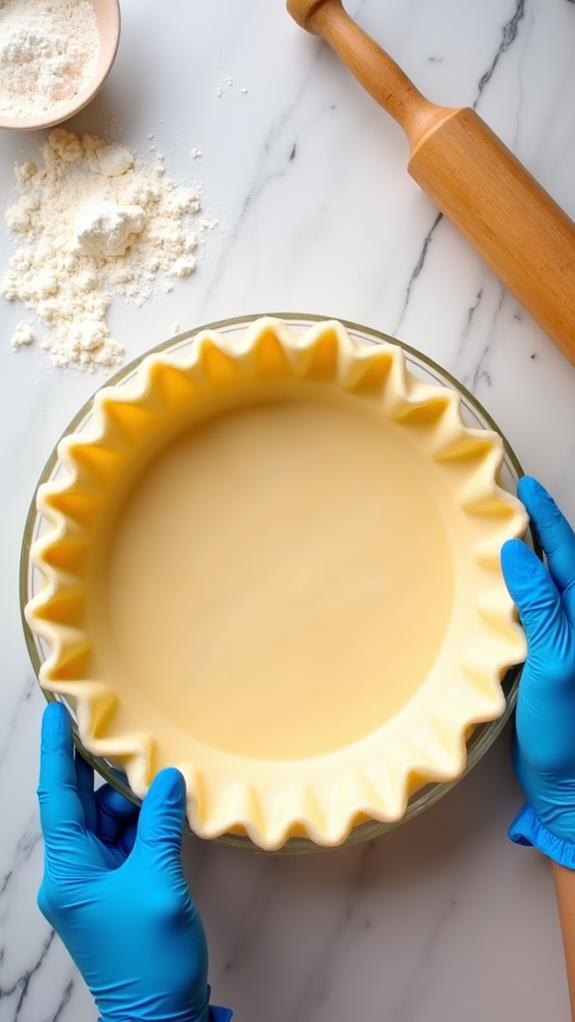
Carefully unrolling one of the pre-made pie crusts, you'll begin the process of lining your pie dish. Gently drape the crust over the dish, allowing it to settle naturally into the contours. Press the dough firmly against the bottom and sides, ensuring there are no air pockets trapped underneath.
Trim any excess dough hanging over the edge, leaving about a half-inch overhang to allow for crimping later. If you notice any tears or thin spots in the crust, don't worry. You can easily patch these areas by using small pieces of excess dough, pressing them gently into place.
For a perfectly even crust, use your fingertips to create a smooth, uniform surface along the bottom and sides of the dish. To prevent the bottom crust from becoming soggy, you might consider blind baking it for a few minutes before adding the filling. This step isn't essential, but it can help create a crispier base for your pot pie.
Once you're satisfied with the positioning and texture of your crust, you're ready to move on to the next step in creating your delicious Herby Spring Chicken Pot Pie.
Step 4. Pour Filling Into Crust
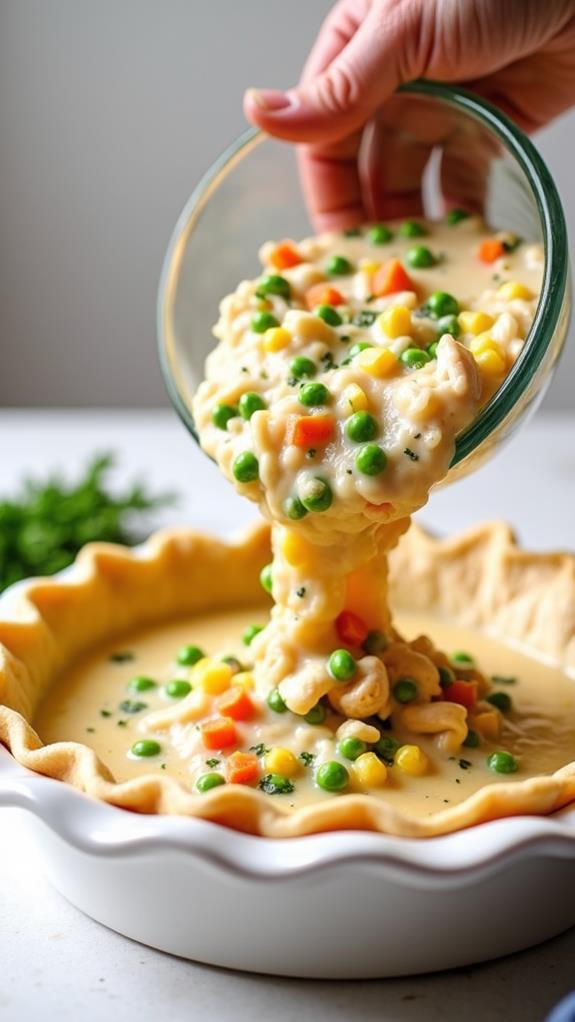
The moment of truth arrives as you prepare to fill your perfectly lined pie crust. Grab your large mixing bowl containing the savory chicken mixture, and position it near your pie dish. Using a sturdy spoon or ladle, begin transferring the filling into the crust. Work carefully to avoid spills, gently guiding the mixture into an even layer. As you pour, you'll notice the enticing aroma of herbs and chicken wafting up from the bowl.
Continue spooning the filling until it's level with the rim of the pie dish, ensuring an equal distribution of chicken, vegetables, and creamy soup. Don't overfill, as this could lead to spillage during baking. If you have extra filling, set it aside for another use.
Once you've added all the filling, use the back of your spoon to smooth the surface, creating an even layer that will cook uniformly. Take a moment to check for any air pockets, gently pressing down to eliminate them. This step ensures your pot pie will have a consistent texture throughout, with every bite offering a perfect balance of ingredients.
Step 5. Crimp Edges and Vent
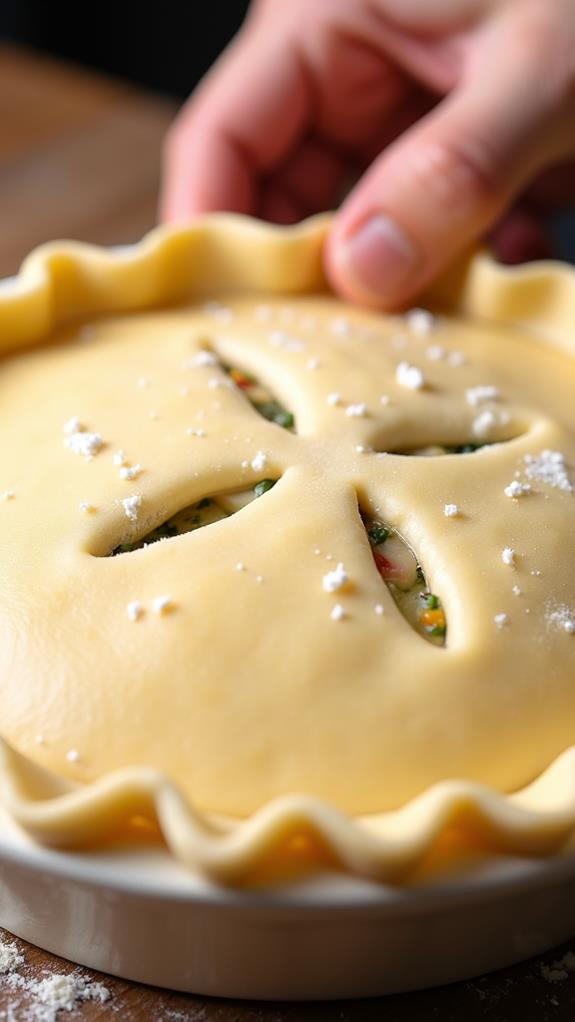
Precision is key as you prepare to seal your pot pie. After pouring the filling into the bottom crust, carefully place the top crust over the pie dish. Trim any excess dough hanging over the edges, leaving about a half-inch overhang.
Now, it's time to crimp the edges to create a secure seal and attractive finish. Using your fingers, press the top and bottom crusts together around the rim of the pie dish. Then, create a fluted edge by pinching the dough between your thumb and forefinger at regular intervals. This not only looks appealing but also ensures the filling doesn't leak during baking.
Once you've crimped the edges, it's essential to vent the top crust. This allows steam to escape during cooking, preventing the crust from becoming soggy. Using a sharp knife, cut four to five small slits in the center of the top crust. Alternatively, you can create a decorative pattern with your vents, such as a star or leaf shape.
Final Thoughts
With its comforting flavors and simple preparation, this Herby Spring Chicken Pot Pie is sure to become a staple in your meal rotation. You'll love how easily it comes together, using just five ingredients to create a hearty and satisfying meal. The pre-made pie crust and cream of chicken soup save you time, allowing you to focus on the star ingredients: tender chicken, mixed vegetables, and fresh herbs.
Don't be afraid to experiment with different herb combinations to suit your taste. You can also customize the vegetable mix based on what's in season or your family's preferences.
Remember to let the pie cool for 10-15 minutes before serving to allow the filling to set properly. If you're short on time during the week, prepare the filling mixture ahead and store it in the refrigerator for up to 24 hours before assembling and baking.
This versatile dish is perfect for both busy weeknights and relaxed weekend dinners. With its golden, flaky crust and flavorful filling, you'll find yourself reaching for this recipe time and time again.
[DIRECTIONS]: