Maria's grandmother always said the secret to perfect Tsoureki wasn't in the recipe but in the way you'd fold love into each braid of the dough. You'll find this traditional Greek Easter bread in countless Mediterranean households, where its sweet aroma and distinctive shape tell a story that's both spiritual and deeply personal. While modern bakeries offer convenient alternatives, there's something uniquely rewarding about mastering this centuries-old bread that'll transform your Easter celebration into a meaningful tradition.
Key Takeaways
- Tsoureki is a traditional Greek Easter bread with a braided shape symbolizing the Holy Trinity and often decorated with red-dyed eggs.
- Made with enriched dough containing milk, eggs, and sugar, resulting in a sweet, tender bread with a golden-brown crust.
- The bread-making process requires two rises: first after kneading the dough, then again after shaping the braid.
- Originally from Byzantine times, Tsoureki evolved from a religious symbol to become a cherished cultural icon in Greek cuisine.
- Basic ingredients include flour, yeast, warm milk, sugar, and eggs, with room for personal adaptations while maintaining authenticity.
History
Although the exact origins of Tsoureki remain somewhat debated, this cherished Greek Easter bread traces its roots back to ancient Byzantine times, when egg-enriched breads held both religious and cultural significance.
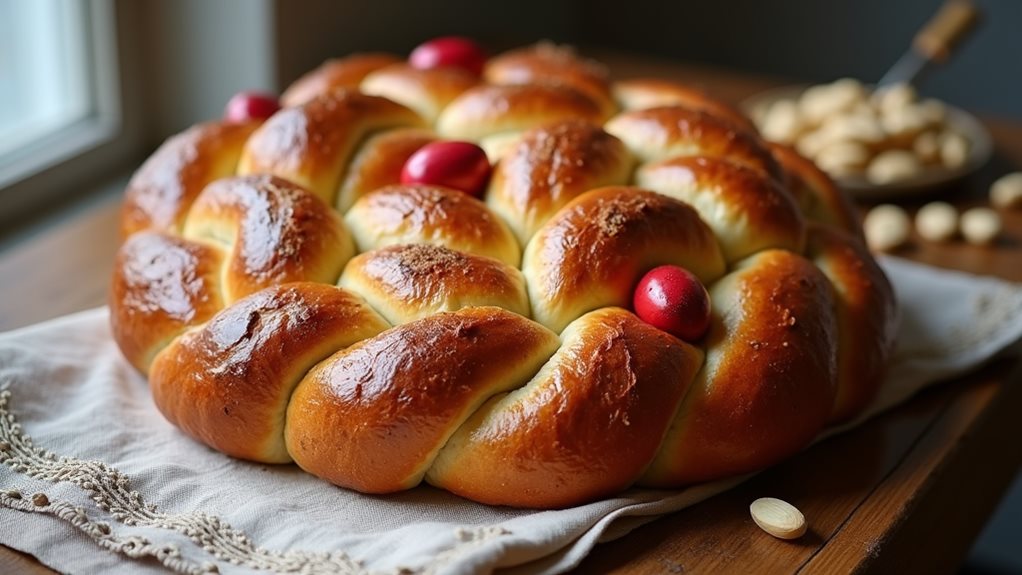
You'll find that the bread's distinctive braided shape symbolizes the Holy Trinity, while the red-dyed eggs traditionally pressed into the dough represent Christ's blood and resurrection.
Throughout Greek history, you've likely noticed how this bread has evolved from a simple religious symbol into a beloved cultural icon.
When you're making Tsoureki today, you're participating in a tradition that's been passed down through generations of Greek families, who've gathered to bake this sweet, aromatic bread as a centerpiece of their Easter celebrations.
Recipe
Greek Easter Bread, or Tsoureki, is a cherished traditional bread that graces Greek Easter celebrations with its sweet aroma and delicate texture. This braided bread is known for its golden-brown exterior and soft, pillowy interior that pulls apart in satisfying strands.
This simplified version of Tsoureki maintains the essence of the traditional recipe while being more approachable for home bakers. While some authentic versions include specialized ingredients, this recipe focuses on common pantry staples to create a delicious Easter bread that honors the Greek tradition.
- All-purpose flour (4 cups / 500g)
- Active dry yeast (2¼ teaspoons / 7g)
- Warm milk (1 cup / 240ml)
- Sugar (½ cup / 100g)
- Eggs (2 large, plus 1 for egg wash)
- Salt (½ teaspoon / 3g)
- Unsalted butter, softened (¼ cup / 60g)
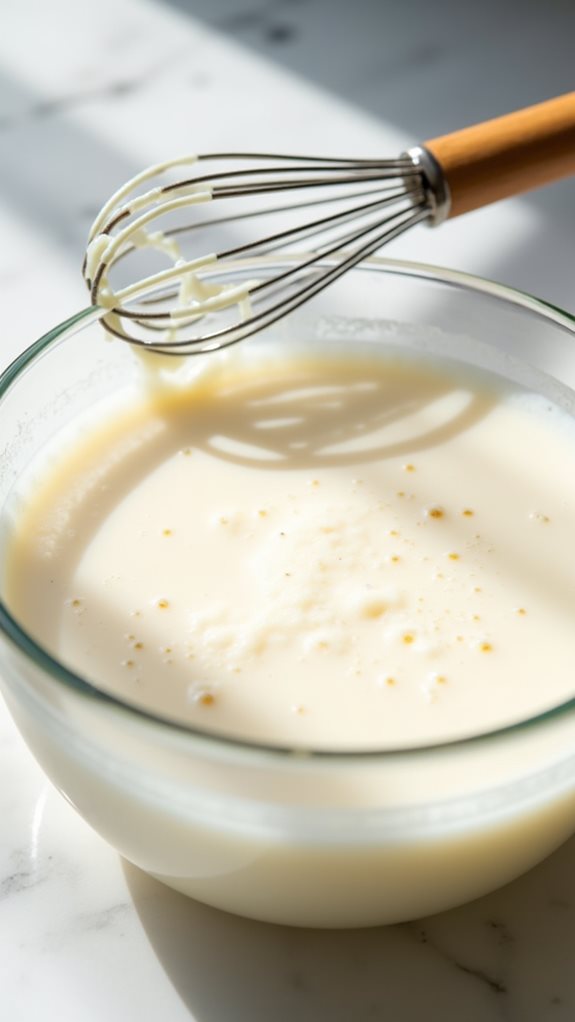
Begin by combining warm milk (110°F/43°C) with yeast and sugar in a large bowl, letting it stand for 5 minutes until foamy. Add beaten eggs and softened butter, then gradually incorporate flour and salt, mixing until a soft dough forms.
Knead for 10 minutes until smooth and elastic. Place in a greased bowl, cover, and let rise for 1 hour or until doubled. Punch down the dough, divide into three equal portions, and roll each into a 16-inch rope. Pinch the ends together and braid the ropes, tucking the ends under.
Place on a parchment-lined baking sheet, cover, and let rise for 30 minutes. Brush with beaten egg and bake at 350°F (175°C) for 30-35 minutes until golden brown.
For optimal results, ensure all ingredients are at room temperature before starting, as this promotes better dough development. The dough should be slightly sticky but manageable – add flour one tablespoon at a time if needed.
Test for doneness by tapping the bottom of the loaf; it should sound hollow. Allow the bread to cool completely on a wire rack before slicing to maintain its texture. Store in an airtight container for up to 3 days, or freeze for up to 1 month.
Cooking Steps
You'll begin your Greek Easter bread by combining warm milk with yeast and beaten eggs, ensuring the mixture is well incorporated before gradually adding flour while kneading until you achieve a smooth, elastic dough.
After letting your dough rise for an hour, you'll divide it into three equal portions and carefully braid them together to create the traditional shape.
Once braided, you'll give the dough another 30-minute rise before brushing it with beaten egg and baking it until it develops that characteristic golden-brown crust.
Step 1. Mix Milk With Yeast
Begin the bread-making process by heating milk to a lukewarm temperature, around 110°F (43°C), as this creates the perfect environment for activating the yeast.
Pour the warm milk into a large mixing bowl, then add your yeast and sugar, stirring gently to combine the ingredients.
You'll need to let this mixture stand undisturbed for about 5 minutes, during which you'll notice it becoming foamy on top.
If you don't see any foam developing after 5 minutes, your yeast might be inactive or your milk's temperature wasn't quite right.
In this case, you'll want to start over with fresh yeast and carefully temperature-controlled milk.
The foamy surface is crucial, as it indicates that your yeast is alive and ready to help your bread rise properly.
Step 2. Adding Beaten Eggs Gradually
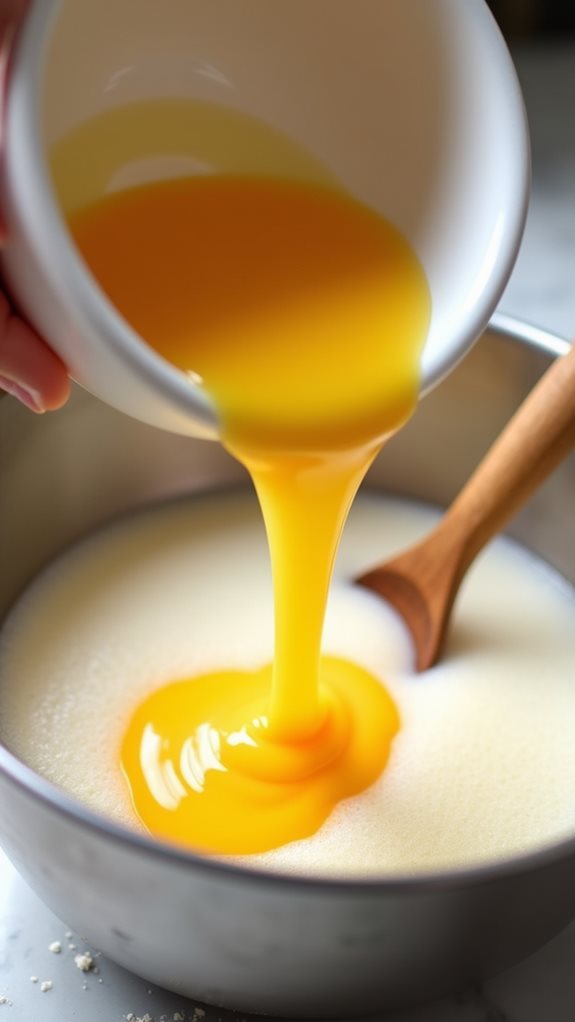
Once the yeast mixture has become foamy and active, it's time to incorporate the beaten eggs into your Tsoureki dough.
You'll want to break two large eggs into a separate bowl and whisk them thoroughly until they're well combined. Add the beaten eggs to your yeast mixture gradually, about a tablespoon at a time, while stirring constantly to ensure even distribution.
As you're adding the eggs, you'll notice the mixture becoming smoother and more uniform in consistency.
Don't rush this process, as proper incorporation of the eggs is crucial for achieving the bread's characteristic texture. If you see any streaks of egg in the mixture, continue stirring until they're fully integrated before adding more.
This careful approach will help create the tender, fluffy interior that makes Tsoureki so special.
Step 3. Knead Dough Until Elastic
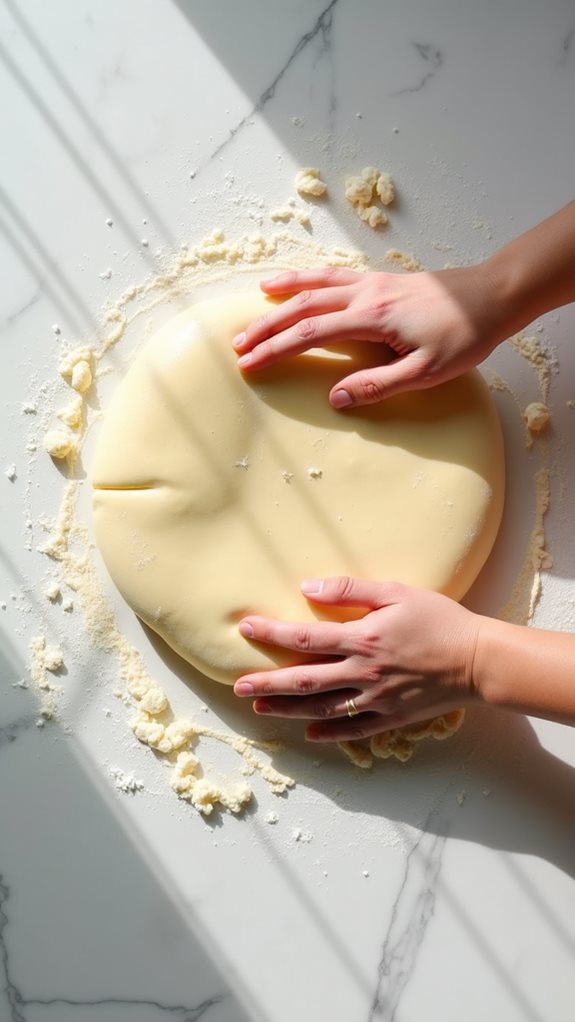
After incorporating the eggs completely, the crucial process of kneading begins by gradually adding the flour to your wet ingredients while working the dough with steady, rhythmic motions.
You'll need to knead the dough for about 10 minutes until it develops a smooth, elastic consistency that's slightly tacky but not overly sticky.
To test if you've kneaded enough, try the windowpane test: take a small piece of dough and gently stretch it between your fingers.
If you can stretch it thin enough to see light through it without the dough tearing, you've developed sufficient gluten.
If the dough tears easily, continue kneading for a few more minutes.
The dough should feel springy and bounce back when you press it with your finger.
Step 4. Let Rise One Hour
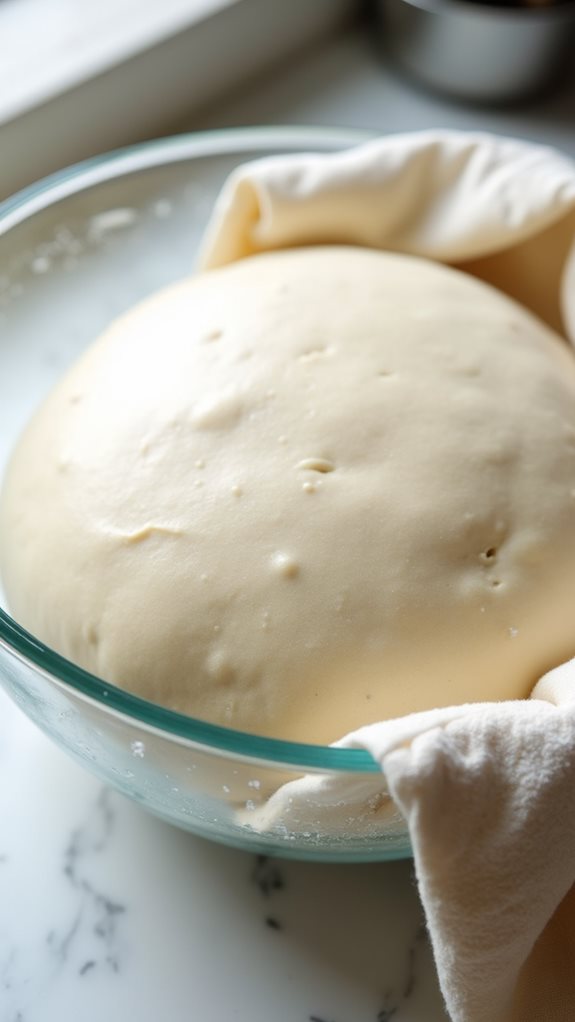
The properly kneaded dough now requires a crucial resting period of one hour in a warm, draft-free environment.
You'll want to place your dough in a lightly oiled bowl, covering it with a clean, damp kitchen towel or plastic wrap to prevent the surface from drying out. The ideal temperature for rising is between 75-85°F (24-29°C).
During this hour, the yeast will continue feeding on the sugars in your dough, producing carbon dioxide that creates small air pockets throughout.
You'll know your dough has risen properly when it's doubled in size and feels light and airy when you gently press it with your finger.
If your kitchen is particularly cool, you might need to extend the rising time by 15-20 minutes to achieve the desired result.
Step 5. Braid and Shape Dough
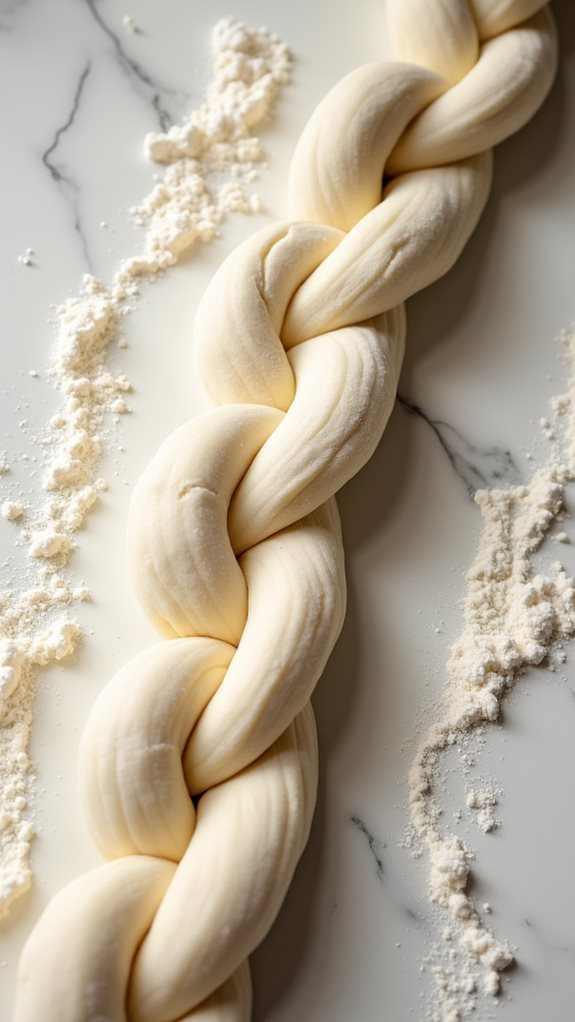
Now that your dough has doubled in size, you'll start the traditional braiding process that gives Greek Easter bread its distinctive appearance.
Gently punch down the dough to release any air bubbles, then transfer it to a clean, lightly floured surface.
Divide the dough into three equal portions, and roll each piece into a long rope about 16 inches in length, keeping the thickness uniform throughout.
Place the three ropes parallel to each other on your work surface, pinching them together at one end.
Begin braiding by crossing the right rope over the middle one, then the left rope over the new middle one.
Continue this pattern until you reach the end, then pinch the ends together firmly and tuck them under the loaf.
Final Thoughts
Making Greek Easter bread may seem challenging at first, but you'll find that mastering this traditional recipe brings immense satisfaction and a deeper appreciation for Greek culinary heritage.
As you practice braiding and perfecting the texture, you'll develop an instinct for when the dough feels just right. Remember that each loaf you make will have its own character, and that's part of the beauty of homemade bread.
Don't be discouraged if your first attempt isn't picture-perfect – focus on achieving a golden-brown crust and that characteristic tender interior.
With time, you'll learn to adjust the recipe to your preferences while maintaining the authentic essence of Tsoureki. The joy of sharing this aromatic, freshly baked bread with family and friends makes every effort worthwhile.