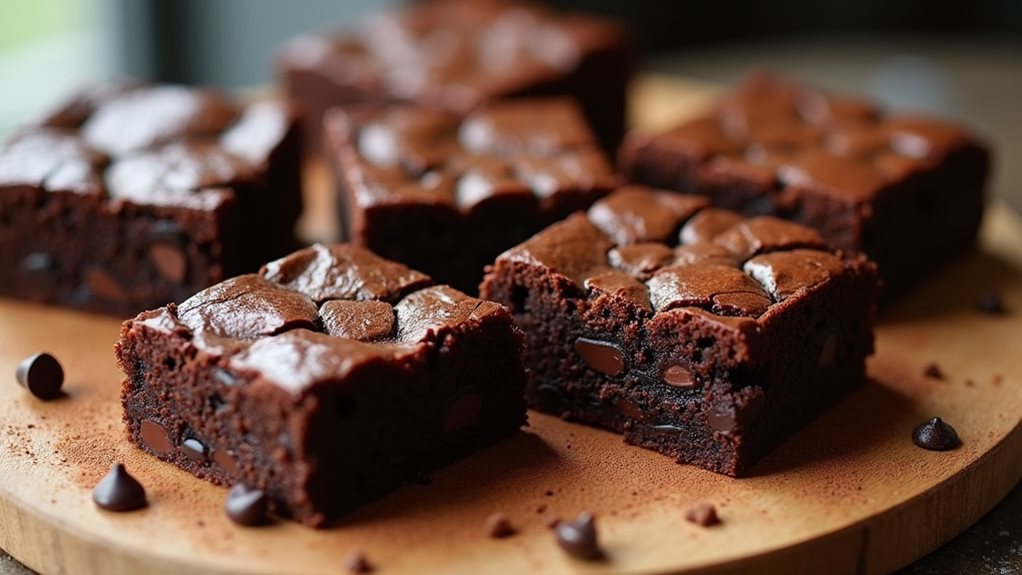
You've probably encountered traditional brownies countless times, but flourless brownies offer an entirely different experience. These rich, fudgy squares don't just serve as a gluten-free alternative; they've earned their own reputation as a sophisticated dessert choice. While some might assume that removing flour would compromise texture or taste, you'll find that these brownies actually deliver a more intense chocolate experience. Whether you're avoiding gluten or simply seeking a new twist on a classic treat, there's an intriguing story behind how these deceptively simple confections have transformed from a dietary necessity into a sought-after indulgence.
Key Takeaways
- Flourless brownies are rich, fudgy desserts made with almond butter, cocoa powder, eggs, maple syrup, and dark chocolate chips.
- These gluten-free brownies require only five simple ingredients and are suitable for people with celiac disease or gluten sensitivities.
- Bake at 350°F (175°C) for 25-30 minutes until edges pull away and top becomes non-glossy with a crackly surface.
- Cool completely before cutting for best texture, and store in an airtight container for up to 5 days or freeze for 3 months.
- The recipe achieves its fudgy consistency through almond butter and creates an intense chocolate flavor without using any flour.
History
The flourless brownie emerged in the early 2000s as gluten-free diets gained mainstream attention. You'll find that this innovative dessert was born from necessity, as bakers sought alternatives for those with celiac disease and gluten sensitivities.
What began as a specialized dietary option quickly gained popularity among health-conscious consumers who weren't necessarily gluten-intolerant but appreciated the dense, fudgy texture that flourless brownies offered.
While traditional brownies have existed since the late 1800s, you'll notice that the flourless version represents a significant departure from the original recipe.
Pastry chefs discovered that nut butters could provide the structure typically supplied by wheat flour, while simultaneously adding richness and protein. This discovery wasn't just about substitution; it created an entirely new category of dessert that many people preferred to conventional brownies.
You can trace the recipe's refinement through numerous food blogs and cookbooks of the early 2000s, where bakers experimented with various nut butters and sweeteners until they achieved the perfect balance of ingredients that we know today.
Recipe
Flourless brownies offer a decadent gluten-free alternative that delivers an intensely chocolatey experience without compromising on texture or taste. These brownies achieve their rich, fudgy consistency through the perfect balance of almond butter, cocoa powder, and dark chocolate.
The simplicity of this five-ingredient recipe makes it accessible to bakers of all skill levels while producing consistently impressive results. The absence of flour allows the pure chocolate flavor to take center stage, creating brownies with an almost truffle-like texture that becomes even more pronounced as they cool.
Ingredients:
- 1 cup (250g) almond butter
- 2 large eggs
- 1/2 cup (120ml) maple syrup
- 1/2 cup (50g) cocoa powder
- 3/4 cup (130g) dark chocolate chips
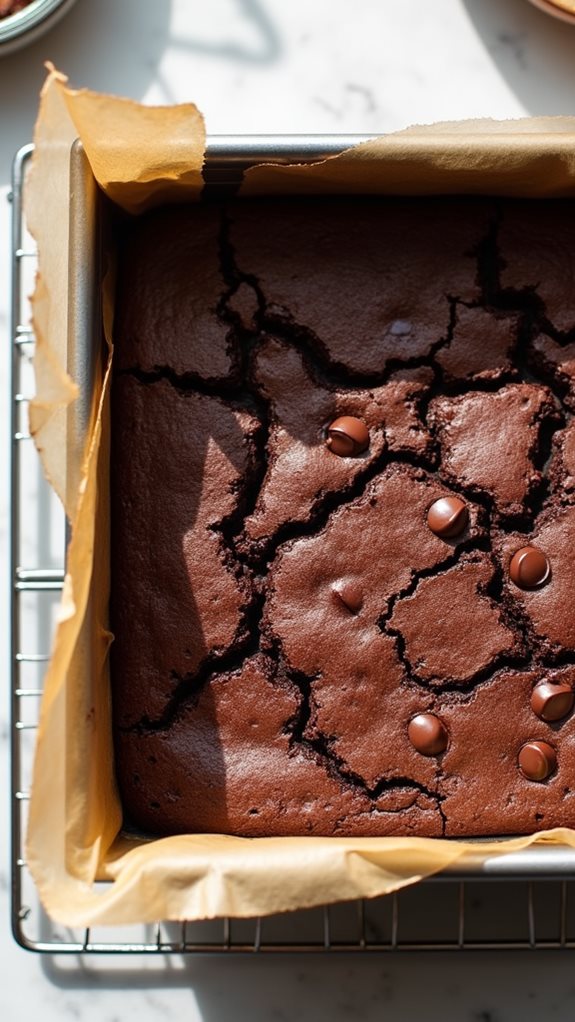
Preheat oven to 350°F (175°C). In a large bowl, combine almond butter and maple syrup until smooth, then beat in eggs until fully incorporated. Sift cocoa powder into the mixture and stir until completely blended. Fold in most of the chocolate chips, reserving some for topping. Transfer the batter to a parchment-lined 8×8 inch baking pan, scatter remaining chocolate chips on top, and bake for 25-30 minutes or until a toothpick inserted comes out with a few moist crumbs attached.
These brownies require patience during the cooling process, as they'll continue to set and develop their optimal texture as they reach room temperature. For clean cuts, allow them to cool completely before slicing.
The brownies can be stored in an airtight container at room temperature for up to 5 days, or refrigerated for up to a week for a denser, more fudge-like consistency. If the brownies seem too soft straight from the oven, remember that this is normal, and they'll firm up significantly during cooling.
Cooking Steps
You'll want to start by preheating your oven to 350°F and setting up your mixer while gathering all your ingredients.
Next, combine your wet ingredients thoroughly, incorporating the almond butter, maple syrup, and eggs until smooth, before gently folding in the cocoa powder and chocolate chips.
Finally, transfer your brownie batter to a lined baking pan, sprinkle the reserved chocolate chips on top, and let them bake for 25-30 minutes until set, remembering that they'll continue firming up as they cool.
Step 1. Preheat Mixer Assembly
Ready to begin these decadent brownies, you'll first need to preheat your oven to 350°F (175°C) and set up your mixing station. Gather your ingredients and equipment, including a large mixing bowl, measuring cups, measuring spoons, and an 8×8-inch baking pan lined with parchment paper.
Before combining any ingredients, you'll want to position your mixing bowl in a stable location with ample workspace around it. Start by measuring out your almond butter and maple syrup, ensuring they're at room temperature for optimal blending.
You'll find it helpful to have your eggs ready nearby, along with pre-measured cocoa powder that's been sifted to remove any lumps. Set aside your chocolate chips in two portions: one for mixing into the batter and another for topping.
While your oven preheats, which typically takes about 10-15 minutes, organize your ingredients in the order you'll use them. This preparation ensures a smooth mixing process and helps prevent the common mistake of forgetting an ingredient.
Position your baking pan within easy reach, and ensure your rubber spatula or wooden spoon is clean and ready for stirring.
Step 2. Mix Wet Ingredients Together
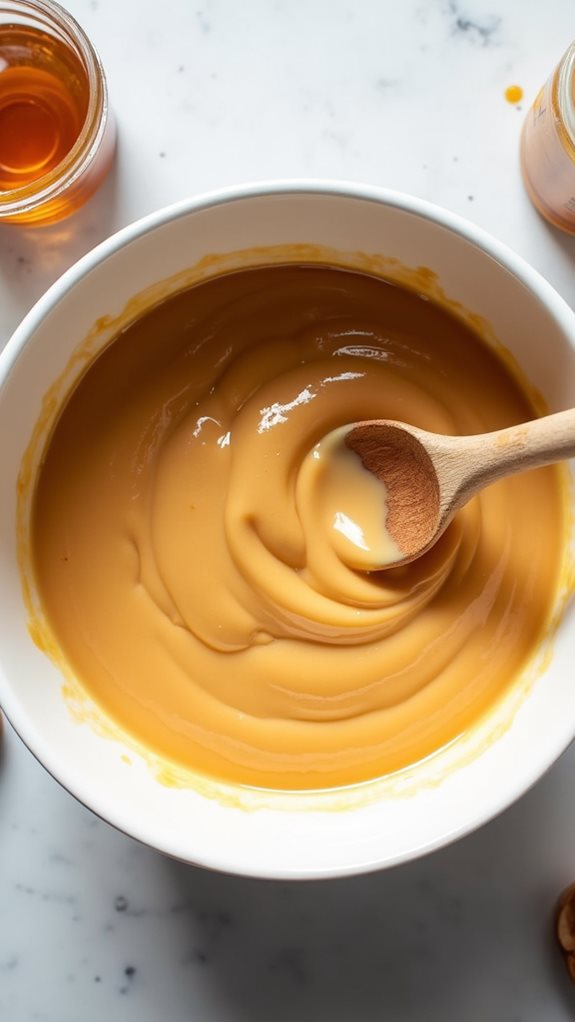
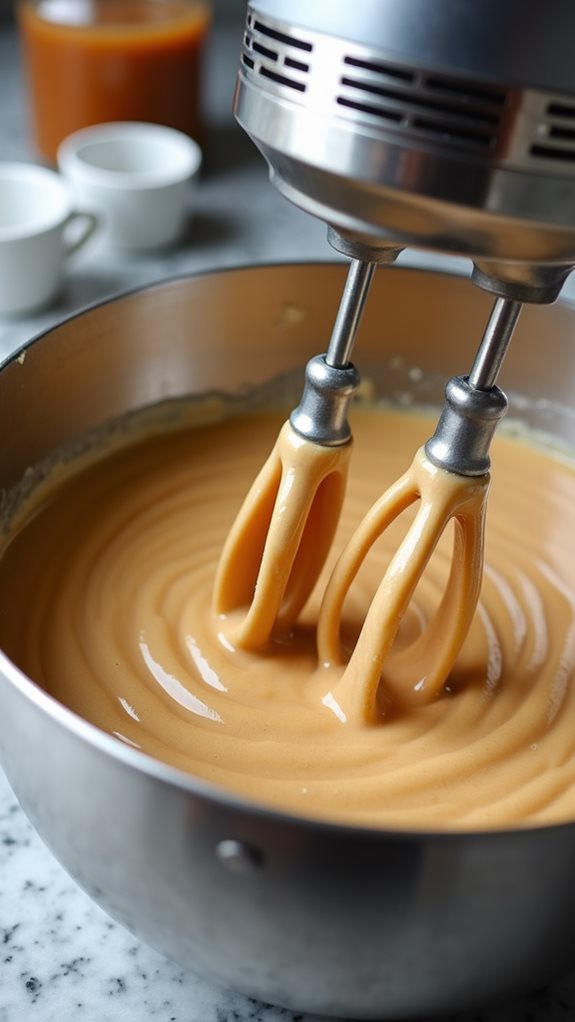
The initial mixing stage begins with combining room temperature almond butter and maple syrup in your prepared bowl. You'll want to stir these ingredients together until they form a smooth, uniform mixture without any visible separation. The consistency should be thick but easily stirrable, similar to cake batter.
Once you've achieved a well-blended almond butter and syrup mixture, it's time to incorporate your eggs. Crack two large eggs directly into the bowl and beat them thoroughly into the mixture. You'll notice the batter becoming lighter in color and slightly fluffier as you mix.
Continue beating until you don't see any streaks of egg remaining, which typically takes about 1-2 minutes of consistent stirring. The wet ingredients need to be fully incorporated before moving on to the dry ingredients, as this ensures your brownies will have the proper texture.
Test the mixture by lifting your spoon or spatula – the batter should fall in a smooth, ribbon-like stream, indicating it's ready for the next step. If you notice any separation or lumps, continue mixing until the consistency is uniform throughout.
Step 3. Fold Dry Cocoa Powder
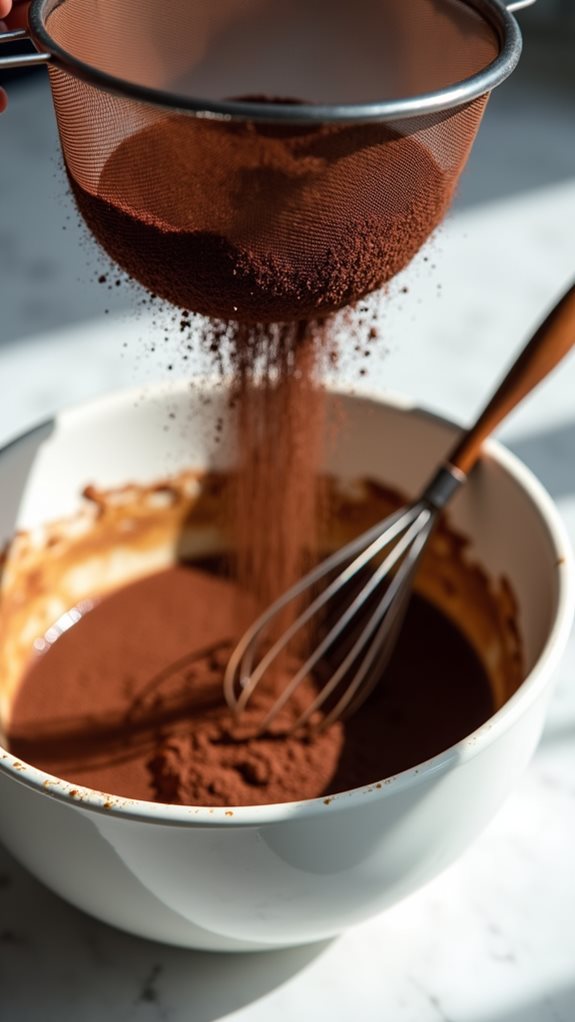
After achieving a smooth wet mixture, sifting cocoa powder into your bowl marks the next step in creating these rich flourless brownies.
You'll want to use a fine-mesh sieve or dedicated sifter to prevent any cocoa powder lumps from forming in your batter, ensuring the smoothest possible texture in your final product.
As you sift the cocoa powder, you'll notice it creates a light dusting over your wet ingredients.
Using a rubber spatula, gently fold the cocoa powder into the almond butter mixture using broad, sweeping motions from the bottom of the bowl upward.
Don't rush this process – thorough incorporation is crucial for achieving that perfect fudgy consistency.
You'll know you're done when the mixture becomes uniformly dark brown with no visible streaks of cocoa powder remaining.
If you find the batter becoming too thick as you fold, don't worry – this is normal for flourless brownies.
The natural oils from the almond butter will help maintain the proper consistency, and the end result will be perfectly dense and fudgy.
Continue folding until all ingredients are fully integrated before moving on to adding the chocolate chips.
Step 4. Pour Into Baking Pan

Properly preparing your baking pan is crucial before pouring the rich brownie batter. Line your 8×8-inch baking pan with parchment paper, allowing the edges to extend slightly over the sides, which will make it easier to lift the brownies out once they're cooled.
You'll want to lightly grease any exposed pan surfaces to prevent sticking.
When you're ready to transfer the batter, use a rubber spatula to scrape the bowl thoroughly, ensuring you don't waste any of the precious mixture. Pour the batter into the center of your prepared pan, then gently spread it toward the corners using smooth, even strokes.
The batter will be quite thick, so take your time to create a level surface. If you notice any air pockets, gently tap the pan on your counter a few times to release them.
Don't forget to sprinkle your reserved chocolate chips across the top of the batter, distributing them evenly. These will create appealing chocolate pockets throughout your finished brownies and add an extra layer of visual interest to the crackly top that will form during baking.
Step 5. Bake and Cool Brownies
With your brownie batter now perfectly spread in the pan, it's time for the baking process to begin.
Place your pan on the middle rack of your preheated 350°F (175°C) oven, and set your timer for 25 minutes. You'll want to watch for the telltale signs of doneness: the edges should begin to pull away slightly from the pan, and the surface should lose its glossy appearance.
Test for doneness by inserting a toothpick into the center of your brownies. You're looking for a few moist crumbs on the toothpick, but not wet batter. If needed, add an additional 3-5 minutes of baking time, checking frequently to avoid overbaking.
Once done, remove the pan from the oven and place it on a wire cooling rack. Here's where patience becomes crucial – you'll need to let the brownies cool completely, which typically takes about 2 hours.
During this time, they'll continue to set and develop that perfect fudgy texture. Don't be tempted to cut them while they're still warm, as they'll be too soft and won't hold their shape properly.
For clean-cut squares, use a sharp knife and wipe it between cuts.
Final Thoughts
Boasting both simplicity and decadence, these flourless brownies prove that gluten-free baking doesn't require compromising on taste or texture.
You'll find that these rich, fudgy treats often surpass their traditional counterparts in terms of chocolate intensity and satisfying mouthfeel, thanks to the almond butter foundation that creates an exceptionally moist crumb.
You can easily adapt this recipe to suit your preferences by experimenting with different nut butters or adjusting the sweetness level.
If you're serving these at a gathering, you'll want to mention that they're gluten-free, as many won't believe it given their incredible texture.
While they're delicious at room temperature, you'll discover they take on an even more intense, truffle-like consistency when chilled.
Consider making a double batch, as they tend to disappear quickly and freeze beautifully for up to three months.
Remember that these brownies aren't just a substitute for traditional versions – they're a standout dessert in their own right, offering an elevated chocolate experience that'll have everyone asking for the recipe.