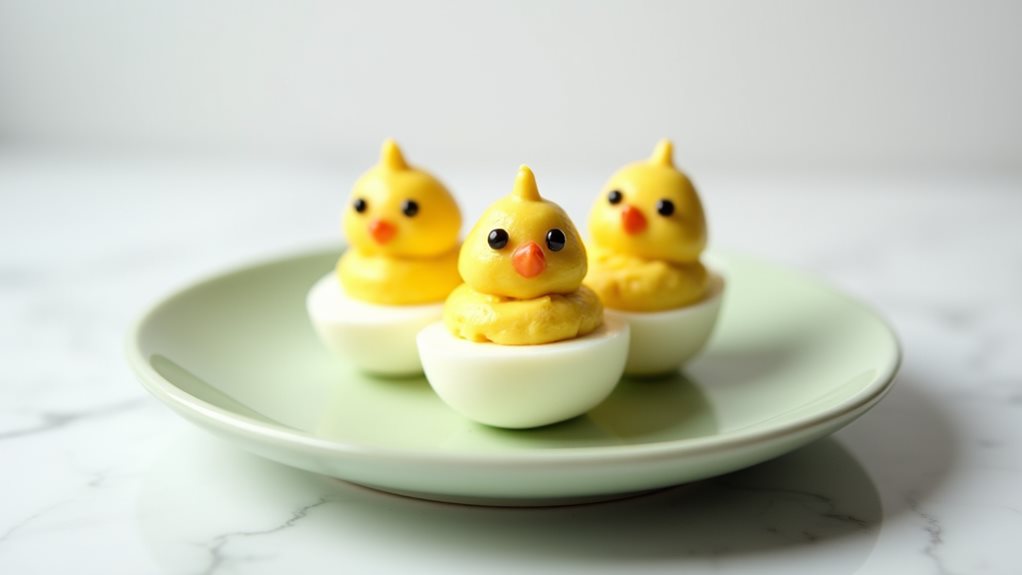
In a world overflowing with Easter appetizers, you've never seen anything quite as captivating as deviled egg chicks. These charming creations transform ordinary deviled eggs into adorable miniature birds that'll make your guests smile. Whether you're hosting a spring brunch or looking to add whimsy to your holiday spread, you'll want to master this creative twist on a classic dish. Let's explore how these eye-catching appetizers can elevate your next gathering.
Key Takeaways
- Deviled egg chicks are decorative appetizers made by cutting boiled eggs lengthwise and filling them with seasoned yolk mixture.
- The basic recipe requires eggs, mayonnaise, mustard, salt, and black peppercorns for the eyes.
- Assembly involves carefully cutting peeled eggs, mixing yolks with mayo and mustard, then decorating to create chick-like appearances.
- Older eggs work best for peeling, and the filled eggs should be served within 2 hours for optimal presentation.
- This whimsical dish became popular in the mid-20th century and remains a festive choice for spring celebrations and Easter gatherings.
History
While deviled eggs have been a popular appetizer since ancient Roman times, the whimsical transformation into chick-shaped presentations emerged during the mid-20th century as Easter celebrations became more commercialized and creative.
You'll find that homemakers in the 1950s and 1960s began experimenting with decorative food presentations, leading to the creation of these festive deviled egg chicks.
Women's magazines of the era frequently featured these charming appetizers, alongside other creative holiday-themed recipes. The trend gained momentum as America's post-war prosperity allowed for more elaborate entertaining, and you'd often see these adorable treats at spring gatherings, church socials, and family celebrations.
Today, they're a beloved Easter tradition that combines the classic deviled egg recipe with playful presentation techniques that continue to delight modern party guests.
Recipe
Deviled egg chicks bring a playful twist to the classic deviled egg appetizer, perfect for spring gatherings and Easter celebrations. These whimsical treats transform ordinary deviled eggs into adorable chick-shaped bites that delight both children and adults alike.
The preparation is straightforward despite their charming appearance, requiring just a handful of basic ingredients and simple assembly techniques. The key to success lies in properly boiled eggs and a smooth, creamy filling that can be easily piped or spooned into the egg white halves to create these festive treats.
- 6 large eggs
- 1/4 cup (60g) mayonnaise
- 1 teaspoon (5ml) yellow mustard
- 1/8 teaspoon salt
- 2 black peppercorns per egg
Place eggs in a pot and cover with cold water. Bring to a boil, then reduce heat and simmer for 10 minutes. Transfer eggs immediately to an ice bath for 5 minutes. Peel eggs carefully and cut lengthwise. Remove yolks and place in a bowl. Mash yolks with mayonnaise, mustard, and salt until smooth. Cut a small slice from the bottom of each egg white half to create a flat base. Fill whites with yolk mixture, creating a slight mound. Position eggs upright with the pointed end facing up, and gently press peppercorns into the filling to create eyes.
For perfect deviled egg chicks, use eggs that are at least a week old, as they're easier to peel. The filling can be prepared up to 24 hours in advance and stored in an airtight container in the refrigerator.
Before assembly, ensure egg whites are completely dry to prevent sliding, and serve within 2 hours for best presentation. If transporting, place in a single layer in a container with a tight-fitting lid and keep chilled.
Cooking Steps
You'll start by bringing a pot of water to a rolling boil, carefully lowering your eggs in, and letting them cook for exactly 10 minutes before transferring them to an ice bath.
After peeling the cooled eggs with gentle care, cut them lengthwise and remove the yolks to create a smooth filling mixture with mayonnaise, mustard, and salt.
Once you've filled the egg white halves, position them upright and add peppercorn eyes to transform your deviled eggs into adorable spring chicks that are ready to serve.
Step 1. Boiling Fresh Water Bath

Starting with a clean pot, fill it with enough fresh water to fully submerge your eggs by at least one inch.
Place the pot on your stovetop and turn the heat to high, bringing the water to a rolling boil. Once you've reached a vigorous boil, carefully lower your eggs into the water using a slotted spoon to prevent cracking.
Maintain the rolling boil for exactly 10 minutes, adjusting the heat as needed to prevent overflow.
While you're waiting, prepare an ice bath in a large bowl by combining cold water and ice cubes.
When the cooking time's up, immediately transfer the eggs to the ice bath using your slotted spoon. Let them cool for 5 minutes to stop the cooking process and prevent that grayish ring from forming around the yolks.
Step 2. Peel Eggs Gently
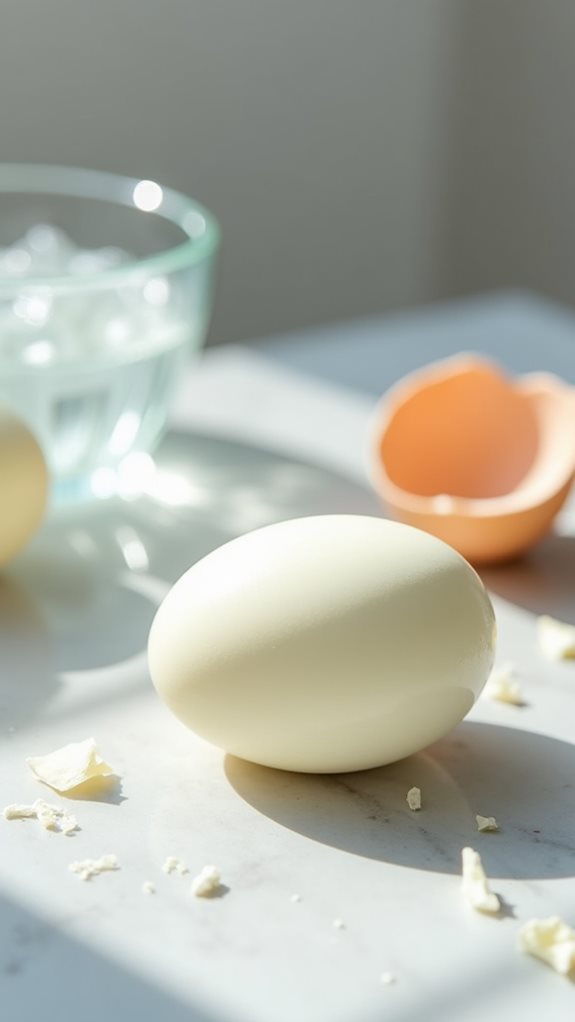
Once your eggs have cooled completely in the ice bath, gently tap each one against a hard surface, creating small cracks all around the shell's surface.
Begin peeling from the larger end, where there's typically an air pocket, making the initial separation easier. Carefully remove the shell pieces while keeping the egg white intact.
If you're having trouble, try peeling the eggs under cool running water, which helps separate the membrane from the white.
You'll want to be extra gentle during this step, as any tears or damage to the egg whites will affect your final presentation.
Once you've removed all the shell and membrane, pat each egg dry with a paper towel.
This careful attention to peeling will ensure you have smooth, unblemished egg whites ready for creating your adorable chicks.
Step 3. Cut Eggs in Half
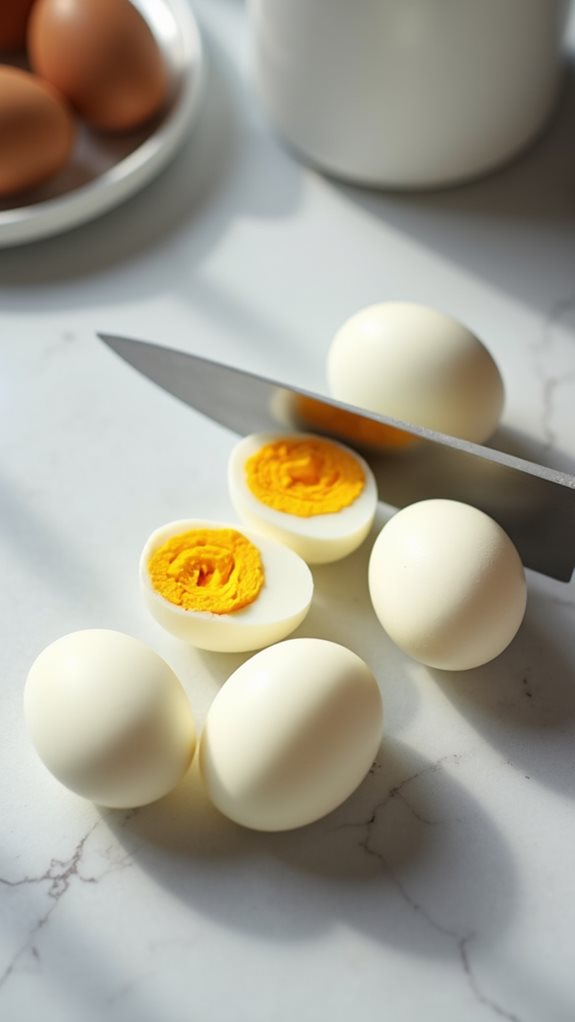
Place each peeled egg lengthwise on a cutting board, and using a sharp knife, carefully slice through the center from top to bottom.
You'll want to maintain steady pressure as you cut, ensuring a clean line that'll create two even halves. If you're finding it difficult to keep the eggs stable, try placing a paper towel underneath to prevent rolling.
Once you've cut all your eggs, gently separate the halves and check that your cuts are neat and precise.
If you notice any jagged edges, you can carefully trim them with your knife. Remember, you're creating the foundation for your chick design, so it's important to have smooth, even surfaces to work with.
Set the halves aside on your work surface, making sure the cut sides are facing up.
Step 4. Create Yolk Mixture Smooth
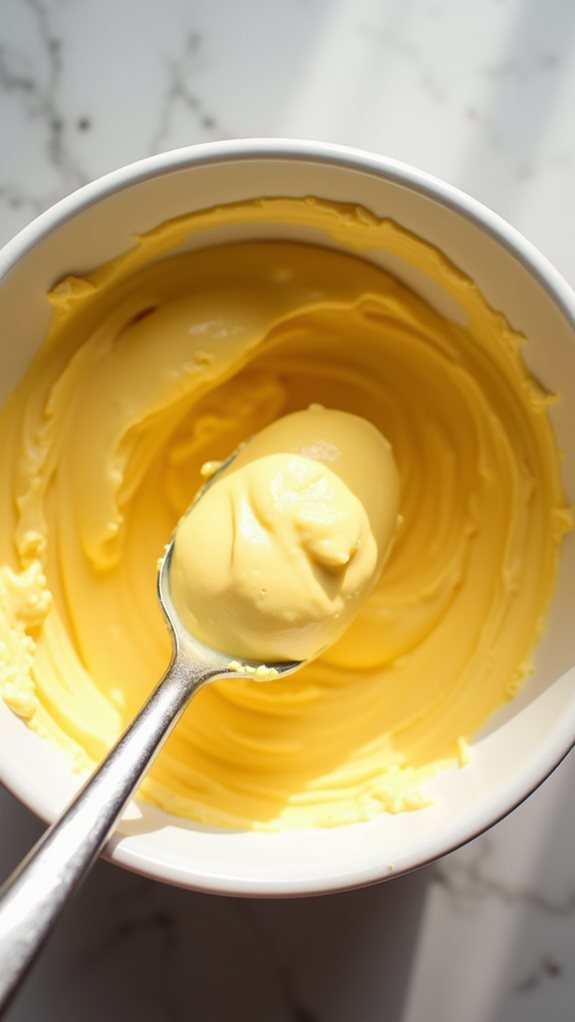
Removing egg yolks from their whites marks the beginning of creating your smooth, creamy filling for the deviled egg chicks.
You'll want to place the yolks in a medium-sized bowl, ensuring there aren't any white pieces mixed in.
Using a fork, begin mashing the yolks thoroughly until they're broken down into fine particles.
Add your mayonnaise, yellow mustard, and salt to the bowl, then continue mashing and stirring until you've achieved a completely smooth consistency.
If you notice any lumps, keep working the mixture until they disappear.
You can also press the filling through a fine-mesh strainer for an ultra-smooth result.
The final texture should be creamy enough to pipe easily but firm enough to hold its shape when decorated.
Step 5. Decorate Eggs Into Chicks
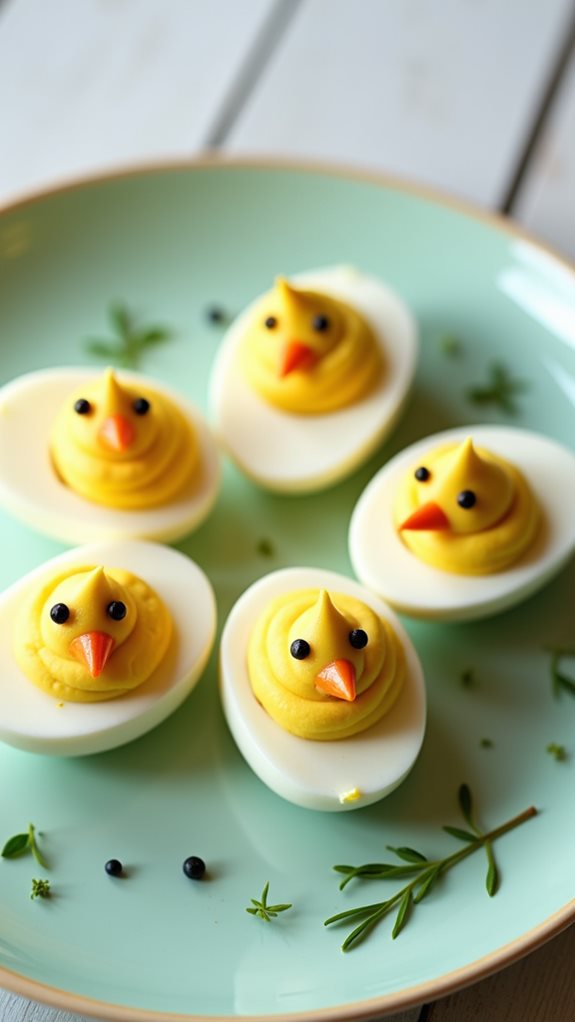
After preparing your smooth yolk mixture, transforming plain deviled eggs into adorable chicks requires careful attention to presentation and detail.
Begin by cutting a small slice from the bottom of each egg white half, ensuring they'll stand upright on your serving platter.
Pipe or spoon the yolk mixture into each egg white cavity, creating a slightly rounded mound that extends just above the edges.
Position the filled eggs with their pointed ends facing upward to form the chicks' heads.
For the finishing touch, gently press two black peppercorns into the yolk mixture to create eyes, placing them slightly above the center point.
You'll want to arrange these delicate creations immediately before serving to maintain their fresh appearance and prevent any unwanted sliding.
Final Thoughts
These whimsical deviled egg chicks will bring a delightful touch of spring to your table, transforming an ordinary appetizer into a memorable treat that guests won't soon forget.
With just a few simple ingredients and basic kitchen skills, you'll create an eye-catching display that's perfect for Easter gatherings, spring celebrations, or any occasion that calls for a cheerful presentation.
Remember to plan ahead by using slightly older eggs for easier peeling, and don't hesitate to make the filling in advance to streamline your preparation.
While these adorable chicks might look intricate, they're actually quite simple to assemble.
You'll find that the extra effort in presentation is well worth it when you see the smiles these charming appetizers bring to your guests' faces.