To decorate cakes like a pro, you'll need essential tools like offset spatulas, cake turntables, and piping bags. Master frosting consistency by achieving the ideal butter-to-sugar ratio and controlling temperature. Experiment with fondant design, gum paste flowers, and advanced piping techniques to elevate your creations. Develop your color mixing skills and create custom cake toppers for personalized touches. Apply smooth buttercream by using a crumb coat and chilling the cake. Practice different techniques on parchment paper before decorating your actual cake. As you explore these secrets, you'll unlock a world of cake artistry possibilities.
Essential Baking Tools
Equip yourself with the right tools to elevate your cake artistry game. Offset spatulas are your secret weapon for achieving flawlessly smooth frosting. Available in various sizes, they'll help you tackle cakes of all dimensions with precision.
Don't underestimate the power of a cake turntable; it's your key to even frosting application and seamless decoration. By rotating your creation effortlessly, you'll ensure every angle is picture-perfect.
Piping bags are essential for creating intricate designs. Experiment with different tips to unleash a world of textures and decorative possibilities.
Palette knives are versatile tools you'll reach for repeatedly, ideal for spreading, texturing, and refining cake edges. They're indispensable for achieving that professional finish you're after.
Lastly, invest in quality cake pans. Non-stick options are your best bet, minimizing the risk of damaging your masterpiece during removal.
With these tools at your disposal, you're well-equipped to push the boundaries of cake artistry. Remember, innovation in baking often starts with the right equipment, so choose wisely and let your creativity soar.
Perfecting Frosting Consistency
As you venture into the world of cake decorating, mastering frosting consistency is crucial for achieving professional-looking results.
You'll need to understand how to create the ideal texture for various decorating techniques, learn temperature control methods to maintain the perfect consistency, and be prepared to troubleshoot common issues that may arise.
Ideal Frosting Texture
The secret to stunning cake decorations lies in achieving the perfect frosting consistency. Your ideal frosting texture should be smooth and spreadable, typically accomplished with a 1:3 butter-to-sugar ratio for buttercream. This balance ensures your frosting holds its shape while remaining creamy.
To adjust consistency, you'll want to add less liquid and more powdered sugar for a thicker texture, or incorporate milk or cream for a thinner spread.
Temperature plays a crucial role in your frosting's performance. Aim for room temperature (around 70°F) when spreading or piping. If it's too soft, a quick chill in the refrigerator can firm it up.
To avoid pesky air bubbles, mix on low speed and let your frosting rest before use.
For optimal decorating results:
- Whip until soft peaks form, signaling readiness
- Avoid overmixing to prevent a grainy texture
- Strive for a velvety finish that glides effortlessly
Temperature Control Techniques
Temperature control is the key to perfecting your frosting consistency. When working with buttercream, aim for a sweet spot of 70°F (21°C) to achieve optimal spreadability and piping performance.
If your frosting becomes too warm during mixing or decorating, don't panic. Simply pop it in the refrigerator for 10-15 minutes to thicken it up and restore its shape-holding abilities.
For ganache enthusiasts, maintaining a temperature of around 90°F (32°C) after cooling will give you that smooth, pourable consistency you're after without it being too runny.
When it comes to fondant, room temperature is your friend for maintaining pliability. However, if it starts getting sticky, a brief chilling session can work wonders for easier handling.
To revolutionize your cake decorating game, invest in a reliable thermometer. This essential tool will help you accurately measure ingredient temperatures, ensuring consistent results and preventing decorating disasters.
Troubleshooting Common Issues
Mastering frosting consistency can be the difference between a cake masterpiece and a decorating disaster. To achieve the right consistency, aim for a 2:1 ratio of powdered sugar to fat. If your frosting's too stiff, add small amounts of milk or cream until it reaches the desired smoothness. Conversely, if it's too runny, gradually mix in more powdered sugar to thicken it.
Remember, temperature plays a crucial role; ensure your butter's at room temperature (68°F or 20°C) for optimal mixing and texture.
When troubleshooting common issues, keep these tips and tricks in mind:
- Avoid overmixing, which can incorporate too much air and affect smoothness.
- Adjust consistency gradually to prevent drastic changes.
- Test frosting on a small area before applying to the entire cake.
To achieve smooth edges and perfect techniques such as Rosettes, you'll need frosting that holds peaks while spreading easily.
If you're facing challenges, don't worry – it's all part of the learning process. With practice and attention to detail, you'll soon be creating cakes with flawlessly smooth frosting that's truly the icing on the cake of your baking skills.
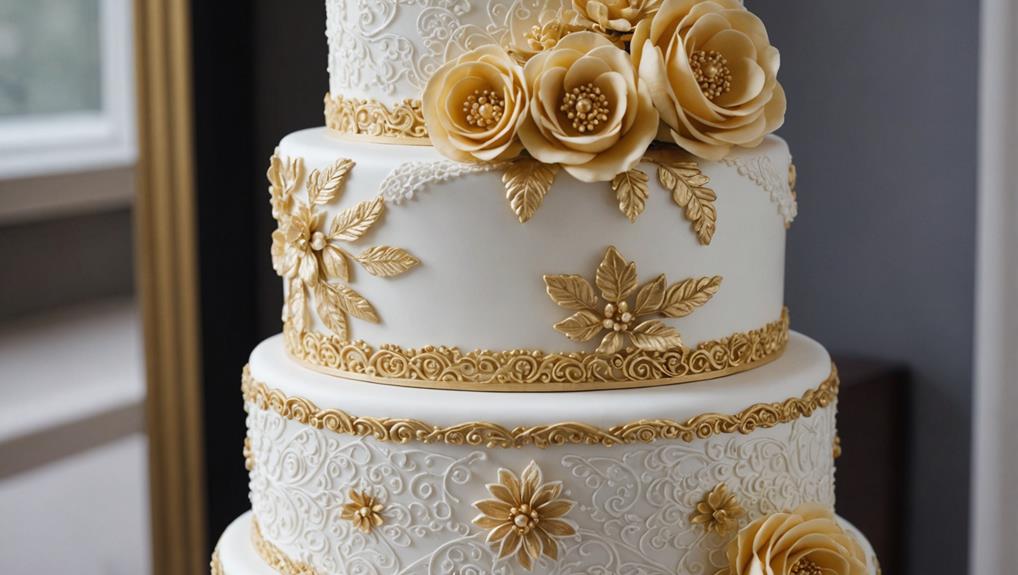
Fondant Design Mastery
Fondant design mastery opens up a world of creative possibilities for cake decorators. This versatile icing allows you to achieve a smooth finish and create intricate designs that'll captivate your audience.
To begin, knead your fondant thoroughly until it's pliable, using cornstarch or powdered sugar to prevent sticking. Before applying fondant, cover your cake with a thin layer of buttercream or ganache for better adhesion.
As you roll out the fondant, consider the endless customization options. You can tint it with gel food colors to achieve your desired shade, and use tools like cutters, molds, and embossing mats to add texture and detail.
Create edible flowers, figurines, and complex patterns to elevate your cake's visual appeal. Don't be afraid to combine fondant work with other techniques, such as piping, to add depth and dimension to your designs.
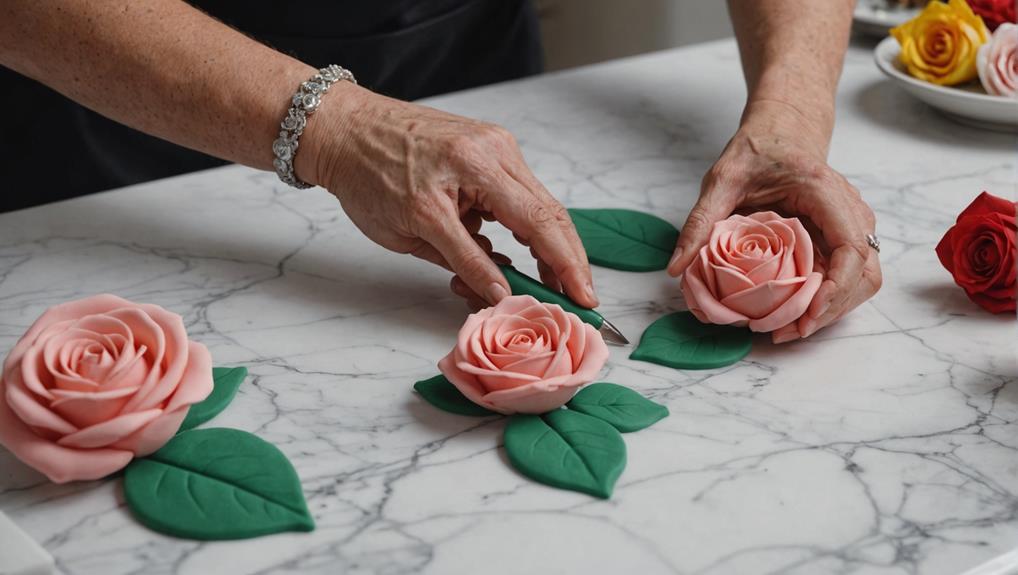
Gum Paste Flower Techniques
How can you take your cake decorating skills to the next level? Mastering gum paste flower techniques will elevate your creations from ordinary to extraordinary. This pliable sugar dough hardens when dried, allowing you to craft intricate and realistic flower decorations that'll wow your clients or guests.
To create stunning gum paste flowers, start by rolling out the paste to your desired thickness. Use specific flower cutters and veining tools to shape the petals and leaves accurately. For enhanced elasticity and quicker drying time, add tylose powder to your fondant.
After shaping, color your flowers with edible dusts or gels to achieve natural hues and lifelike finishes.
Here are three reasons to master gum paste flower techniques:
- Unleash your creativity with limitless design possibilities
- Stand out from the competition with professional-quality decorations
- Impress clients with your attention to detail and artistic flair
Once you've shaped your flowers, allow them to dry completely on a foam pad. This process typically takes 24 hours or longer, depending on humidity and thickness.
With practice and patience, you'll soon be crafting breathtaking floral masterpieces that transform ordinary cakes into edible works of art.
Piping Tips and Tricks
Numerous piping tips and tricks can transform your cake decorating skills from amateur to professional. Start by choosing the right piping tips for your desired designs. A star tip creates textured rosettes, while a round tip produces smooth lines and dots.
To achieve professional-looking designs, maintain consistent pressure on your piping bag throughout the decorating process. This ensures even and uniform results, elevating the overall visual appeal of your cake.
Before tackling your masterpiece, practice basic piping techniques on parchment paper. This will boost your confidence and accuracy when working on the actual cake.
Don't forget to adjust your frosting consistency for optimal results. Add milk to create smoother lines or powdered sugar for more structured shapes.
As you progress, incorporate a variety of piping techniques like shells and borders to enhance your cake's design. Remember, mastering these skills takes time and patience.
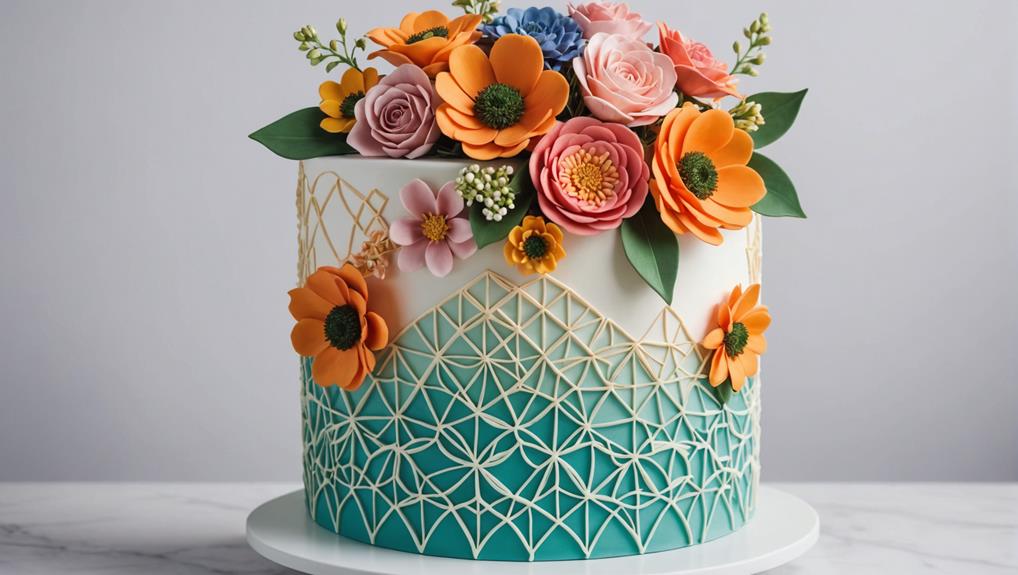
Edible Color Palettes
When creating edible color palettes for your cakes, you'll need to consider whether to use natural or artificial colorants, each with their own advantages and considerations.
You can enhance your color mixing skills by experimenting with different techniques, such as layering or blending, to achieve unique and vibrant hues that will make your cake stand out.
To keep your designs fresh and appealing, it's worth exploring seasonal color trends, which can inspire you to create cakes that are both timely and visually striking.
Natural vs. Artificial Colorants
In the world of cake artistry, choosing between natural and artificial colorants can significantly impact your final creation. Natural colorants, derived from fruits, vegetables, and spices, offer a range of colors but may produce less vibrant hues compared to their artificial counterparts.
When using natural options like beet juice for red or turmeric for yellow, you'll need to experiment with concentrations and pH levels to achieve desired shades. Artificial colorants, on the other hand, provide consistent results and a wider spectrum of intense colors, making them ideal for precise color matching in professional cake decorating.
Consider these emotional aspects when selecting your colorants:
- Pride in using all-natural ingredients
- Excitement in achieving vibrant, eye-catching designs
- Satisfaction in mastering color-mixing techniques
As an innovative cake decorator, you'll want to explore both natural and artificial options. While natural colorants may require more experimentation and can affect flavor profiles, they appeal to health-conscious consumers.
Artificial colorants, being FDA-approved and available in liquid or gel form, offer longevity and precision. By understanding the strengths and limitations of each type, you'll be better equipped to create stunning, customized cake designs that showcase your artistic vision.
Color Mixing Techniques
Mastering color mixing techniques is essential for creating stunning edible color palettes in cake artistry. To achieve harmonious color combinations, you'll need to understand the color wheel, which helps you identify primary, secondary, and tertiary colors.
When mixing colors, start with a small amount of gel food coloring and gradually add it to your icing or fondant. This method allows for precise control over the final hue, ensuring you don't overshoot your target shade.
For pastel colors, mix white icing with a tiny amount of colored gel, blending thoroughly for an even, light shade perfect for delicate designs. If you're aiming for vibrant colors, add concentrated gel food coloring incrementally to avoid oversaturation, which can affect the texture of your frosting or fondant.
Don't be afraid to experiment with complementary colors, such as pairing blue with orange or purple with yellow. These combinations can dramatically enhance your cake's visual impact, making decorations pop.
Seasonal Color Trends
Seasonal color trends play a crucial role in cake artistry, allowing you to create designs that resonate with the time of year and current fashion preferences. By incorporating nature's palette into your edible color palettes, you'll craft cakes that perfectly capture the essence of each season.
For spring, embrace soft pastels like blush pink and mint green, while autumn calls for warm hues such as burnt orange and deep red.
To elevate your cake designs, consider adding trendy metallics like rose gold or copper. These contemporary touches complement both modern and traditional aesthetics, giving your creations a fresh, innovative look.
Don't forget to harness the power of color psychology in your seasonal selections. Vibrant yellows and corals can evoke joy and energy, making them ideal for summer celebrations.
For a cutting-edge approach to seasonal color trends, try:
- Experimenting with natural food dyes derived from fruits and vegetables
- Blending unexpected color combinations to create unique, eye-catching designs
- Incorporating ombré effects using seasonal hues for a gradient that mimics nature's transitions
Creating Custom Cake Toppers
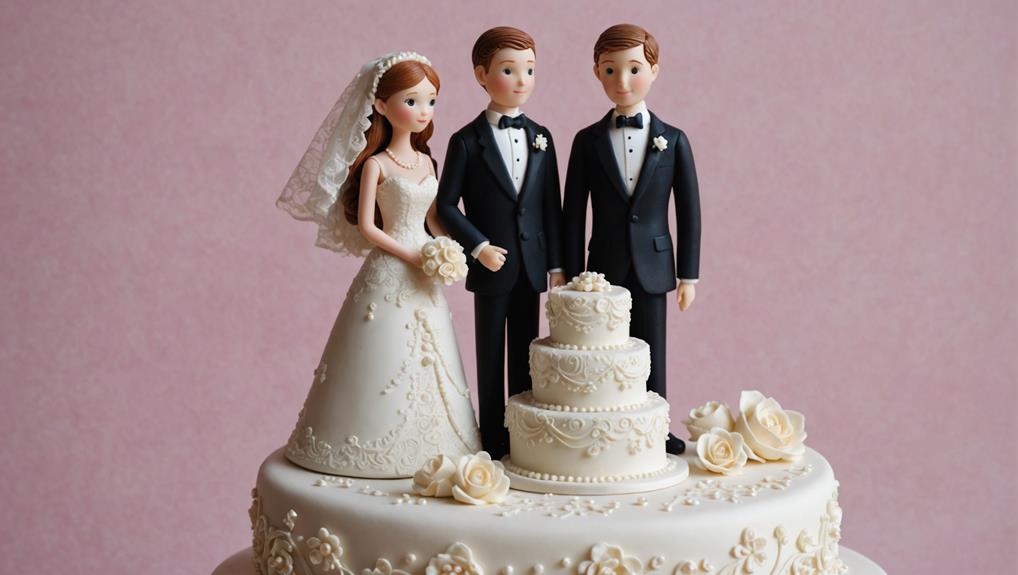
Custom cake toppers are the crowning glory of any well-designed cake, offering a unique opportunity to personalize your creation. By crafting intricate designs from materials like fondant, gum paste, or modeling chocolate, you'll elevate your cake's aesthetic appeal.
To ensure your toppers maintain their shape, allow them to dry completely for at least 24 hours before placing them on the cake.
Enhance your toppers' visual impact by using edible food colors and luster dust, creating vibrant elements that seamlessly blend with your cake's overall design. For stability, especially with heavier or three-dimensional figures, incorporate a wooden or plastic dowel as support. This prevents toppling and maintains the integrity of your creation.
Embrace artistic expression by sketching your designs beforehand. This practice helps you visualize the final product and ensures all elements harmonize with the cake's decor.
Smooth Buttercream Application
Achieving a flawlessly smooth buttercream finish is a hallmark of professional cake decorating. To master this skill, start with a well-chilled cake to minimize crumbs and create a stable foundation.
Apply a crumb coat, a thin layer of buttercream that seals in loose crumbs, before the final icing layer. This step is crucial for a polished appearance.
Begin with a stiff buttercream consistency for the initial layer, gradually thinning it out for smoother application on the final coat. Use an offset spatula or bench scraper to spread the frosting evenly, rotating the cake on a turntable for uniform coverage.
Aim for an ice-cream-like texture in your buttercream, which allows for easy spreading and a clean, professional appearance when smoothed out.
To elevate your cake decorating skills and achieve that coveted smooth buttercream application, consider these innovative techniques:
- Experiment with temperature-controlled spatulas for precise control
- Utilize airbrushing techniques for ultra-smooth finishes
- Incorporate textured mats for unique, yet smooth patterns
Fondant Sculpting Secrets
When it comes to fondant sculpting secrets, mastering the art of shaping complex figures is essential for creating stunning cake designs.
You'll need to develop techniques for adding texture and intricate details to your fondant sculptures, which can elevate your creations from simple to extraordinary.
Shaping Complex Figures
The art of shaping complex figures with fondant demands both skill and patience. To create stunning cake toppers and decorations, you'll need to master a few key techniques. Start by ensuring your fondant is at the perfect consistency—pliable enough to mold but not sticky.
Use a variety of tools, including smoothers, modeling tools, and cutters, to craft intricate details that bring your figures to life. For larger, more complex figures, build a sturdy base using wire frames or rice cereal treats. This provides the stability needed to support your creation.
As you assemble your figure, use edible glue or a water-fondant mixture to securely attach pieces, preventing unwanted shifts or collapses. To enhance visual appeal, experiment with edible dusts and paints. These accents add depth and highlight features, elevating your fondant sculpture from good to extraordinary.
When shaping complex figures, remember:
- Every curve and line tells a story
- Your hands are powerful tools of creation
- Patience is the secret ingredient to perfection
Texture and Detail Techniques
Fondant artistry reaches new heights with texture and detail techniques that transform simple shapes into lifelike masterpieces. To elevate your cake designs, start with high-quality fondant that's been kneaded until smooth and elastic. This pliable foundation is crucial for achieving intricate sculpting results.
Equip yourself with specialized tools like ball tools and fondant cutters to create complex shapes and textures. These instruments allow you to craft fine details that bring your designs to life. For even more realism, experiment with impression mats to imprint patterns onto your fondant surfaces.
Enhance depth and dimension by applying edible dusts or colors, adding a professional touch to your creations. When assembling your fondant pieces, use a light mist of water to help them adhere. Be cautious, though – too much moisture can make your fondant sticky and difficult to manipulate.
As you work, remember that patience is key. Detailed sculpting demands time and precision to avoid cracking or tearing. With these techniques at your disposal, you'll be crafting fondant masterpieces that showcase your innovative cake decorating skills in no time.
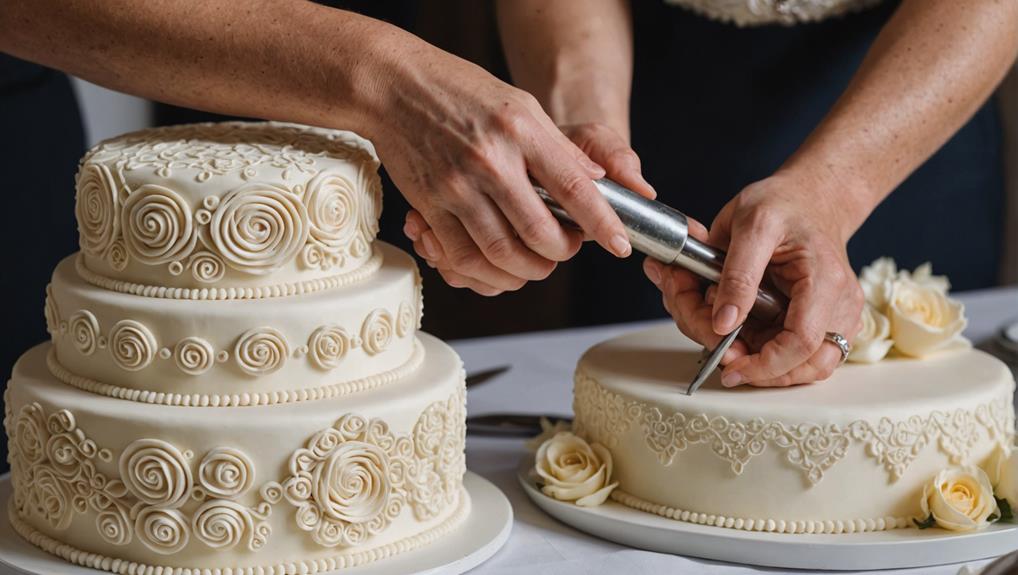
Advanced Piping Techniques
Numerous advanced piping techniques can elevate your cake decorating skills to new heights. By mastering the use of various piping tips, such as petal, leaf, and basketweave, you'll create intricate designs that transform your cakes into works of art.
Consistent pressure is key; maintaining even force while piping ensures uniformity in your decorations, enhancing the overall aesthetic. Don't forget to experiment with different frosting consistencies, as they significantly impact the final appearance of your piped elements.
To truly excel in advanced piping techniques:
- Practice relentlessly on parchment paper, honing your skills before applying them to cakes.
- Embrace innovative methods like reverse piping for stunning textures.
- Push your boundaries by combining multiple techniques in a single design.
Frequently Asked Questions
What Do Professionals Use to Decorate Cakes?
You'll elevate your cake game with pro tools like piping tips, fondant flowers, and edible glitter. Create stunning buttercream textures, use cake stencils for precision, and master airbrush techniques to achieve jaw-dropping designs that'll wow your clients.
What Makes a Cake Look Professional?
Hit the nail on the head with cake aesthetics by mastering color harmony, texture contrast, and design balance. You'll elevate visual appeal through theme consistency. Innovate with unexpected elements while maintaining a polished, cohesive look for professional results.
What Are the 7 Different Cake Decorating Techniques?
You'll master seven techniques to elevate your cakes: piping techniques, fondant smoothing, edible glitter application, flower creation, color blending, texture layering, and airbrushing. Each skill offers unique ways to transform your desserts into stunning, innovative masterpieces.
How to Get Better at Decorating Cakes?
You'll become a cake artist in no time! Master piping techniques, experiment with bold color combinations and texture contrasts. Explore innovative flavor pairings and themed decorations. Invest in essential tools and practice consistently to elevate your decorating game.
Final Thoughts
You've now unlocked the secrets to cake artistry. Armed with the right tools and techniques, you're ready to transform simple ingredients into edible masterpieces. Remember, practice makes perfect, so don't be discouraged if your first attempts aren't picture-perfect. Like a painter honing their craft, you'll refine your skills with each creation. Keep experimenting, pushing your boundaries, and letting your creativity soar. Soon, you'll be crafting cakes that not only taste delicious but also look stunning, impressing friends and family alike.