You've likely encountered various pastry creations throughout your culinary adventures, but Curly Twirlies stand apart with their distinctive spiral shape and rich heritage. Dating back to 1923, these delightful treats emerged from Samuel McPherson's innovative kitchen, transforming traditional Scandinavian pastry techniques into something uniquely appealing. While their golden-brown exterior and sweet cinnamon-sugar filling might remind you of familiar breakfast rolls, there's an intriguing story behind how these spiraled confections became a beloved morning staple, and why their preparation method continues to captivate both home bakers and professionals alike.
Key Takeaways
- Curly Twirlies are spiral-shaped confections invented by Samuel McPherson in 1923, originally made from corn syrup and molasses.
- These pastries require basic ingredients like flour, yeast, sugar, milk, eggs, and butter to create their signature spiral dough.
- The pastries are baked at 350°F for 15-18 minutes until golden brown, with proper spacing for even heat circulation.
- An egg wash application before baking ensures a beautiful golden-brown finish and enhances the visual appeal.
- Curly Twirlies can be served warm, stored in airtight containers, and reheated briefly to maintain freshness.
History
Several famous candy makers during the 1920s claimed to have invented the curly twirlie, but most historians credit Samuel McPherson with creating the first spiral-shaped confection in his small Chicago candy shop in 1923.
You'll find that McPherson's original recipe used a unique combination of corn syrup and molasses, which he'd heat to precisely 270 degrees Fahrenheit before carefully pulling and twisting the mixture into its signature spiral shape.
Recipe
Curly Twirlies are a delightful spiral-shaped pastry treat that combines the rich flavors of cinnamon and butter with a light, flaky texture. Perfect for breakfast, brunch, or as an afternoon snack with coffee or tea, these twisted treats have become a beloved staple in many home bakeries.
Originally inspired by traditional Scandinavian pastries, Curly Twirlies have evolved into their own unique creation, featuring a distinctive spiral pattern that not only looks impressive but also creates multiple layers of flavor in every bite. The dough is enriched with butter and eggs, making it both tender and sturdy enough to hold its shape during baking.
Ingredients:
- 3 cups (375g) all-purpose flour
- 2¼ teaspoons (7g) active dry yeast
- ¼ cup (50g) granulated sugar
- 1 teaspoon salt
- 1 cup (240ml) warm milk
- 2 large eggs
- ½ cup (113g) unsalted butter, softened
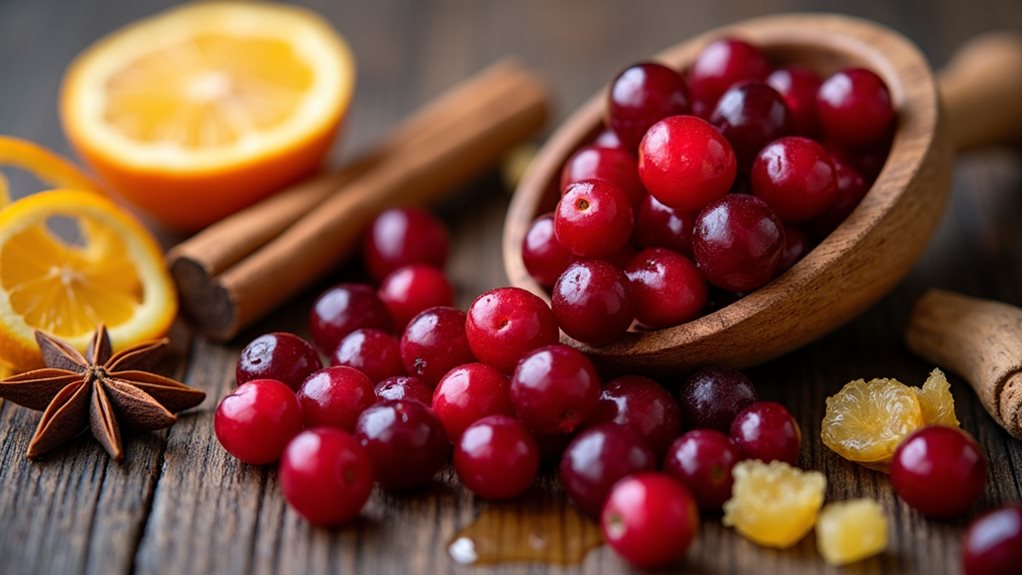
- 1 cup (200g) brown sugar
- 2 tablespoons ground cinnamon
- ¼ cup (57g) melted butter for filling
- 1 egg (for egg wash)
The dough is prepared by activating the yeast in warm milk, then combining it with the flour, sugar, salt, and eggs to form a soft dough. After the first rise, the dough is rolled into a rectangle, spread with melted butter, and sprinkled with a cinnamon-sugar mixture.
The rectangle is then cut into long strips, which are twisted and coiled to create the signature spiral shape. After a second rise, the pastries are brushed with egg wash and baked at 375°F (190°C) for 15-18 minutes until golden brown.
For best results, ensure all ingredients are at room temperature before beginning. The dough can be prepared the night before and refrigerated for the first rise, which will develop more flavor.
When twisting the strips, keep them tight enough to hold their shape but not so tight that they tear. If the dough becomes too soft while working with it, place it in the refrigerator for 10-15 minutes to firm up.
These pastries are best served warm and can be reheated briefly in the oven to restore their freshness.
Cooking Steps
You'll start by preheating your oven to 350°F while preparing your butter mixture until it reaches a light, fluffy consistency.
Next, you'll carefully incorporate the flour and vanilla into your whipped butter base, working the ingredients until they form a smooth, pliable dough that's ready for shaping into signature spiral logs.
Once you've achieved the perfect spiral shape, brush each log with egg wash to ensure they'll bake up with an appealing golden finish that makes Curly Twirlies instantly recognizable.
Step 1. Preheat Oven to 350°F
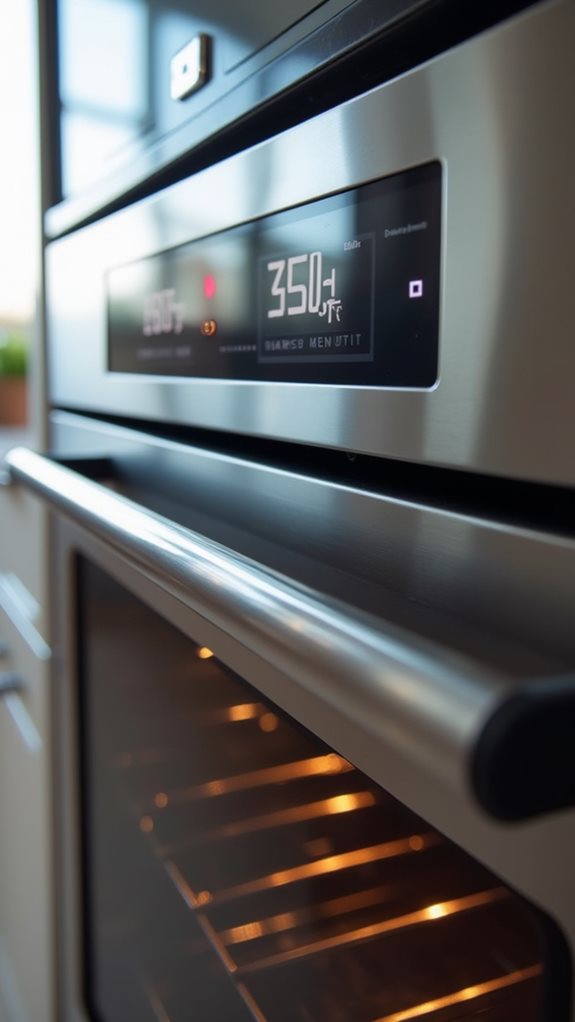
Getting your oven ready is the critical first step in making perfect Curly Twirlies. You'll need to ensure your oven reaches exactly 350°F (175°C) before you begin the baking process, as this precise temperature guarantees the ideal texture and consistency of your treats.
Start by checking that your oven racks are positioned in the center, which allows for optimal heat distribution and even baking. If you're using a conventional oven, you'll want to let it preheat for at least 15 minutes, even after it signals it's ready. For convection ovens, reduce the temperature to 325°F to compensate for the increased air circulation. You can verify the accuracy of your oven's temperature by using an oven thermometer, which you should place in the center of the middle rack.
While you're waiting for the oven to reach the proper temperature, don't be tempted to start baking too soon. An inadequately heated oven will affect the rise, texture, and overall quality of your Curly Twirlies.
If you're baking multiple batches, maintain the temperature between rounds by keeping the oven door closed as much as possible.
Step 2. Mix Butter Until Fluffy
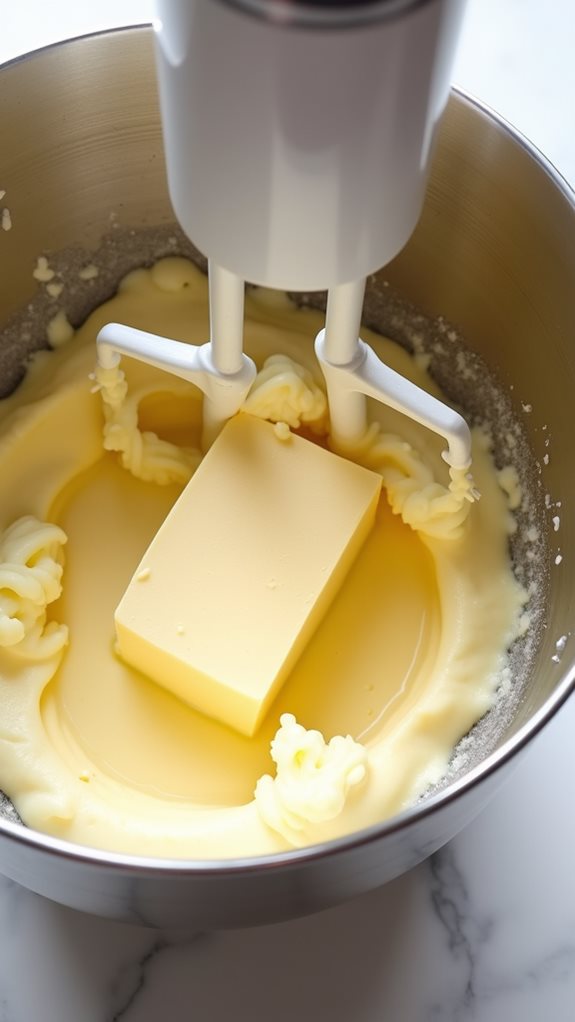
With your oven heating up, now's the time to focus on achieving perfectly whipped butter – the foundation of delectable Curly Twirlies.
You'll need two sticks of unsalted butter that have been sitting at room temperature for at least 30 minutes, ensuring they're soft but not melted.
Place the softened butter in your mixing bowl, and if you're using a stand mixer, attach the paddle attachment.
Begin mixing at medium speed, gradually increasing to medium-high as the butter starts to break down. You'll want to scrape down the sides of the bowl every minute or so to ensure even incorporation.
Continue beating until the butter lightens in color and becomes noticeably fluffier, which typically takes about 3-4 minutes.
You'll know you've reached the right consistency when the butter has nearly doubled in volume and appears almost white in color.
It should be light, airy, and easily spreadable, with no visible lumps or uneven patches.
If you're not sure, test it by pressing a spoon into the mixture – it should leave smooth, ribbon-like impressions that hold their shape.
Step 3. Add Flour and Vanilla
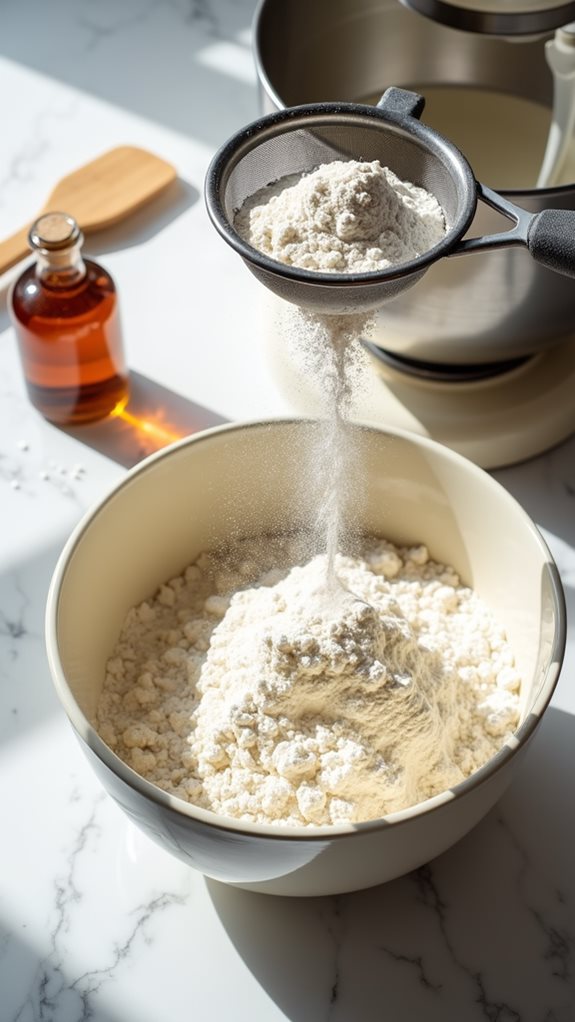
Once your butter reaches peak fluffiness, it's time to incorporate the dry ingredients.
Begin by gradually adding your pre-sifted flour, one cup at a time, while maintaining your mixer at medium speed. You'll want to ensure each addition is fully incorporated before adding the next portion, which helps prevent lumps and ensures even distribution throughout your mixture.
As you're adding the flour, you'll notice the dough becoming increasingly thick and starting to pull away from the sides of the bowl. At this point, pour in two teaspoons of pure vanilla extract, which will enhance the overall flavor profile of your Curly Twirlies.
Don't skimp on quality here – artificial vanilla won't provide the same depth of flavor you're aiming for in these cookies.
Continue mixing until you've achieved a smooth, cohesive dough that's neither too sticky nor too dry. You'll know you've reached the right consistency when the dough forms a ball that holds together well but doesn't stick to your fingers when touched.
If needed, scrape down the sides of the bowl with a rubber spatula to ensure all ingredients are thoroughly combined.
Step 4. Shape Into Spiral Logs
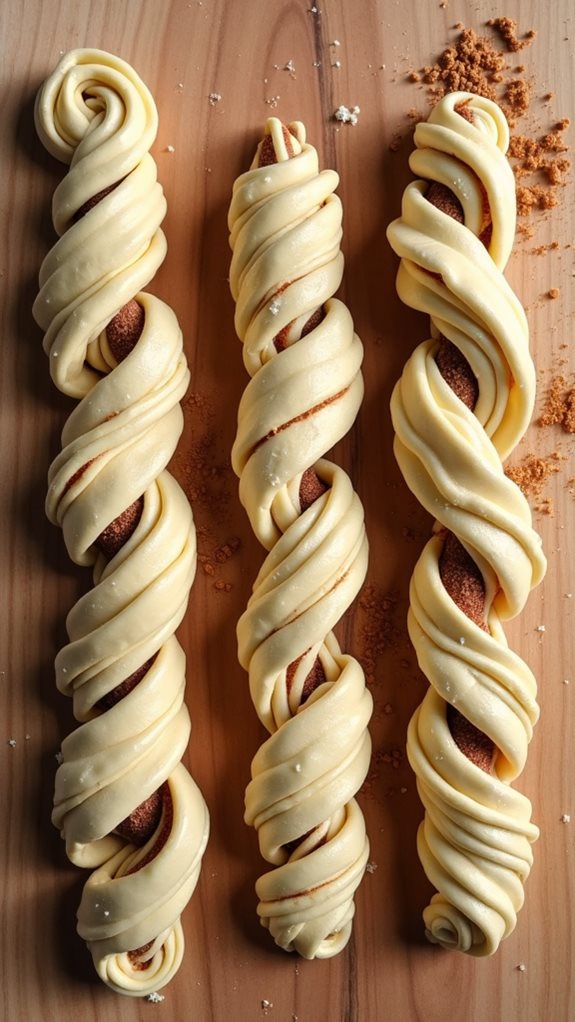
The perfectly mixed dough is ready for shaping into its signature spiral form. You'll want to divide your dough into four equal portions, each weighing approximately 12 ounces.
Working with one portion at a time, roll the dough between your palms to create a uniform rope that's about 18 inches long and 1 inch in diameter. As you roll, make sure you're applying even pressure to maintain consistent thickness throughout.
Now comes the crucial spiral-forming technique. Hold one end of the rope firmly with your left hand, and begin coiling the dough around this center point with your right hand. You'll want to work slowly, maintaining even spacing between each loop while gently pressing the coils together to ensure they'll hold their shape.
If you notice the rope becoming too thin as you coil, stop and gently roll that section to restore the proper thickness. Continue this process until you've used the entire length of dough, tucking the end underneath to secure it.
Place each completed spiral on a parchment-lined baking sheet, leaving at least 2 inches of space between them.
Step 5. Brush With Egg Wash

Preparing a proper egg wash gives your Curly Twirlies their characteristic golden-brown shine. You'll need to crack one large egg into a small bowl and add two tablespoons of water, whisking them together until they're completely combined. Make sure there aren't any streaks of separated egg white or yolk remaining in your mixture.
Using a pastry brush, you'll want to apply the egg wash evenly across the surface of your shaped spiral logs. Start from the center and work your way outward, being careful not to let the mixture pool in any one area.
Don't forget to brush the sides and any exposed edges, as these areas will also benefit from the attractive glazed finish. If you notice any spots you've missed, it's better to catch them now rather than discovering pale patches after baking.
For the best results, you'll want to apply your egg wash just before putting your Curly Twirlies in the oven. This timing ensures that the wash won't dry out or become tacky, which could affect the final appearance of your baked goods.
Final Thoughts
Learning to make perfect Curly Twirlies isn't rocket science, but it does require attention to detail and practice. As you've discovered through this guide, mastering the art of these delightful pastries comes down to properly handling the dough, maintaining the right temperature, and executing precise rolling techniques.
You'll find that your skills improve with each batch you make, and don't be discouraged if your first attempts aren't picture-perfect. Remember to keep your workspace well-floured, your butter cold, and your rolling pin moving confidently.
The key to achieving those signature swirls lies in maintaining consistent pressure while rolling and following the proper chilling times between steps.
As you continue to perfect your technique, you'll develop an instinct for when the dough feels just right and how tightly to curl each pastry.
Don't forget that the final egg wash is crucial for that golden-brown finish that makes Curly Twirlies so irresistible. With these fundamentals in mind, you're well-equipped to create these beloved treats that will surely impress family and friends alike.