You've likely encountered classic stuffing with sage and onion at many holiday dinners, but have you ever considered its rich history and versatility? This timeless side dish has graced tables for generations, evolving from a simple way to use stale bread into a beloved culinary tradition. While the basic recipe remains constant, countless variations exist, each with its own unique twist. Whether you're a seasoned cook or a novice in the kitchen, understanding the essence of this dish can elevate your meal preparation and impress your guests. So, what makes this stuffing so special, and how can you perfect it?
Key Takeaways
- Classic stuffing combines bread cubes, sage, and onion, complementing roasted meats and offering a traditional flavor profile.
- Key ingredients include day-old bread, butter, onion, sage, and broth, baked at 350°F for optimal texture and taste.
- Sautéing onions in butter and mixing with bread and herbs creates the base, while broth adds moisture before baking.
- Baking involves an initial covered period, followed by uncovered baking for a crispy, golden-brown top.
- Allow the stuffing to rest briefly after baking to enhance flavor settling and ease portioning.
History
Stuffing has been around for centuries, dating back to ancient Roman times. Originally, it was used as a way to preserve meat and add flavor to poultry dishes. As culinary traditions evolved, stuffing became a standalone side dish, popular in various cultures around the world.
In medieval Europe, stuffing was often made with a mixture of herbs, spices, and bread, reflecting the ingredients available at the time. The practice of using sage in stuffing can be traced back to this period, as it was believed to have medicinal properties and was widely cultivated in herb gardens.
By the 16th century, stuffing had become a common feature in English cuisine, with recipes appearing in cookbooks of the era. The combination of sage and onion, which you'll find in the classic recipe, emerged as a favorite during this time.
As European settlers arrived in North America, they brought their stuffing traditions with them, adapting the recipes to incorporate local ingredients.
Today, stuffing remains a beloved side dish, particularly during holiday meals. While regional variations exist, the classic sage and onion stuffing continues to be a timeless favorite, cherished for its comforting flavors and nostalgic appeal.
Recipe
Classic stuffing is a beloved side dish that brings comfort and warmth to any meal. Its aromatic blend of sage and onion perfectly complements roasted meats, making it a staple during holiday feasts and family gatherings.
This simplified version of the traditional recipe uses only five key ingredients, allowing the essential flavors to shine through while maintaining the dish's beloved taste and texture. The combination of fresh bread, sage, onion, butter, and broth creates a harmonious balance that will satisfy even the most discerning palates.
- 8 cups (500g) day-old bread cubes
- 1 cup (240ml) chicken or vegetable broth
- 1/2 cup (115g) unsalted butter
- 1 large onion, finely chopped
- 2 tablespoons fresh sage, minced
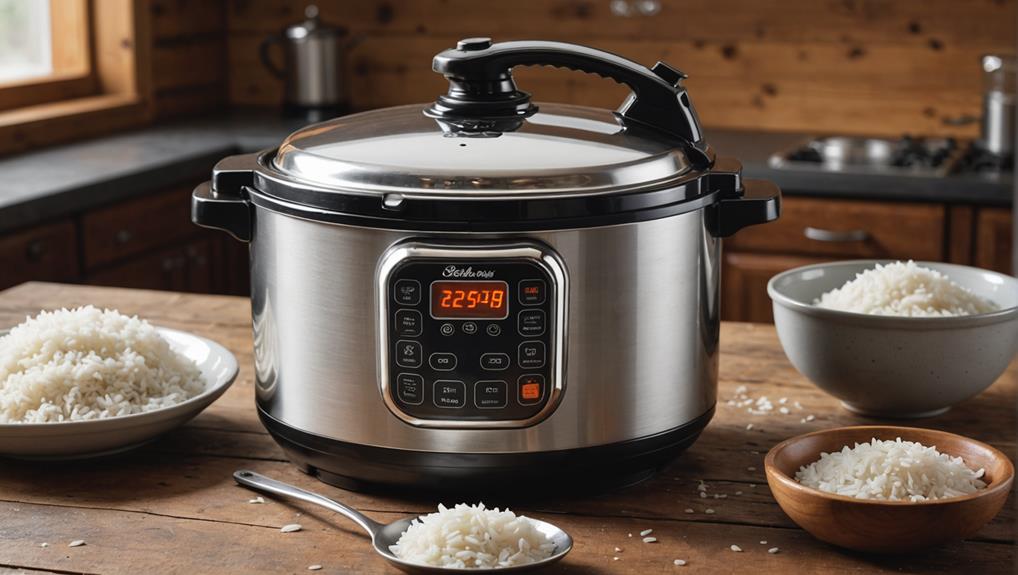
Preheat the oven to 350°F (175°C). In a large skillet, melt the butter over medium heat and sauté the chopped onion until translucent. Add the minced sage and cook for another minute.
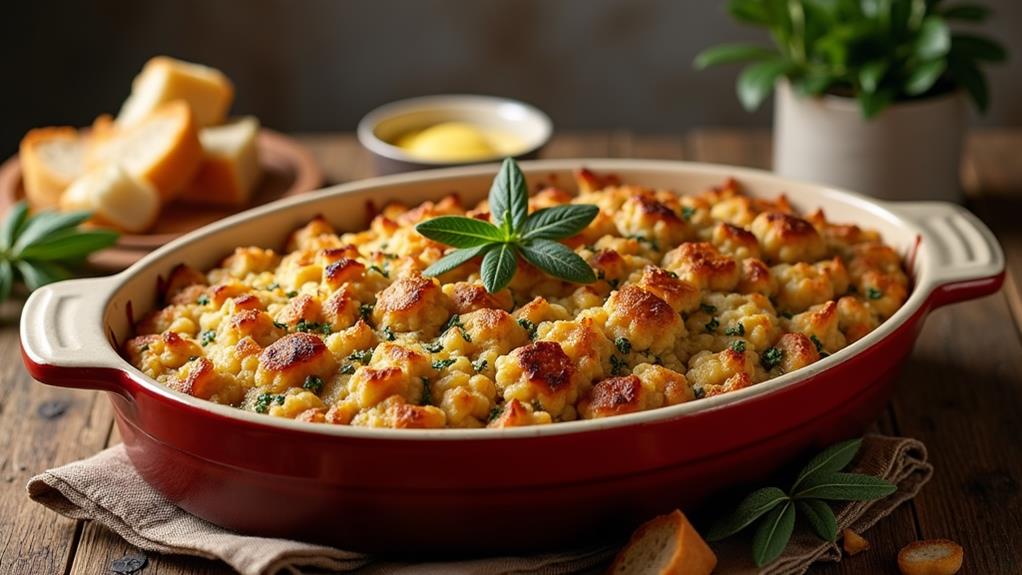
In a large bowl, combine the bread cubes with the onion-sage mixture. Gradually pour in the broth, stirring gently to ensure even distribution. Transfer the mixture to a greased baking dish and cover with foil. Bake for 30 minutes, then remove the foil and bake for an additional 15-20 minutes until the top is golden brown and crispy.
For best results, use day-old bread that has been left out to dry overnight. This helps the bread absorb the flavors more effectively and prevents the stuffing from becoming too soggy.
If you prefer a more moist stuffing, add extra broth gradually until you reach the desired consistency. Remember that the stuffing will continue to absorb liquid as it bakes, so it's better to err on the side of slightly drier before placing it in the oven.
Cooking Steps
Begin your culinary journey by preheating your oven to 350°F and melting butter in a skillet to sauté the onions until translucent.
Next, you'll combine the bread cubes with the onion-sage mixture, ensuring even distribution of flavors throughout.
Step 1. Preheat Oven to 350°F

Before you dive into preparing the ingredients, it's crucial to preheat your oven to 350°F (175°C). This step ensures that your oven reaches the optimal temperature for baking the stuffing, resulting in a perfectly cooked dish with a golden-brown crust and moist interior.
While your oven is heating up, you'll have time to gather and prepare the other ingredients. Don't rush this process, as a properly preheated oven is essential for even cooking.
If you're using an older oven, you might want to allow a few extra minutes for preheating, as it may take longer to reach the desired temperature. Some modern ovens have a preheat indicator, which will signal when the oven is ready.
If your oven doesn't have this feature, you can use an oven thermometer to ensure accuracy.
Step 2. Melt Butter, Sauté Onions
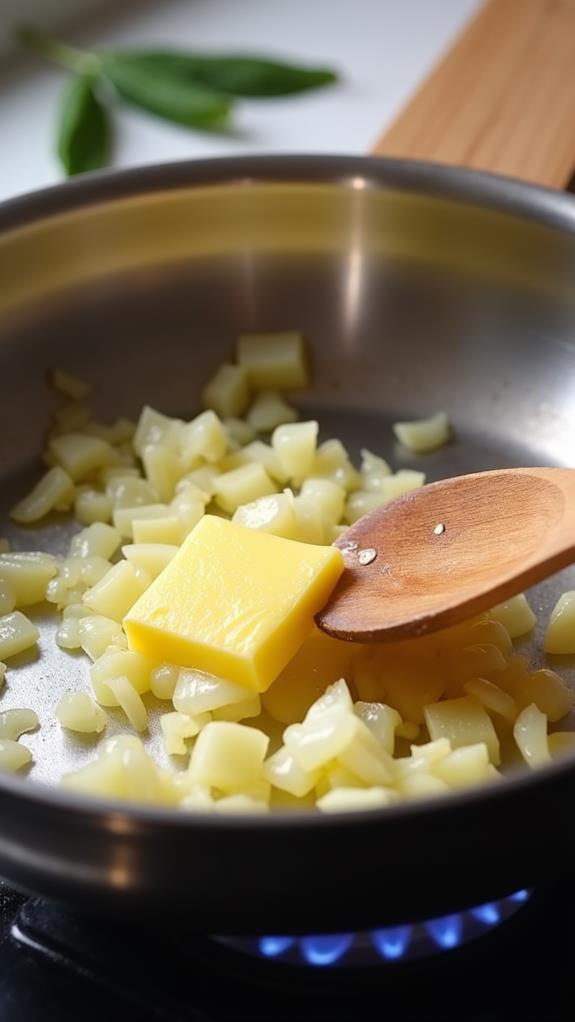
While the oven preheats, it's time to start cooking the aromatics.
Begin by placing a large skillet over medium heat and adding the 1/2 cup of unsalted butter. Allow the butter to melt completely, swirling the pan occasionally to ensure even distribution.
Once melted, add the finely chopped onion to the skillet. Stir the onions frequently, coating them with the melted butter.
Continue sautéing the onions until they become translucent and slightly golden, which should take about 5-7 minutes. You'll notice a sweet aroma filling your kitchen as the onions cook.
Next, add the minced fresh sage to the skillet. Stir the sage into the onions and cook for an additional minute. This brief cooking time will release the sage's essential oils, enhancing its flavor and aroma.
The combination of butter, onions, and sage creates a fragrant base for your stuffing, infusing it with rich, savory flavors.
Once the onions are soft and the sage is fragrant, remove the skillet from the heat. You're now ready to combine these aromatic ingredients with the bread cubes in the next step.
Step 3. Mix Bread With Onion-Sage
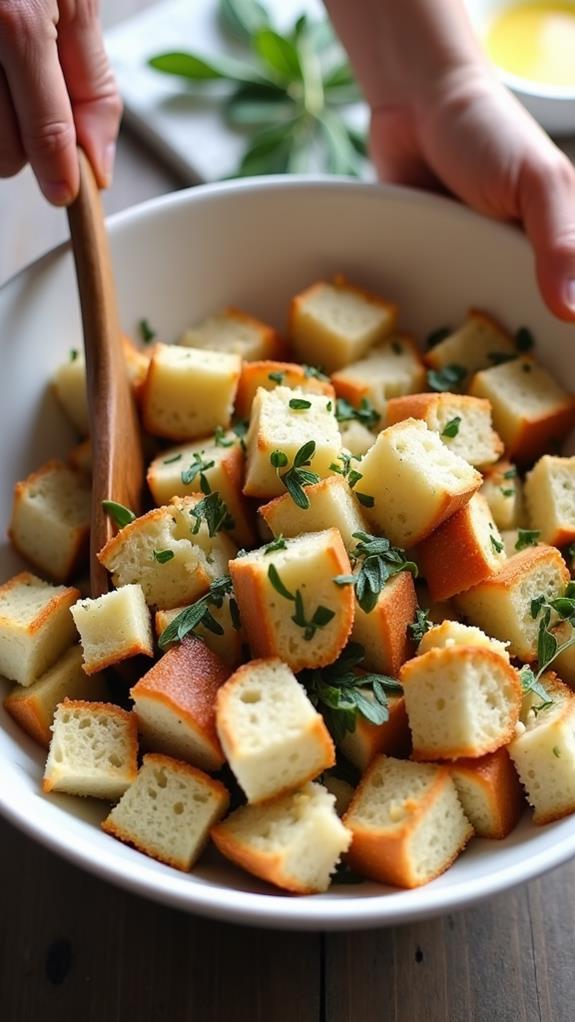
With your fragrant onion-sage mixture ready, it's time to combine it with the bread cubes. Grab a large mixing bowl and add the dried bread cubes. Pour the warm onion-sage mixture over the bread, making sure to scrape all the flavorful bits from the skillet.
Using a sturdy wooden spoon or your hands, gently fold the ingredients together, ensuring that the bread is evenly coated with the buttery, herb-infused mixture.
As you're mixing, gradually add the chicken or vegetable broth to the bowl. Start with about half the broth, stirring it in thoroughly. Continue adding small amounts of broth, mixing after each addition, until the bread is moist but not soggy.
You'll want the cubes to hold their shape while still being pliable. If you prefer a drier stuffing, use less broth; for a moister version, add more. Remember, the stuffing will absorb additional liquid during baking, so it's better to err on the side of slightly drier at this stage.
Once you've achieved the desired consistency, give the mixture a final toss to ensure all ingredients are well combined.
Step 4. Bake Covered for 30 Minutes
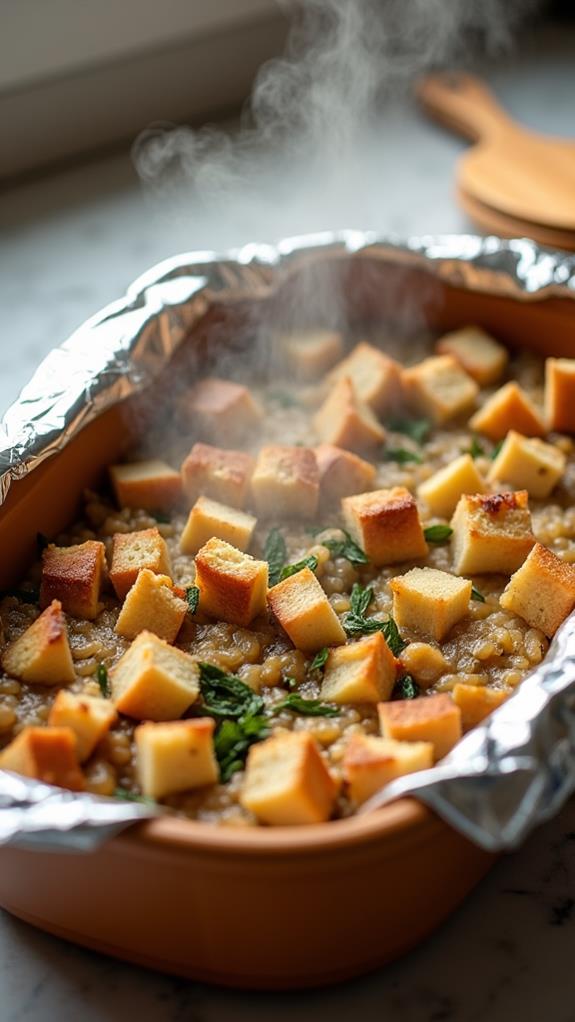
According to the recipe, you'll now need to transfer the stuffing mixture into a greased baking dish. Ensure that you've evenly distributed the mixture, pressing it down gently to create a uniform surface. This step is crucial for achieving consistent texture throughout the stuffing.
Next, cover the baking dish tightly with aluminum foil. This covering serves two important purposes: it traps moisture within the dish, preventing the stuffing from drying out, and it allows for even heat distribution during the initial baking phase. You'll want to make sure the foil is securely wrapped around the edges of the dish to create a proper seal.
Once your stuffing is prepared and covered, place it in the preheated oven. Set your timer for 30 minutes and allow the stuffing to bake undisturbed.
During this time, the flavors will meld together, and the bread will absorb the savory liquids, creating that classic stuffing texture you're aiming for. The covered baking process ensures that your stuffing cooks through without browning too quickly on top.
Step 5. Bake Uncovered Until Crispy
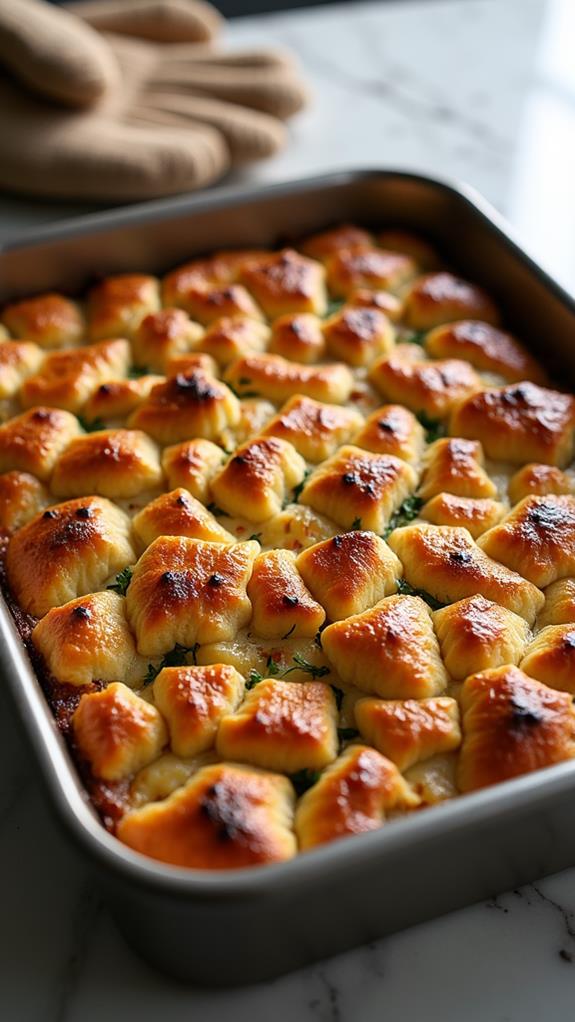
Removing the foil marks the beginning of the final baking phase. After 30 minutes of covered baking, you'll want to uncover the stuffing to achieve that perfect golden-brown crust. Carefully remove the foil, being mindful of the hot steam that may escape. The exposed surface will now begin to crisp up, creating a delightful contrast to the moist interior.
Continue baking for an additional 15-20 minutes, keeping a close eye on the color. You're looking for a rich, golden hue across the top. If you notice any areas browning too quickly, you can loosely cover them with small pieces of foil to prevent burning.
The stuffing is done when the top is crispy and the edges have pulled away slightly from the sides of the baking dish. To test for doneness, insert a knife into the center; it should come out clean and hot.
Once perfectly browned, remove the stuffing from the oven and let it rest for a few minutes before serving. This brief cooling period allows the flavors to settle and makes portioning easier.
Final Thoughts
While classic stuffing may seem simple, it's a dish that can elevate any meal.
The combination of sage, onion, and bread creates a comforting aroma that'll fill your kitchen and tantalize your taste buds.
Don't be afraid to experiment with different types of bread or herbs to put your own spin on this timeless recipe.
You'll find that even small changes can yield delightful results.