You've likely encountered countless dessert combinations, but cheesecake-stuffed strawberries offer something uniquely appealing. These bite-sized treats transform ordinary strawberries into sophisticated confections that blend the tartness of fresh berries with rich, creamy cheesecake filling. While they look impressively complex, you'll find they're surprisingly simple to prepare and don't require any baking. Whether you're hosting a gathering or simply want to elevate your dessert game, understanding the history and technique behind these elegant morsels will help you master this modern classic that's been captivating food enthusiasts since the early 2010s.
Key Takeaways
- Cheesecake-stuffed strawberries combine fresh berries with cream cheese filling and graham cracker crumbs for a no-bake, elegant dessert.
- Hollow out fresh strawberries using a knife or melon baller, then pipe in sweetened cream cheese mixture until filling peaks.
- Refrigerate filled strawberries for at least 30 minutes before serving to allow the filling to firm up properly.
- Best served within 24 hours of preparation and kept refrigerated until serving time to maintain freshness and texture.
- Garnish with graham cracker crumbs, chocolate shavings, or mint leaves for an attractive presentation at parties or gatherings.
History
Cheesecake-stuffed strawberries emerged as a modern twist on traditional cheesecake in the early 2010s, when food bloggers and home cooks began experimenting with creative ways to serve classic desserts in bite-sized portions.
You'll find that this innovative treat quickly gained popularity on social media platforms, where its visual appeal and simple preparation made it an instant hit among dessert enthusiasts.
The concept draws inspiration from both chocolate-covered strawberries, which have been popular since the 1960s, and the ancient origins of cheesecake itself, which dates back to Greece in the 5th century BCE.
You're essentially combining two timeless favorites into one contemporary creation. The addition of graham cracker crumbs as a garnish pays homage to the traditional cheesecake crust, which was first popularized in America during the mid-20th century.
While you might think this dessert is a completely new invention, similar filled fruit concepts have appeared throughout culinary history.
You can trace comparable recipes back to Victorian-era dinner parties, where stuffed fruits were considered elegant alternatives to heavy desserts, particularly during summer months when lighter fare was preferred.
Recipe
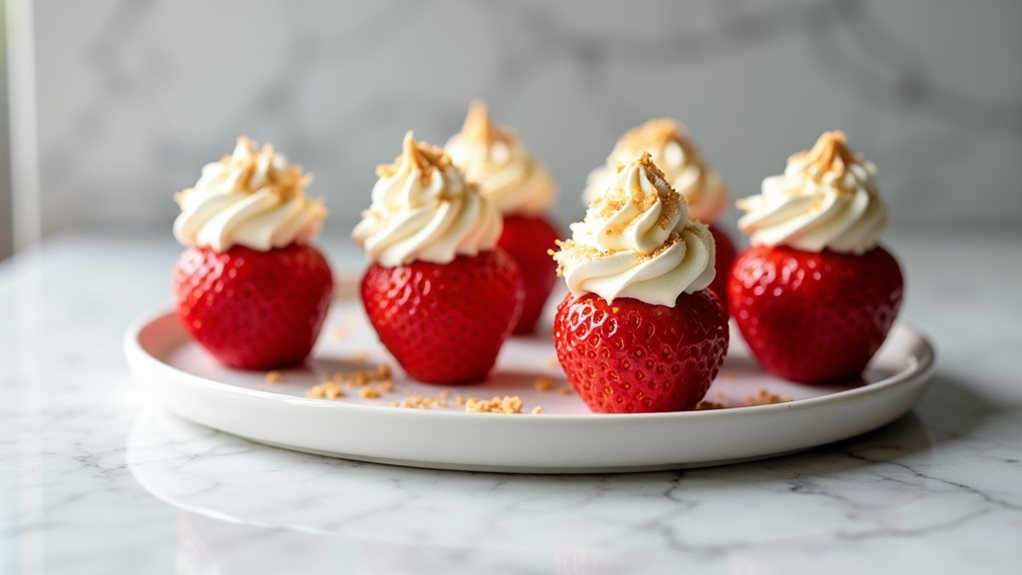
Cheesecake-stuffed strawberries transform ordinary berries into elegant, bite-sized desserts that perfectly balance fresh fruit with rich, creamy filling. These impressive treats capture the essence of classic cheesecake while keeping preparation simple and avoiding the need to bake.
This no-bake dessert combines the natural sweetness of fresh strawberries with a smooth cream cheese mixture, topped with a sprinkle of graham cracker crumbs for that authentic cheesecake experience. Perfect for parties, special occasions, or any time you want to serve something that looks sophisticated without spending hours in the kitchen.
Ingredients:
- 1 pound (450g) fresh strawberries (20-24 large berries)
- 8 oz (225g) cream cheese, softened
- 1/4 cup (50g) granulated sugar
- 1/2 cup (60g) crushed graham crackers
- 1 teaspoon (5ml) vanilla extract
Begin by washing and drying the strawberries thoroughly. Cut off the leafy tops and hollow out the center of each berry using a small paring knife or melon baller, creating a cavity for the filling.
In a mixing bowl, beat the softened cream cheese, sugar, and vanilla extract until smooth and creamy. Transfer the mixture to a piping bag fitted with a star tip. Pipe the filling generously into each strawberry cavity, creating a decorative swirl on top. Dip the filled portion into crushed graham crackers to coat. Refrigerate for at least 30 minutes before serving.
For best results, select large, firm strawberries that can stand upright independently, and ensure the cream cheese is completely softened to room temperature before mixing to avoid lumps.
If preparing in advance, store the hollowed strawberries and filling separately in the refrigerator, then assemble just before serving to maintain optimal freshness. The assembled treats will keep in the refrigerator for up to 24 hours, though they're best enjoyed within a few hours of preparation.
Cooking Steps
You'll want to begin by washing your strawberries thoroughly and carefully removing their tops with a sharp knife.
Next, beat your cream cheese mixture until it's perfectly smooth and fluffy, then transfer it to a piping bag fitted with a star tip for easy filling.
Finally, pipe the cream cheese mixture generously into each hollowed strawberry and top with a sprinkle of graham cracker crumbs for that classic cheesecake finish.
Step 1. Wash Strawberries Thoroughly
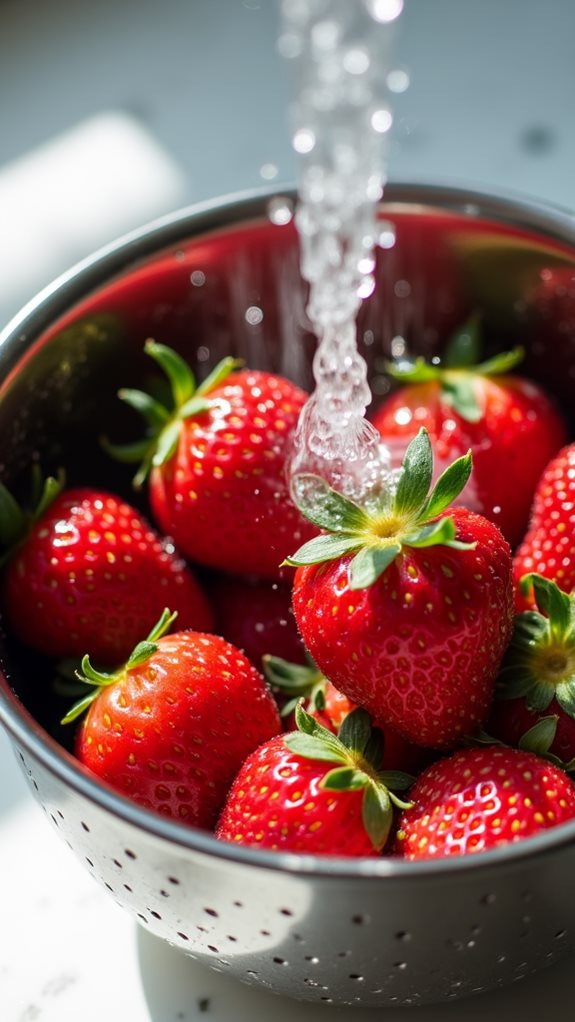
Before diving into any fruit preparation, properly cleaning your strawberries is essential for both food safety and optimal taste. You'll want to remove any dirt, pesticides, or contaminants that might be present on the berries' surface to ensure a safe and delicious final product.
Start by placing your strawberries in a colander and rinse them under cool running water, gently turning them to expose all surfaces to the water flow. Don't soak the berries, as this can make them waterlogged and affect their texture. Instead, use your fingers to carefully rub each berry's surface while rinsing, paying special attention to any crevices or indented areas where dirt might hide.
If you're concerned about pesticides, you can create a solution of three parts water to one part white vinegar for an initial soak, followed by a thorough rinse with clean water.
Once cleaned, place the strawberries on paper towels or a clean kitchen towel and pat them dry completely. You'll need the berries to be completely dry before cutting and filling them, as excess moisture can prevent the cheesecake filling from adhering properly to the fruit.
Step 2. Remove Strawberry Tops Carefully
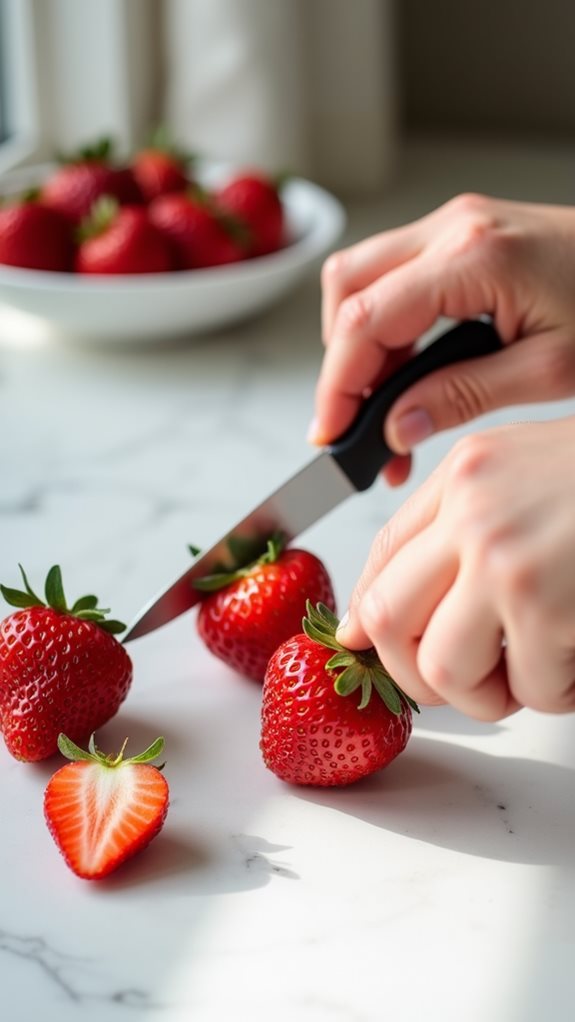
Once your strawberries are thoroughly dried, removing their tops properly sets the stage for creating perfect cheesecake-stuffed treats.
Using a sharp paring knife, slice across each strawberry at a slight angle, about 1/4 inch below the stem, creating a flat surface that will allow your berries to stand upright when filled.
Next, you'll need to create a cavity for the cheesecake filling.
Hold each strawberry firmly but gently, and insert the tip of your paring knife about halfway into the berry's center. Carefully rotate the strawberry while keeping the knife steady, or twist the knife while holding the berry still, to hollow out a cone-shaped cavity.
Don't cut too deeply or too close to the sides, as you'll want to maintain the structural integrity of the strawberry's walls. Remove any remaining white flesh from the center, ensuring there's enough space for a generous amount of filling.
If you're working with particularly large strawberries, you can use a small melon baller instead of a knife to create uniform cavities with less effort.
Step 3. Beat Cream Cheese Until Fluffy
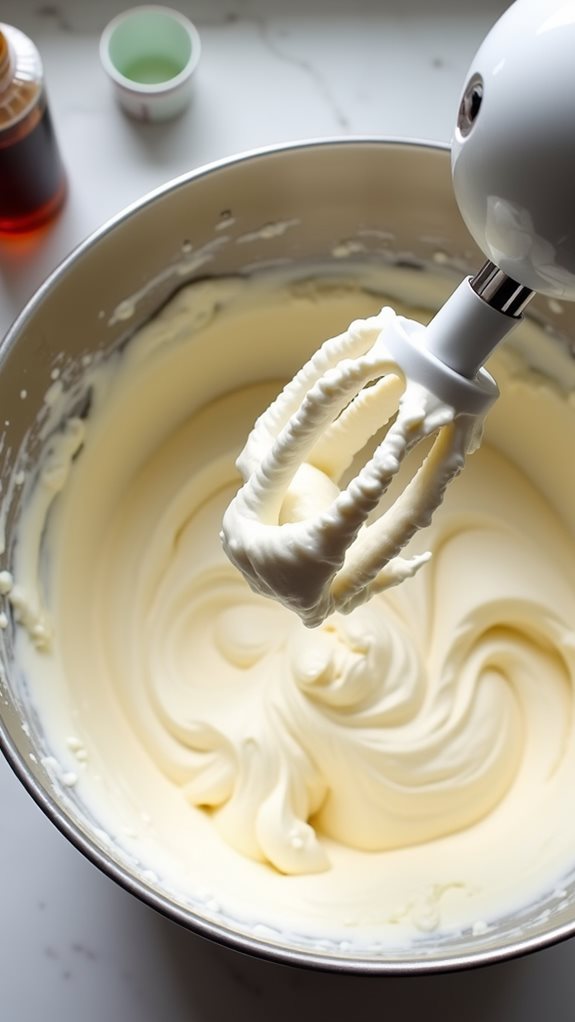
Creating the perfect cheesecake filling starts with properly beating the cream cheese until it reaches a light, fluffy consistency.
You'll want to begin with cream cheese that's completely softened to room temperature, which typically takes about an hour on your counter. This crucial step ensures you won't end up with stubborn lumps in your filling.
In a medium bowl, combine your softened cream cheese with the granulated sugar and vanilla extract. Using an electric mixer on medium speed, beat the mixture for 2-3 minutes, stopping occasionally to scrape down the sides of the bowl with a rubber spatula.
You'll notice the texture becoming increasingly smooth and airy as you continue beating. The filling is ready when it's completely lump-free and has a silky appearance that holds its shape when you lift the beaters.
Don't rush this process, as properly beaten cream cheese filling will pipe more easily into your strawberries and create a more luxurious mouthfeel.
If you see any remaining lumps, continue beating until they've disappeared completely, ensuring your finished dessert will have that professional-quality texture you're aiming for.
Step 4. Pipe Filling Into Berries
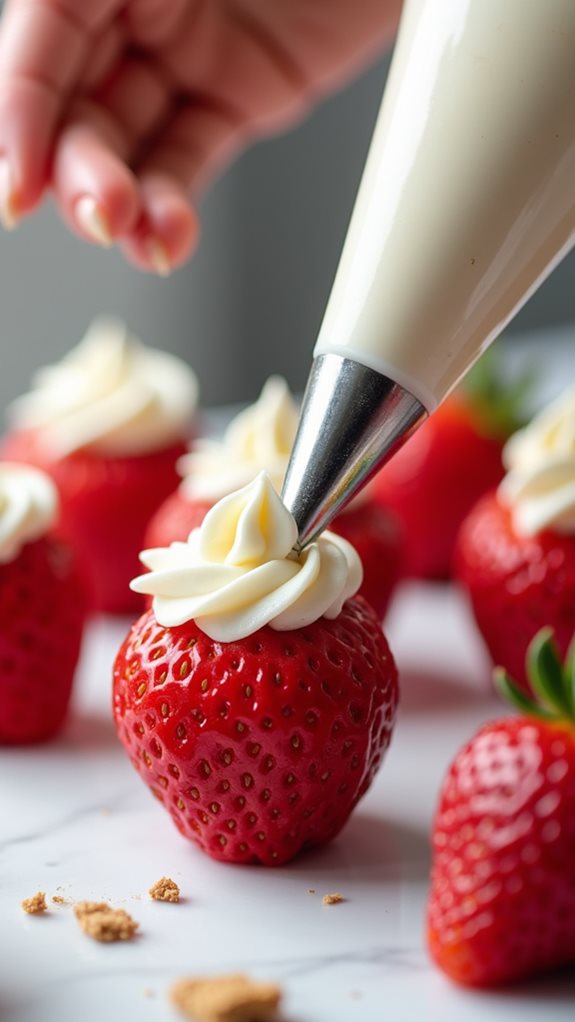
The piping process transforms your fluffy cream cheese mixture into elegant strawberry vessels. After transferring your sweetened cream cheese filling into a piping bag fitted with a star tip, you'll want to hold each berry firmly but gently in one hand while applying steady pressure to the bag with your other hand.
Start by inserting the piping tip into the hollowed cavity of each strawberry, positioning it near the bottom. As you squeeze the bag with consistent pressure, you'll see the filling gradually rise to fill the space. Continue piping until the cream cheese mixture creates a small, decorative peak above the berry's opening.
If you notice any air pockets forming, simply adjust your piping angle and continue filling. You'll know you've achieved the right amount when the filling is level with the top of the berry and creates an attractive swirl pattern.
For a professional finish, stop squeezing the bag before pulling the tip away, which prevents unwanted strands of filling from forming. Work systematically through your prepared berries, maintaining consistent pressure and fill levels for a uniform appearance that'll impress your guests.
Step 5. Garnish With Graham Cracker Crumbs
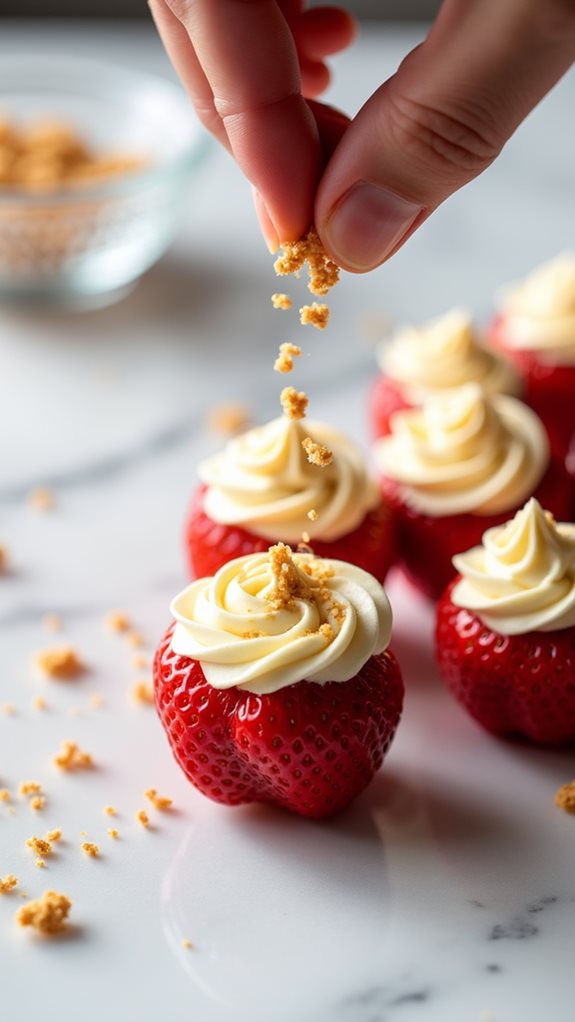
After piping the filling, your cheesecake-stuffed strawberries need their signature finishing touch – the graham cracker crumbs.
Pour your crushed graham crackers into a shallow dish, ensuring you've created a fine, even layer that'll easily adhere to the cream cheese filling. You'll want the crumbs to be relatively uniform in size, though a few larger pieces can add interesting texture.
Gently turn each filled strawberry upside down and dip the exposed cream cheese portion into the graham cracker crumbs, being careful not to press too hard. The crumbs should stick naturally to the filling, creating that classic cheesecake crust appearance.
If you notice any bare spots, you can carefully sprinkle additional crumbs over them. For extra precision, you can also use a small spoon to deposit crumbs exactly where you want them.
Once you've coated all your strawberries, arrange them on your serving platter, making sure they're standing upright. Remember to refrigerate them for at least 30 minutes before serving to allow the filling to firm up and the flavors to meld together perfectly.
Final Thoughts
Mastering cheesecake-stuffed strawberries will add an elegant yet simple dessert to your entertaining repertoire. You'll find that these bite-sized treats strike the perfect balance between sophistication and practicality, offering your guests the indulgent flavors of cheesecake without the fuss of baking a full-sized dessert.
When you're planning to serve these delightful treats, remember that timing is crucial. While you can prepare the components in advance, it's best to assemble them within a few hours of serving to maintain optimal freshness and texture.
You'll want to keep the filled strawberries refrigerated until just before presentation, as this helps the filling stay firm and ensures the berries remain crisp. Don't hesitate to experiment with variations, such as adding different extracts to the filling or trying alternative toppings like chocolate shavings or crushed nuts.
With practice, you'll develop an eye for selecting the best strawberries and perfecting your piping technique, making each batch more impressive than the last. These stuffed strawberries aren't just a dessert; they're a testament to your culinary creativity and attention to detail.