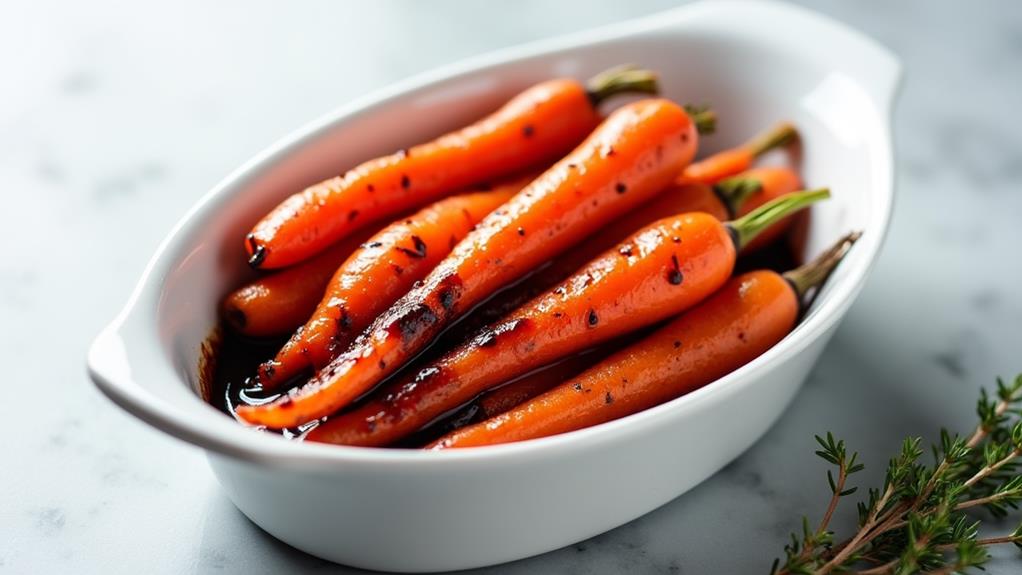
Like Cinderella's transformation at the ball, humble carrots can become the belle of the dinner table with a touch of balsamic magic. You've probably encountered these glossy, caramelized gems at upscale restaurants, but you don't need a fairy godmother to recreate them at home. The secret lies in the perfect balance of sweet and tangy flavors, coupled with a cooking method that brings out the carrots' natural sweetness. Whether you're aiming to impress guests or simply elevate your weeknight dinner, mastering this dish will add a touch of culinary sophistication to your repertoire. But there's more to these glazed beauties than meets the eye…
Key Takeaways
- Balsamic Glazed Carrots combine sweet carrots with tangy balsamic vinegar for a flavorful side dish.
- The dish requires minimal preparation and can be cooked in under 30 minutes.
- Key ingredients include carrots, balsamic vinegar, olive oil, butter, and honey.
- The cooking process involves sautéing carrots, then glazing them with a balsamic mixture.
- Careful monitoring of cooking time ensures carrots remain tender with a slight crunch.
History
The origins of balsamic glazed carrots can be traced back to the culinary traditions of Northern Italy, particularly the Modena and Reggio Emilia regions. These areas are renowned for their production of traditional balsamic vinegar, a key ingredient in this dish.
While the exact date of the recipe's creation isn't known, it's likely that the combination of carrots and balsamic vinegar emerged as cooks sought to enhance the natural sweetness of root vegetables.
You'll find that the use of balsamic vinegar in cooking dates back centuries, with its production methods carefully guarded and passed down through generations.
The pairing of this prized condiment with carrots probably developed as part of the farm-to-table ethos prevalent in Italian cuisine. Carrots, being a hardy and versatile vegetable, were often available year-round, making them an ideal canvas for experimentation.
As Italian cuisine spread globally, so did the practice of glazing vegetables with balsamic vinegar. The dish gained popularity in the late 20th century as international chefs embraced the complex flavors of balsamic and sought new ways to elevate simple ingredients.
Recipe
Balsamic Glazed Carrots are a delicious and elegant side dish that combines the natural sweetness of carrots with the rich, complex flavors of balsamic vinegar. This recipe transforms simple ingredients into a sophisticated accompaniment that complements a wide variety of main courses.
With just a handful of ingredients and minimal preparation, these glazed carrots can be on your table in under 30 minutes. The cooking process caramelizes the carrots and reduces the balsamic vinegar to create a glossy, flavorful coating that enhances the vegetable's natural taste.
- 1 pound (450g) carrots, peeled and cut into 2-inch pieces
- 2 tablespoons (30ml) olive oil
- 1/4 cup (60ml) balsamic vinegar
- 2 tablespoons (30g) butter
- 1 tablespoon (15g) honey
Heat olive oil in a large skillet over medium-high heat. Add the carrots and cook for about 10 minutes, stirring occasionally, until they begin to soften and caramelize.
Reduce heat to medium-low and add balsamic vinegar, butter, and honey. Stir to combine and continue cooking for another 5-7 minutes, or until the carrots are tender and the balsamic mixture has reduced to a syrupy glaze that coats the carrots.
For best results, choose carrots that are similar in size to ensure even cooking. If you prefer a stronger balsamic flavor, you can use a higher quality, aged balsamic vinegar.
Be careful not to overcook the carrots – they should be tender but still have a slight crunch. If the glaze becomes too thick before the carrots are done, you can add a tablespoon of water to thin it out.
Lastly, feel free to garnish with fresh herbs like parsley or thyme for added flavor and visual appeal.
Cooking Steps
To prepare these delicious Balsamic Glazed Carrots, you'll start by peeling and slicing the carrots into uniform pieces.
Next, you'll heat oil in a skillet and add the carrots, cooking them until they begin to soften and caramelize.
Step 1. Peel and Slice Carrots
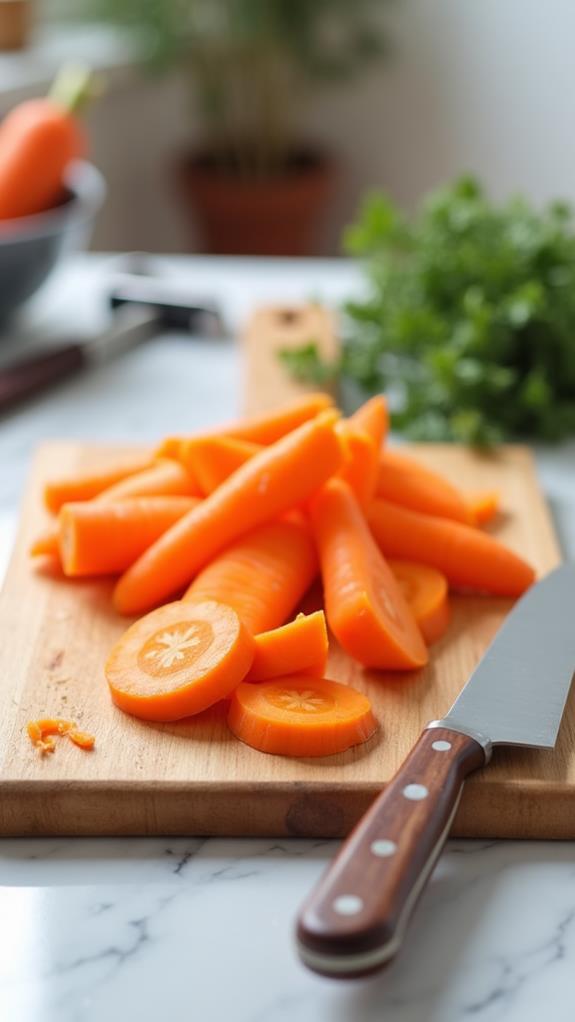
Ready to start preparing those delicious balsamic glazed carrots? First, you'll need to peel and slice your carrots. Begin by washing the carrots thoroughly under cool running water, scrubbing gently to remove any dirt or debris.
Once clean, use a vegetable peeler to remove the outer skin, starting from the thick end and working your way down to the tip. Hold the carrot firmly but gently to avoid injury.
After peeling, it's time to slice. Place the carrot on a cutting board and, using a sharp knife, cut off both ends. Then, slice the carrot diagonally into 2-inch pieces. This angled cut not only looks appealing but also helps the carrots cook evenly and absorb more of the delicious balsamic glaze.
If your carrots are particularly thick, you may want to halve them lengthwise before slicing to ensure uniform cooking. Remember, consistency in size is key for even cooking.
Once you've finished slicing, you'll have beautifully prepared carrots ready for the next step in creating your mouthwatering balsamic glazed side dish.
Step 2. Heat Oil in Skillet

With your carrots peeled and sliced, it's time to heat the oil in your skillet.
Place a large skillet on your stovetop and set the heat to medium-high. Pour two tablespoons of olive oil into the pan, allowing it to heat up for about a minute. You'll know the oil is ready when it starts to shimmer slightly.
While you're waiting for the oil to heat, give your carrots a final once-over to ensure they're evenly cut. This will help them cook uniformly.
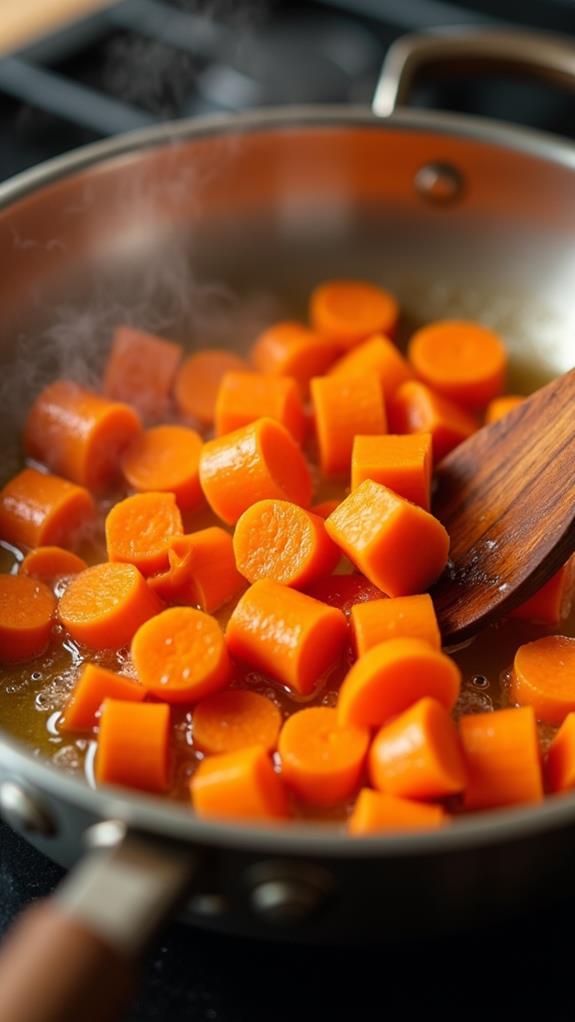
Once the oil is hot, carefully add your carrot pieces to the skillet. They should sizzle as they hit the oil. Using a wooden spoon or heat-resistant spatula, gently stir the carrots to coat them evenly with oil.
Allow the carrots to cook for about 10 minutes, stirring occasionally. You'll notice them beginning to soften and develop a golden-brown color as they caramelize.
This process enhances their natural sweetness and creates a beautiful base for the balsamic glaze you'll add later. Don't rush this step; proper caramelization is key to achieving the dish's signature flavor.
Step 3. Add Carrots and Cook
The star of the show is ready to take center stage. Once your skillet is hot and the oil is shimmering, it's time to add your prepared carrots.
Gently place the 2-inch carrot pieces into the pan, ensuring they're spread out in a single layer. You'll want to cook them for about 10 minutes, stirring occasionally to promote even caramelization.
As the carrots cook, you'll notice they begin to soften and develop a golden-brown color. This caramelization process is crucial, as it brings out the natural sweetness of the carrots and creates a delicious flavor base for your dish.
Keep a close eye on the heat; if you notice the carrots browning too quickly, reduce it slightly to prevent burning.
During this initial cooking phase, you're aiming for the carrots to become tender while still retaining a slight crunch. They shouldn't be fully cooked through at this point, as they'll continue to soften when you add the balsamic glaze.
Step 4. Add Balsamic Vinegar Mixture
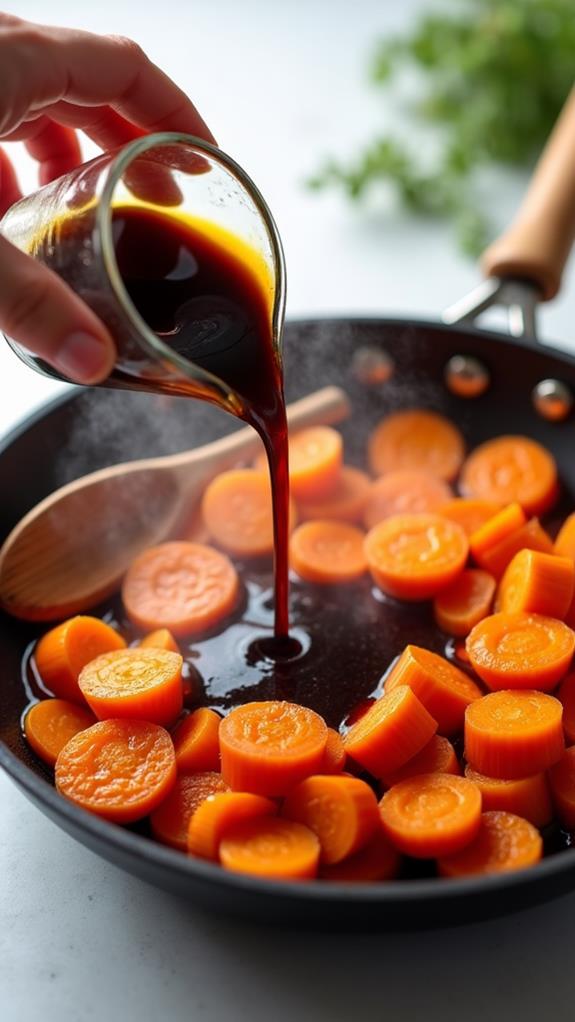
Having achieved a golden caramelization on your carrots, it's time to introduce the star flavors. Reduce the heat to medium-low, as you don't want to burn the delicate ingredients you're about to add.
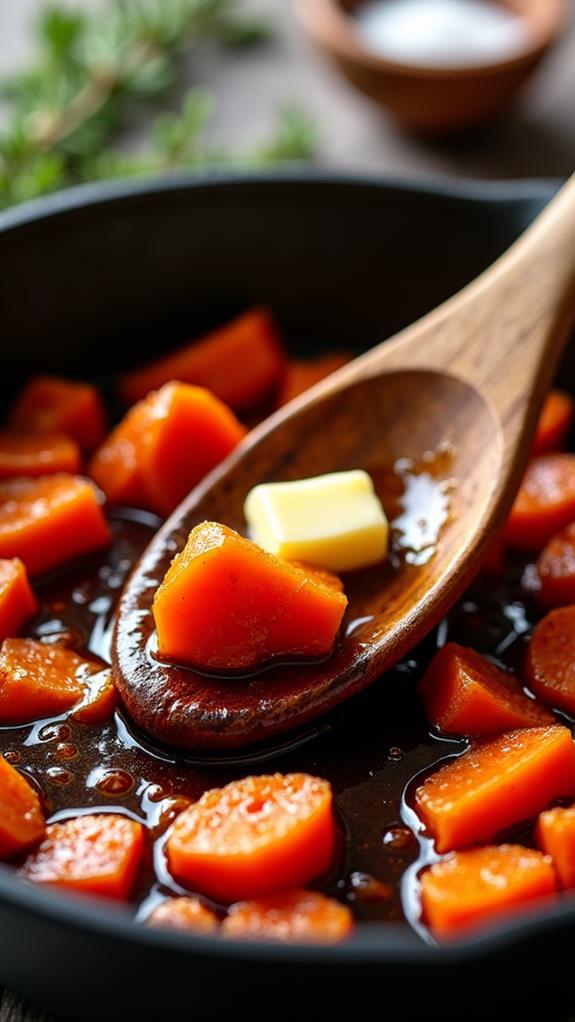
Carefully pour in the balsamic vinegar, watching for any splatters. Next, add the butter and honey to the pan. These three components will work together to create a luscious glaze that'll coat your carrots perfectly.
Gently stir the mixture to combine all the ingredients, ensuring the carrots are evenly coated. As you continue cooking, you'll notice the balsamic mixture starting to thicken. This process usually takes about 5-7 minutes, during which the carrots will continue to soften.
Keep a close eye on the pan, stirring occasionally to prevent sticking and ensure even cooking. The goal is to achieve tender carrots enrobed in a syrupy glaze. If you find the glaze reducing too quickly, don't hesitate to add a tablespoon of water to thin it out. This will give you more control over the final consistency of your balsamic glazed carrots.
Step 5. Adjust Seasoning to Taste
Seasoning adjustment marks the final crucial step in perfecting your balsamic glazed carrots. Once you've achieved the desired glaze consistency, it's time to fine-tune the flavors.
Taste the carrots and assess their balance of sweetness and acidity. If you find them too tart, add a touch more honey to counteract the balsamic vinegar's sharpness. Conversely, if they're overly sweet, a splash of additional balsamic vinegar will provide the necessary tang.
Don't forget to consider salt and pepper at this stage. A pinch of salt can enhance the overall flavor profile, while freshly ground black pepper adds a subtle warmth and complexity. Be cautious with these additions, as a little goes a long way.
Stir the carrots gently after each adjustment, allowing the flavors to meld before tasting again. Remember, you can always add more seasoning, but you can't take it away.
Once you've achieved the perfect balance, remove the skillet from heat. Your balsamic glazed carrots are now ready to serve, boasting a harmonious blend of flavors that will complement any main dish.
Final Thoughts
Three key takeaways make Balsamic Glazed Carrots a standout dish. First, the simplicity of ingredients and preparation allows the natural flavors to shine, creating a sophisticated side with minimal effort.
Second, the balance of sweet and tangy notes elevates the humble carrot to a gourmet level, appealing to a wide range of palates.
Third, the versatility of this dish makes it suitable for both casual family dinners and elegant dinner parties.
As you perfect your Balsamic Glazed Carrots, remember that timing is crucial. You'll want to achieve that perfect tenderness while maintaining a slight crunch, so keep a close eye on your carrots as they cook.
Don't be afraid to experiment with different varieties of carrots or balsamic vinegars to find your ideal flavor profile. The recipe's adaptability allows for personal touches, such as adding fresh herbs or a sprinkle of toasted nuts for extra texture.
With practice, you'll develop an intuitive understanding of how the ingredients interact, enabling you to create consistently delicious results that will impress your family and guests alike.