You might wonder if Halloween bark truly captures the essence of the spooky season. While it's a relatively recent addition to holiday treats, this festive confection has quickly become a staple at October gatherings. Its appeal lies not just in its ghoulish appearance, but in the versatility that allows for endless creativity. As you consider making your own Halloween bark, you'll find it's more than just a simple candy – it's a canvas for expressing your Halloween spirit. But what makes this treat so adaptable, and how can you elevate it beyond the ordinary?
Key Takeaways
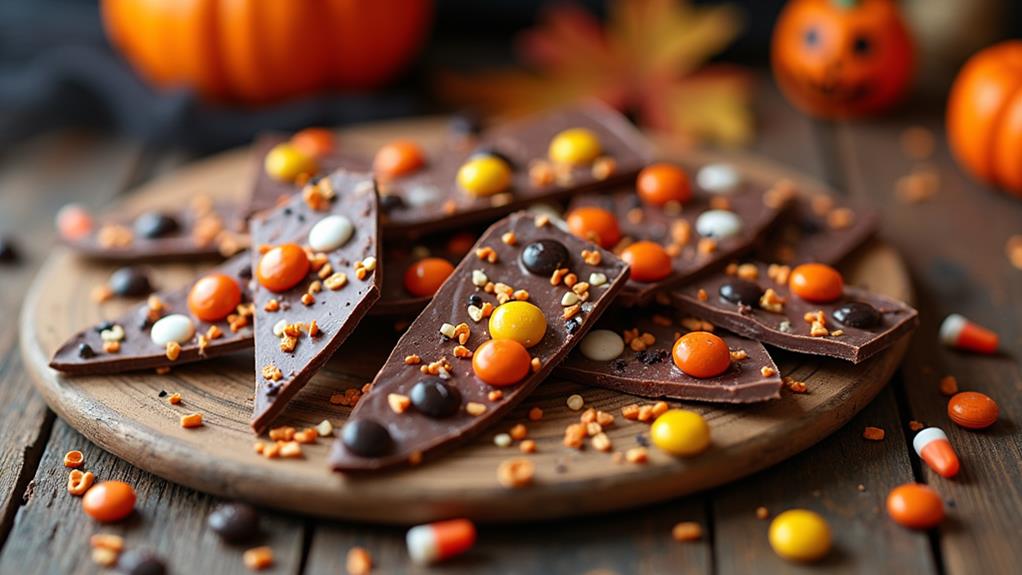
- Halloween bark combines chocolate with festive candies for a visually striking and customizable treat.
- Essential ingredients include chocolate chips, Halloween-themed candies, crushed pretzels, and sprinkles.
- The process involves melting chocolate, spreading it on parchment, adding toppings, and refrigerating until firm.
- Breaking the bark into irregular pieces creates unique patterns and adds charm to the homemade treat.
- Creative variations can include different chocolate types, unconventional toppings, and seasonal flavor combinations.
History
Tracing the origins of Halloween Bark reveals a relatively modern twist on traditional holiday treats. While chocolate bark itself has been around for decades, the Halloween-themed version gained popularity in the early 2000s as home cooks and food bloggers sought creative ways to celebrate the spooky season.
You'll find that Halloween Bark draws inspiration from classic confections like peppermint bark, which has been a Christmas staple since the mid-20th century. The concept of melting chocolate and adorning it with candies and other treats was adapted to suit the festive nature of Halloween. This adaptation allowed for the incorporation of iconic Halloween candies and colors, transforming a simple dessert into a visually striking and seasonally appropriate treat.
As social media platforms grew, Halloween Bark's popularity soared. Its eye-catching appearance made it perfect for sharing online, leading to countless variations and recipes.
Today, you'll see Halloween Bark featured in magazines, cookbooks, and on countless food blogs, cementing its place as a beloved Halloween tradition for many families and party hosts.
Recipe
Halloween Bark is a delightful treat that captures the essence of the spooky season. This easy-to-make confection combines rich chocolate with an array of colorful Halloween candies, creating a visually striking and tasty dessert. Perfect for parties, gift-giving, or simply enjoying while watching your favorite scary movies, Halloween Bark is sure to be a hit with both kids and adults alike.
With just a handful of ingredients and minimal prep time, you can create a festive treat that's as fun to make as it's to eat. The beauty of Halloween Bark lies in its versatility – you can customize it with your favorite candies, nuts, or even pretzels for added crunch. Whether you're a seasoned baker or a kitchen novice, this recipe is accessible and guaranteed to impress your friends and family during the Halloween season.
Ingredients:
- 2 cups (340g) chocolate chips (semi-sweet or milk)
- 1 cup (150g) Halloween-themed candies
- 1/2 cup (75g) crushed pretzels
- 1/2 cup (75g) sprinkles
- 1 teaspoon (5ml) coconut oil or vegetable shortening
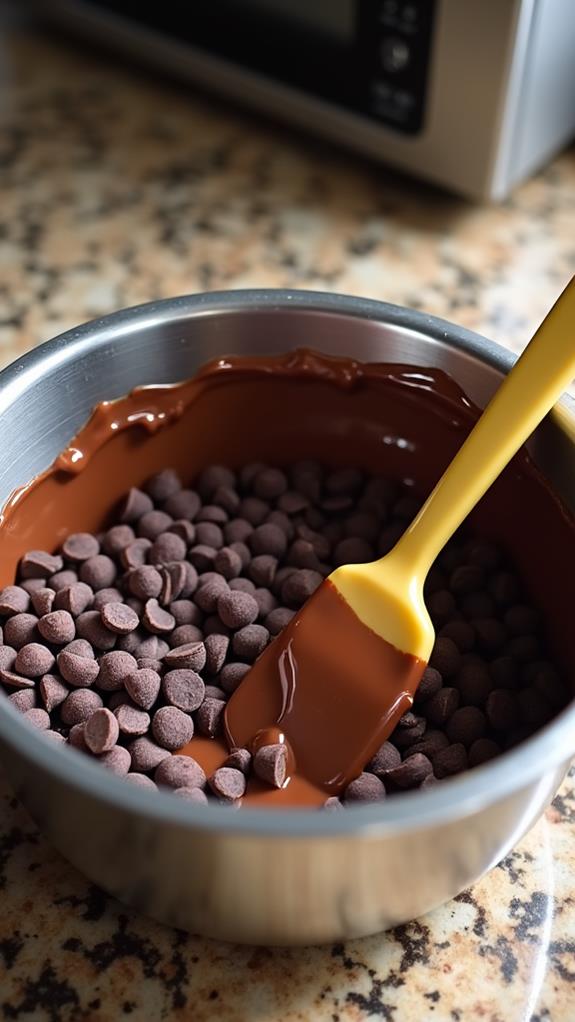
To make Halloween Bark, start by lining a baking sheet with parchment paper. In a microwave-safe bowl, combine the chocolate chips and coconut oil. Melt the mixture in the microwave, stirring every 30 seconds until smooth. Pour the melted chocolate onto the prepared baking sheet and spread it into an even layer.
Before the chocolate sets, sprinkle the crushed pretzels, candies, and sprinkles over the top, gently pressing them into the chocolate. Refrigerate for at least 30 minutes or until completely hardened, then break into pieces.
For best results, be careful not to overheat the chocolate when melting, as this can cause it to seize and become grainy. Always use dry utensils and bowls, as even a small amount of water can ruin the chocolate. Consider adding a pinch of sea salt on top of the bark before it sets for a delightful sweet and salty combination.
If you want to add more texture and flavor, try mixing in your favorite nuts or seeds. Remember, the key to great Halloween Bark is creativity, so don't be afraid to experiment with different toppings and flavor combinations!
Cooking Steps
To make Halloween Bark, you'll start by melting chocolate with a small amount of oil, then pour the smooth mixture onto a parchment-lined baking sheet.
Once you've spread the chocolate evenly, you'll quickly add your chosen Halloween-themed toppings, pressing them gently into the surface.
After chilling the bark in the refrigerator until it's completely hardened, you'll break it into pieces, creating a festive treat perfect for sharing or enjoying on your own.
Step 1. Melt Chocolate With Oil
Let's kick off the Halloween Bark-making process by melting the chocolate.
You'll need a microwave-safe bowl to combine your chocolate chips with the coconut oil or vegetable shortening. This addition of oil is crucial, as it helps create a smoother consistency and prevents the chocolate from becoming too brittle when it sets.
Start by microwaving the mixture in 30-second intervals, stirring thoroughly between each round. This method ensures even heating and prevents the chocolate from burning or seizing.
You'll notice the chocolate starting to melt and become glossy. Continue this process until you've achieved a completely smooth, lump-free consistency.
Be cautious not to overheat the chocolate, as this can alter its texture and flavor. If you're using different types of chocolate, such as dark and white, melt them separately to maintain their distinct colors.
Once your chocolate is perfectly melted and silky, you're ready to pour it onto your prepared baking sheet and start creating your Halloween Bark masterpiece.
Step 2. Pour Chocolate Onto Parchment
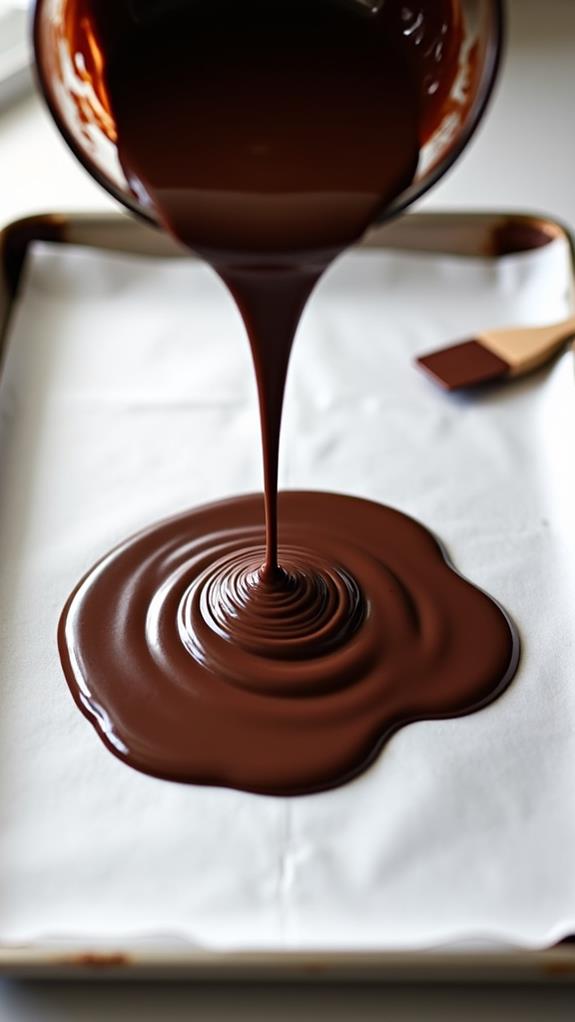
The next crucial step in creating your Halloween Bark is pouring the melted chocolate onto parchment paper. You'll want to ensure you've lined a baking sheet with parchment paper before you begin this process.
Once your chocolate is fully melted and smooth, carefully pour it onto the prepared sheet. Using a spatula or the back of a spoon, spread the chocolate into an even layer across the parchment. Aim for a thickness of about 1/4 inch to ensure your bark isn't too thin or fragile.
As you spread the chocolate, work quickly but carefully to create a uniform layer. The edges don't need to be perfectly straight; a slightly rustic appearance adds to the charm of homemade bark.
If you notice any air bubbles forming, gently tap the baking sheet on the counter to release them. This step is crucial as it forms the base of your Halloween Bark, so take your time to get it right.
Step 3. Add Halloween Toppings
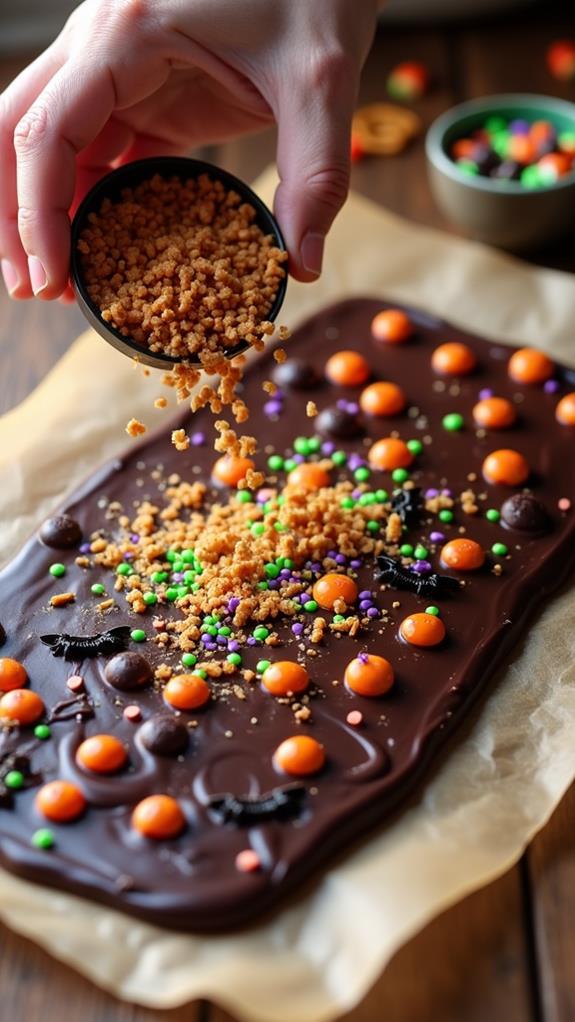
While the chocolate is still wet, it's time to add your festive Halloween toppings.
Start by sprinkling the crushed pretzels evenly across the surface of the melted chocolate. These will add a delightful crunch and a hint of saltiness to contrast with the sweetness.
Next, distribute your Halloween-themed candies, such as candy corn, gummy worms, or chocolate-covered raisins, across the bark. Don't be afraid to get creative and use a variety of shapes and colors to make your bark visually exciting.
After adding the candies, sprinkle your chosen Halloween-themed sprinkles over the entire surface. These tiny decorations will fill in any gaps and add extra bursts of color.
To ensure all toppings adhere properly, gently press them into the chocolate using the back of a spoon or your clean hands. Be careful not to push too hard, as you don't want to completely submerge the toppings.
Remember, the goal is to create a festive, eye-catching surface that's both delicious and visually appealing.
Once you're satisfied with the arrangement of your toppings, it's time to let the bark set.
Step 4. Refrigerate Until Chocolate Hardens
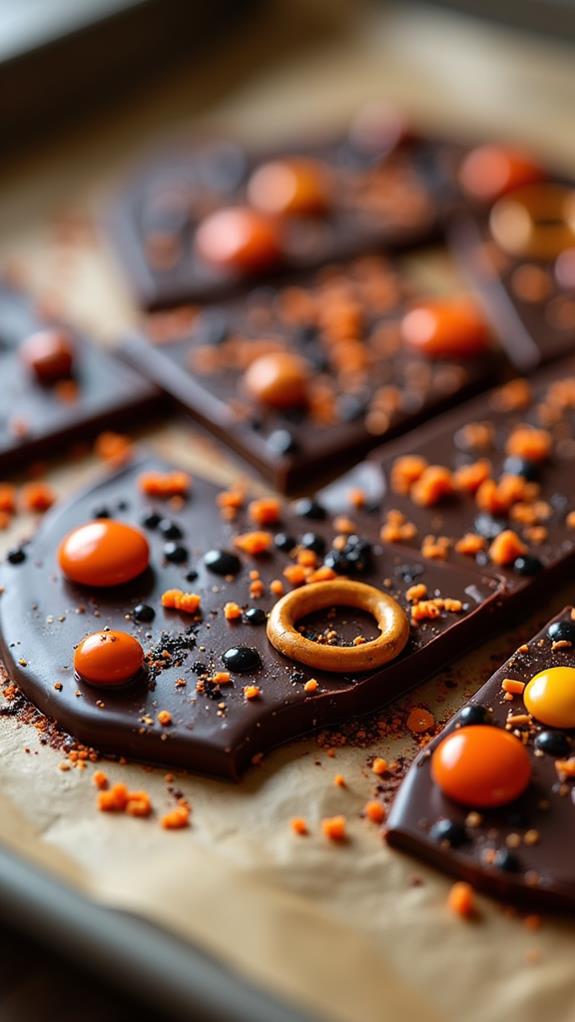
After adding all your festive toppings, it's time to let your Halloween bark set up. Carefully transfer your baking sheet to the refrigerator, ensuring it's level to prevent the chocolate from pooling to one side.
You'll want to refrigerate the bark for at least 30 minutes, though an hour is ideal for achieving the perfect consistency. During this time, the chocolate will gradually harden, encasing your chosen toppings in a solid, glossy base.
While waiting, resist the temptation to check on your creation too frequently. Opening the refrigerator door can introduce warm air, potentially affecting the setting process.
Once the allotted time has passed, gently touch the surface of the bark to test its firmness. It should feel completely solid and cool to the touch. If it's still soft or sticky, return it to the refrigerator for additional time.
When fully set, you'll notice the bark has a matte finish and makes a distinct sound when tapped. At this point, you're ready to remove it from the refrigerator and break it into pieces for serving or packaging.
Step 5. Break Into Pieces
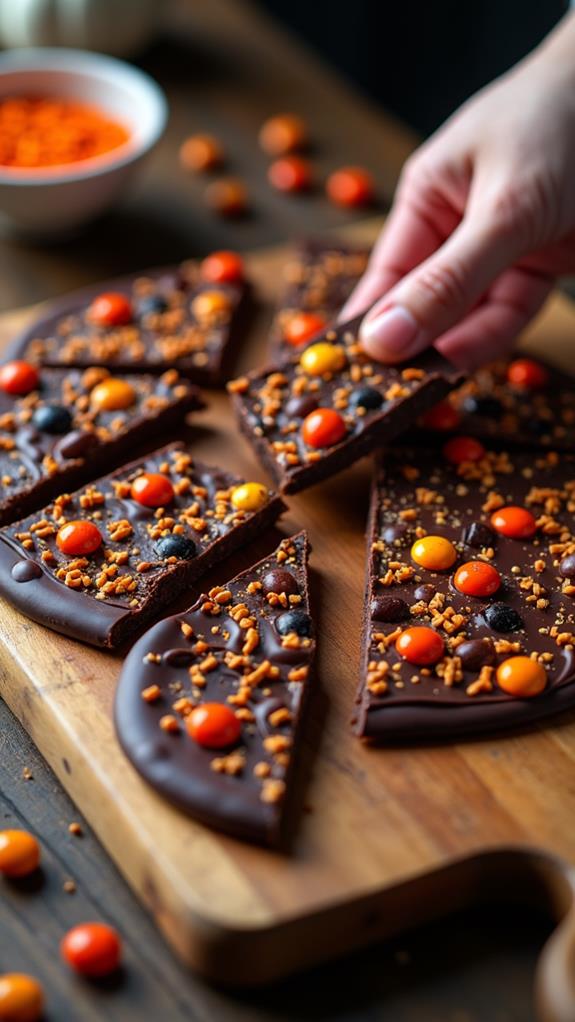
Once your Halloween bark has fully hardened, it's time for the most satisfying step: breaking it into pieces.
Remove the bark from the refrigerator and let it sit at room temperature for a few minutes. This will prevent the chocolate from shattering too much when you break it. Carefully lift the parchment paper with the bark and place it on a clean, flat surface.
Starting from one corner, begin to crack the bark into irregular pieces. You can use your hands or a knife to guide the breaks, aiming for pieces that are roughly 2-3 inches in size.
As you break the bark, you'll notice how the candies and toppings create unique patterns on each piece. Don't worry if some pieces are larger or smaller; the variety adds to the charm of homemade bark.
If you encounter any stubborn sections, use a sharp knife to score the surface before breaking.
Once you've broken all the bark, arrange the pieces on a serving platter or in gift bags. Remember to store any leftovers in an airtight container to maintain freshness.
Final Thoughts
With Halloween Bark, you've got a versatile treat that's sure to impress.
It's not just a delicious snack; it's a canvas for your creativity. You can experiment with different types of chocolate, from dark to white, or even create layers for a marbled effect.
Don't hesitate to mix up your toppings, too. While candy corn and gummy worms are classic choices, you might try crushed cookies, dried fruit, or even edible glitter for extra sparkle.