You've likely encountered chocolate truffles before, but the artisanal Chocolate Truffle Egg Box takes this confectionery classic to new heights. While traditional truffles charm with their spherical shape, these egg-shaped delicacies offer a unique twist that's become synonymous with luxury Easter celebrations. Since their inception in the early 1900s, master chocolatiers have perfected the balance between the silky ganache center and the thin, expertly tempered chocolate shell. What sets these coveted treats apart isn't just their shape or presentation – it's a fascinating story of innovation that begins in Europe's finest chocolate houses.
Key Takeaways
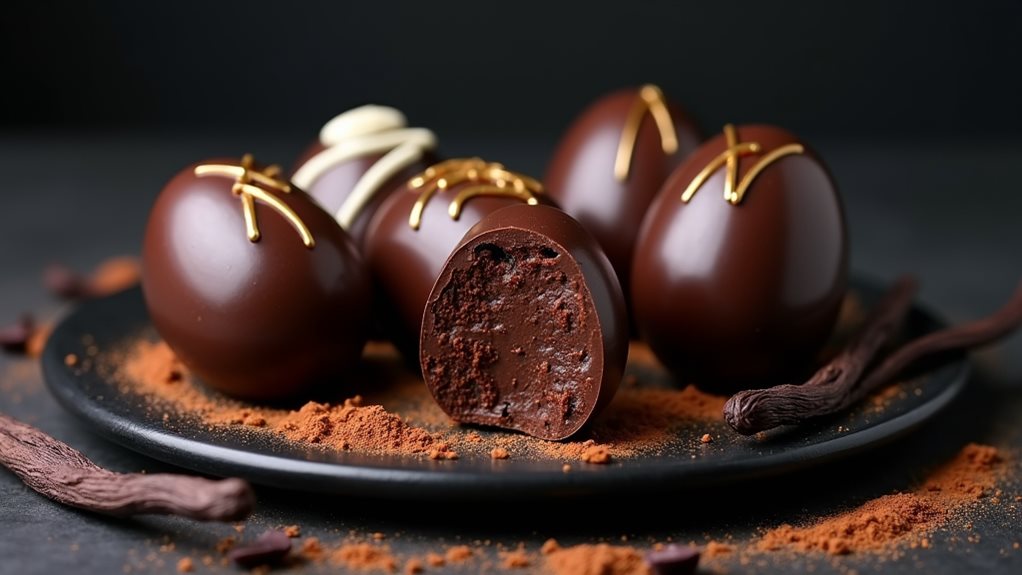
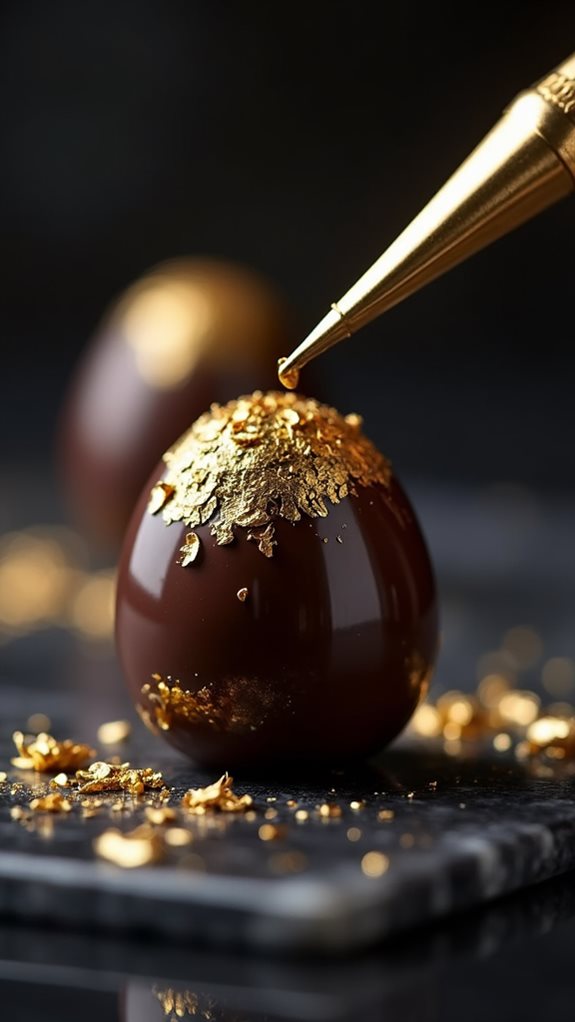
- Chocolate truffle egg boxes contain handcrafted eggs with ganache centers enrobed in tempered chocolate, often decorated with edible gold leaf.
- Each egg is carefully placed in specialized box compartments designed to protect the delicate chocolate shells during presentation and transport.
- Premium dark chocolate must be tempered between 88°F and 90°F to achieve the perfect glossy finish for truffle eggs.
- The tradition began in early 1900s Europe, with Swiss and Belgian chocolatiers creating elegant Easter presentations in decorative boxes.
- High-quality satin or grosgrain ribbons complete the presentation, wrapped precisely with 45-degree angle cuts to prevent fraying.
History
The chocolate truffle egg box emerged in the early 1900s when European chocolatiers began crafting egg-shaped confections for Easter celebrations.
You'll find that Swiss and Belgian artisans were particularly influential in developing these elegant presentations, combining their expertise in chocolate-making with innovative packaging designs.
In the 1920s, you'd have seen the first specialized boxes featuring individual compartments designed to protect these delicate treats.
The practice gained momentum when luxury chocolate houses like Godiva and Leonidas started creating signature collections that showcased their finest truffle eggs.
By the 1950s, you could purchase these artistic confections in department stores across Europe and America.
Today, you can trace the evolution of chocolate truffle egg boxes through their increasingly sophisticated designs and packaging materials.
Modern versions often include temperature-controlled insulation and protective layers that preserve the integrity of each piece.
You'll notice that contemporary chocolatiers have maintained many traditional aspects while incorporating new elements, such as sustainable packaging materials and innovative opening mechanisms that enhance the presentation experience.
Recipe
Chocolate truffle eggs are a delightful confection that combines the rich, velvety texture of traditional chocolate truffles with a festive egg shape perfect for Easter celebrations or special occasions.
These handcrafted treats feature a smooth ganache center enrobed in tempered chocolate, creating a professional finish that rivals artisanal chocolates.
Making chocolate truffle eggs at home allows you to experiment with various flavors and decorative techniques while maintaining the highest quality ingredients. The process involves creating a silky ganache, allowing it to set, forming egg shapes, and finally coating them in a protective shell of tempered chocolate that provides the characteristic snap when bitten.
Ingredients:
- 16 oz dark chocolate (60-70% cocoa), divided (450g)
- 1 cup heavy cream (240ml)
- 3 tablespoons unsalted butter (45g)
- 1 teaspoon vanilla extract (5ml)
- ¼ cup cocoa powder for dusting (30g)
- 2 tablespoons coconut oil (30ml)
Working with a double boiler, heat 10 ounces of the chocolate with heavy cream and butter until smooth.
Remove from heat and stir in vanilla extract. Let the mixture cool to room temperature, then refrigerate for 2-3 hours until firm enough to handle.
Shape the ganache into egg forms and freeze for 30 minutes. Meanwhile, temper the remaining chocolate with coconut oil.
Dip each frozen ganache egg into the tempered chocolate, allowing excess to drip off. Place on parchment paper to set at room temperature.
For best results, keep your working environment cool (around 68°F/20°C) and handle the ganache quickly to prevent melting.
If the ganache becomes too soft during shaping, return it to the refrigerator for 15 minutes.
When coating the eggs, ensure the ganache centers are thoroughly frozen and the tempered chocolate is at precisely 88-90°F (31-32°C) for dark chocolate to achieve the perfect shine and snap.
Cooking Steps
To create these elegant chocolate truffle eggs, you'll start by carefully melting premium dark chocolate blocks over a double boiler until smooth.
Then shape the tempered chocolate into delicate egg shells using polycarbonate molds.
Once set, you'll fill each shell with a rich cream ganache, seal them closed, and embellish with touches of edible gold leaf for a luxurious finish.
For the final presentation, you'll arrange your handcrafted eggs in a custom box, securing it with coordinating ribbons that complement the sophisticated design.
Step 1. Melting Dark Chocolate Blocks
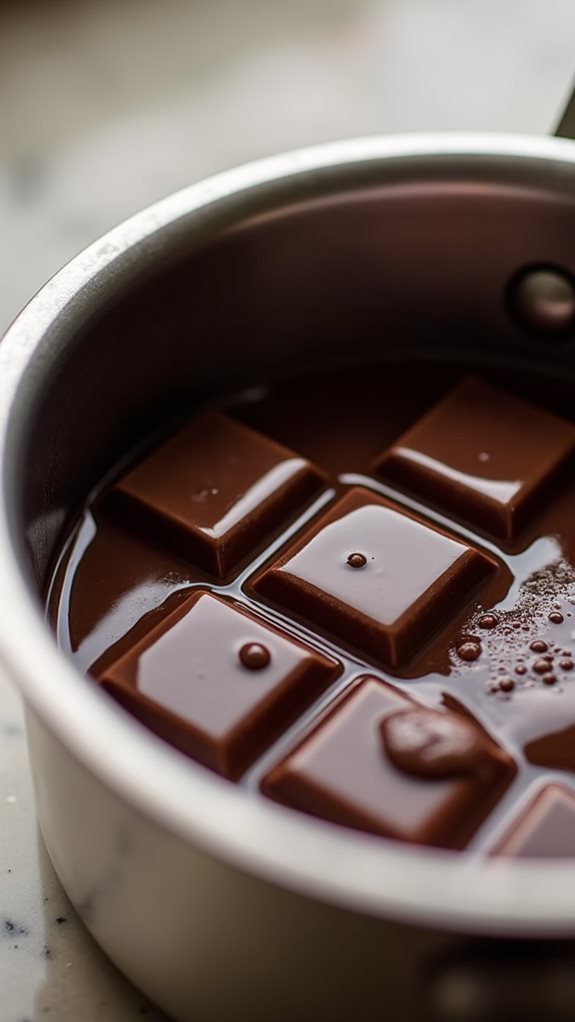
Properly melting dark chocolate blocks requires careful attention to temperature and technique. You'll want to start by chopping your dark chocolate into uniform, small pieces to ensure even melting.
Using a double boiler setup, fill the bottom pan with about two inches of water, making sure it won't touch the upper bowl when assembled. Place your chopped chocolate in the top bowl and heat the water until it's simmering, not boiling.
You'll need to keep the chocolate's temperature between 88°F and 90°F for optimal results. Stir the chocolate gently with a rubber spatula, being careful not to incorporate air bubbles. If you notice any steam rising from the water, reduce the heat immediately, as moisture can cause your chocolate to seize.
Once most of the chocolate has melted, remove the bowl from heat while continuing to stir. You'll know it's ready when the mixture is completely smooth and glossy.
Don't rush this process – proper tempering typically takes 15-20 minutes. If you're using a thermometer, you'll want to avoid exceeding 91°F, as this can affect the chocolate's texture and shine.
Step 2. Adding Cream Ganache Filling
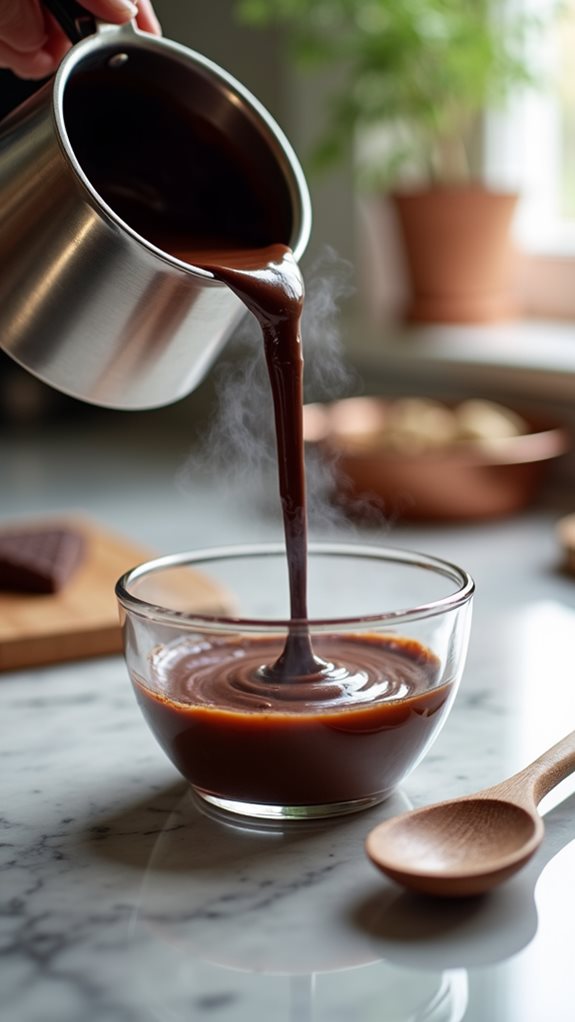
Making the cream ganache filling begins with heating heavy cream in a saucepan until it reaches a gentle simmer. You'll need to carefully monitor the temperature, ensuring it doesn't boil over, while stirring occasionally to prevent a skin from forming on top.
Once you've achieved the right temperature, remove the pan from heat immediately.
Pour the heated cream over your pre-chopped dark chocolate, making sure all pieces are fully submerged, and let it stand for 2-3 minutes.
You'll want to gently stir the mixture with a rubber spatula, starting from the center and working outward in small circles, until you've created a smooth, glossy emulsion. If you notice any remaining chocolate pieces, continue stirring until they're completely incorporated.
For the perfect truffle consistency, you'll need to let your ganache cool at room temperature for about 30 minutes, stirring occasionally.
Once it's reached a pipeable texture that's firm but not solid, transfer it to a piping bag fitted with a small round tip.
You're now ready to fill your chocolate egg shells, being careful not to overfill them.
Step 3. Shaping Chocolate Egg Shells
The essential first step in shaping chocolate egg shells requires tempering your chocolate to 88-90°F (31-32°C) for dark chocolate or 86-87°F (30-31°C) for milk chocolate.
Once you've achieved the proper temperature, brush a thin layer of chocolate inside each cavity of your egg mold, ensuring complete coverage without any gaps or thin spots.
Allow the first layer to set for 3-5 minutes until it's nearly firm, then apply a second coat to strengthen the shell. You'll want to build up 2-3 layers total, making sure each layer sets before adding the next.
While applying the chocolate, tilt and rotate your mold to distribute it evenly and prevent pooling. Once you've completed the final layer, refrigerate the mold for 10-15 minutes until the chocolate contracts slightly from the sides.
To release the shells, gently flex the mold and tap it against your work surface. If you've tempered correctly, your eggs should have a satisfying snap and glossy finish.
Before filling, trim any uneven edges with a warm knife to ensure your egg halves will fit together seamlessly.
Step 4. Adding Gold Leaf Decoration
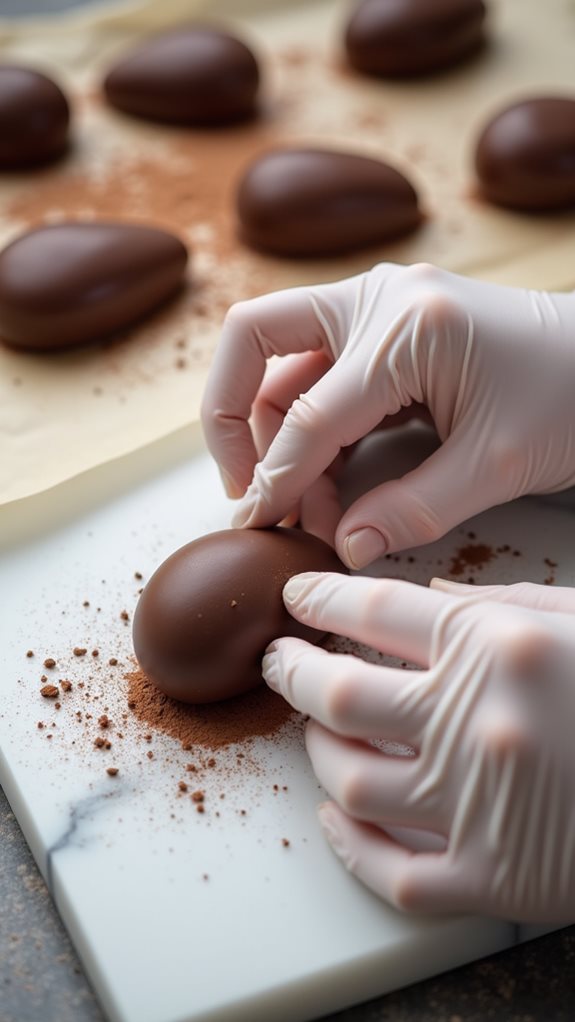
Stunning gold leaf decoration requires starting with completely set chocolate eggs at room temperature. You'll need to wear clean, lint-free cotton gloves to prevent fingerprints from marring your work surface, and ensure your workspace is free from drafts that could scatter the delicate gold leaf.
Begin by gently brushing the areas where you'd like to apply gold leaf with a small amount of edible adhesive, using a fine-tipped food-safe brush. Once the adhesive becomes tacky, carefully lift a sheet of gold leaf using your special gilding brush and position it over the designated area.
Don't worry if the leaf tears slightly, as you can blend multiple pieces together. Press the gold leaf onto the chocolate's surface with gentle, sweeping motions, working from the center outward.
After applying the gold leaf, use a clean, dry brush to remove any excess pieces, saving them for future use. You can create various patterns by applying the leaf in strategic places or using stencils for more precise designs.
Allow the decorated eggs to rest for 15 minutes before handling them to ensure the gold leaf has properly adhered to the surface.
Step 5. Securing Box With Ribbons
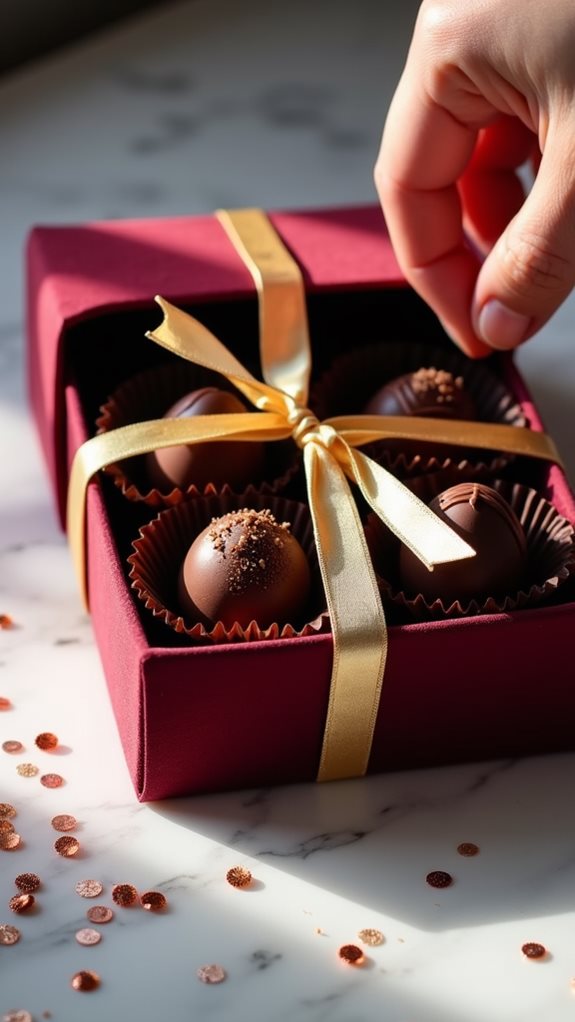
Once your gilded chocolate eggs have fully set, proper presentation demands careful attention to ribbon work.
You'll want to select a high-quality satin or grosgrain ribbon that's at least 1 inch wide, choosing colors that complement your box's design and the occasion.
Begin by measuring two lengths of ribbon that'll wrap completely around your box, with enough excess for a neat bow on top.
Position the first ribbon lengthwise around the box, ensuring it's centered and pulled taut before securing it with a small dot of clear-drying craft glue at the bottom.
Next, wrap the second ribbon width-wise, creating a perpendicular cross with the first ribbon.
You'll need to carefully lift the lengthwise ribbon slightly to thread the second one underneath, maintaining tension for a professional look.
Finally, bring both ribbon ends to the top of the box and tie them into an elegant double bow.
If you're using wired ribbon, you can shape the loops and tails to create additional dimension.
Trim the ribbon ends at a 45-degree angle to prevent fraying, and you'll have a beautifully secured presentation box that's ready for gifting.
Final Thoughts
Making chocolate truffle eggs at home offers a rewarding experience that combines artistry with delicious results. You'll find that each step of the process, from tempering chocolate to creating fillings, builds your confectionery skills and confidence in the kitchen.
The final presentation in your handcrafted box elevates these treats from simple candies to elegant gifts worthy of any special occasion.
As you've learned through this process, attention to detail makes all the difference in both the taste and appearance of your chocolate eggs. You don't need professional equipment or years of experience to create beautiful results – just patience, careful attention to temperature control, and a willingness to practice.
When you're sharing these handmade treasures with friends and family, you'll appreciate how the decorative box adds an extra touch of sophistication to your culinary creation. Remember that even if your first batch isn't perfect, each attempt will improve your technique.
You can always experiment with different flavored fillings, decorative techniques, and box designs to develop your own signature style of chocolate truffle eggs.