To unlock the secret of juicy, melt-in-your-mouth chicken, embrace sous vide cooking. This technique uses precise temperature control to achieve consistently tender results. Start by selecting high-quality cuts, preferably boneless and skinless for even cooking. Set your water bath to 140°F (60°C) and cook for 1-4 hours, depending on thickness. Season generously and vacuum seal to lock in flavors. After cooking, quickly sear the chicken for a crispy exterior while maintaining its succulence. Remember to let it rest before serving to redistribute juices. With these steps, you’ll master the art of perfectly cooked chicken. Dive deeper to refine your technique and elevate your culinary skills.
Mastering Sous Vide Chicken
Three key elements make sous vide chicken a game-changer for juicy results: precise temperature control, extended cooking time, and the sealing process. By immersing vacuum-sealed chicken in a water bath at a lower temperature, typically around 140°F (60°C), you’ll achieve tender chicken that’s cooked evenly throughout.
This method allows you to maintain the perfect cooking temperature for 1 to 4 hours, ensuring your chicken reaches optimal tenderness without the risk of overcooking.
To elevate your sous vide chicken further, consider incorporating marinades before sealing. This technique enhances flavor penetration during the cooking process, resulting in more flavorful, juicy meat.
After the sous vide process, finish your chicken with a quick sear in a hot pan to achieve a crispy exterior while preserving the moist interior.
While a meat thermometer is essential for traditional cooking methods to reach the safe temperature of 165°F (74°C), sous vide’s extended cooking time at lower temperatures effectively tenderizes the meat while ensuring food safety.
Choosing Ideal Chicken Cuts
When it comes to achieving juicy chicken, picking the right cut can make all the difference. For your “Melt In Your Mouth Chicken” recipe, boneless, skinless chicken breasts are the ideal choice. They cook quickly and absorb flavors from the mayo mixture beautifully, making them a popular choice among home cooks.
If you’re looking for an alternative that’s even more forgiving, consider chicken thighs, which offer a delicious flavor profile and higher fat content that helps retain moisture, ensuring your dish stays succulent. Honey mustard chicken thighs are an excellent example of how this cut shines in a dish.
To elevate your culinary game, opt for free-range or organic chicken. These options often provide superior flavor and tenderness compared to conventional choices.
When selecting chicken breasts, look for thinner cuts to ensure even cooking and optimal coverage of the cream of chicken soup and parmesan blend. Remember, fresh is best! Avoid frozen chicken, as it can lead to uneven cooking and a less-than-desirable texture.
Perfect Temperature Control
To achieve juicy chicken, you’ll need to master temperature control.
Start by understanding that the ideal cooking temperature for chicken is 165°F (74°C), but you can use lower temperatures with sous-vide methods for longer durations.
Always use a meat thermometer to monitor the internal temperature, which will help you avoid overcooking and ensure your chicken stays tender and moist.
Ideal Cooking Temperatures
The perfect temperature control is key to achieving juicy chicken every time. While the ideal cooking temperature for chicken is 165°F (74°C) to ensure safety, you can explore innovative techniques to elevate your culinary game.
For tender results, especially with chicken breast, consider using the sous-vide method at 144°F (62°C) for an extended period. This lower temperature approach yields incredibly moist meat while maintaining food safety standards.
To achieve optimal results, invest in a reliable meat thermometer. This tool will help you monitor the internal temperature precisely, preventing overcooking that can lead to dry, rubbery chicken.
Remember, chicken thighs are more forgiving and can withstand higher temperatures without sacrificing juiciness.
Once you’ve reached the desired temperature, don’t rush to serve. Allow your chicken to rest for several minutes after cooking. This crucial step helps redistribute the juices throughout the meat, ensuring each bite is as succulent as possible.
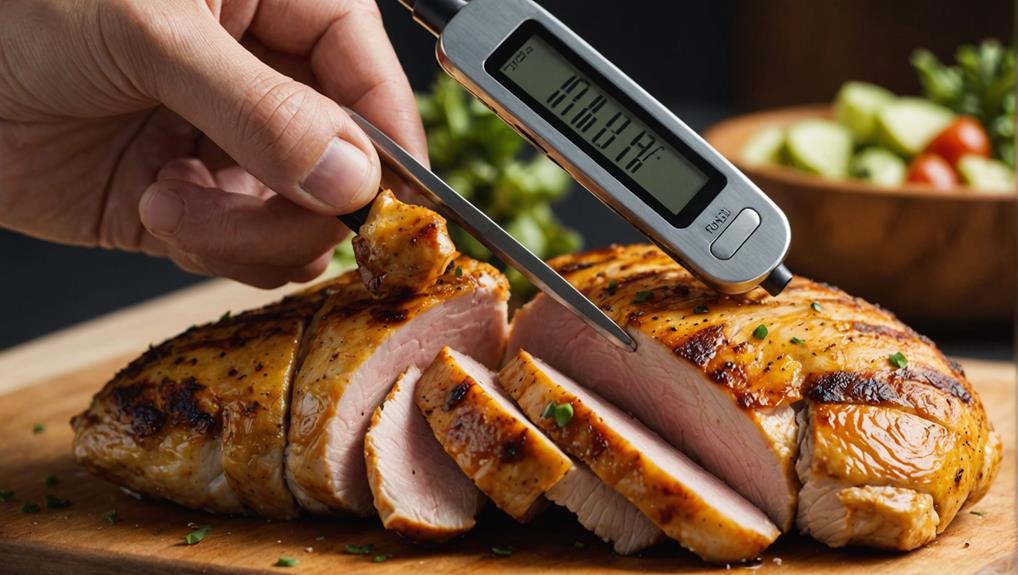
Using Meat Thermometers
Mastering the use of a meat thermometer is crucial for achieving perfect temperature control in your chicken dishes. To ensure juicy chicken every time, invest in a reliable digital meat thermometer. This innovative tool will revolutionize your cooking consistency and help you avoid overcooking, which often results in dry, rubbery meat.
When using your meat thermometer, insert it into the thickest part of the chicken breast, steering clear of bones for an accurate reading. You’re aiming for an internal temperature of 165°F (74°C), the safe minimum temperature that guarantees both food safety and optimal juiciness. Don’t rely on guesswork; let the thermometer guide you to perfection.
For best results, use an instant-read thermometer. It’ll provide quick feedback, allowing you to make real-time adjustments to your cooking process.
Remember, even after you’ve reached the target temperature, let your chicken rest for 5-10 minutes. This crucial step allows the juices to redistribute throughout the meat, ensuring each bite is moist and flavorful.
With these techniques, you’ll consistently produce chicken that’s safe, succulent, and sure to impress.
Water Bath Setup
In accordance with sous-vide cooking principles, setting up your water bath correctly is crucial for achieving juicy, perfectly cooked chicken every time. Your water bath setup should include a precision cooker or immersion circulator to maintain a constant temperature, typically between 140-165°F (60-74°C) for chicken. This precise control ensures even cooking and optimal moisture retention.
To begin, fill a large container with water and attach your precision cooker. Set the temperature based on your desired doneness, remembering that higher temperatures yield firmer textures.
Next, vacuum-seal your chicken breasts to prevent water infiltration and lock in flavors. Submerge the sealed chicken in the water bath, ensuring it’s fully covered.
Cooking times for chicken breasts usually range from 1-2 hours, depending on thickness and desired texture. This extended, gentle cooking process results in incredibly tender meat.
Once your chicken reaches the perfect doneness, remove it from the bath and finish with a quick sear in a hot pan for a crispy exterior. This method guarantees consistently juicy, flavorful chicken that’ll revolutionize your culinary repertoire.
Seasoning and Vacuum Sealing
You’ll want to start by selecting a flavor-enhancing spice blend that complements chicken, such as a mixture of salt, pepper, and garlic powder.
Once you’ve chosen your seasonings, apply them generously and evenly to the chicken, ensuring every part is well-coated for maximum flavor impact.
Flavor-Enhancing Spice Blends
Elevating your chicken dishes to new heights of flavor can be as simple as experimenting with spice blends and vacuum sealing techniques. By creating your own flavor-enhancing spice blends using ingredients like garlic powder, paprika, and dried herbs, you’ll unlock a world of taste possibilities for your poultry.
For added inspiration, consider incorporating unique flavors from dishes like Slow Cooker Chili Con Carne, which is built around bold spices and ingredients. To maximize the impact of these blends, try vacuum sealing your chicken with the spices and marinades. This method not only infuses flavor more deeply but also helps retain moisture during cooking, resulting in a juicier final product.
For best results, allow your chicken to marinate in the vacuum-sealed bag for 30 minutes to 2 hours. This concentrated environment significantly enhances both flavor and tenderness.
To further tenderize the meat, incorporate acidic ingredients like vinegar or citrus juice into your spice blend. These additions will help break down the protein fibers, creating that sought-after melt-in-your-mouth texture.
Don’t be afraid to venture beyond traditional seasonings; try unique combinations like Old Bay seasoning or a homemade Ethiopian spice mix to add exciting new dimensions to your chicken dishes.
With these techniques, you’ll consistently achieve juicy, flavorful chicken that’s sure to impress.
Proper Seasoning Techniques
Mastering proper seasoning techniques is crucial for achieving consistently juicy and flavorful chicken. To elevate your culinary game, start by salting your chicken before cooking. This simple step enhances moisture retention and flavor penetration, resulting in a tender, succulent dish.
For even better results, try vacuum sealing your chicken with a marinade. This innovative method intensifies the interaction between seasonings and meat, allowing for deeper flavor absorption. Just as with braised short ribs, where slow cooking enhances both texture and taste, marinating chicken while vacuum sealed allows the flavors to meld beautifully.
When marinating chicken, incorporate acidic components like lemon juice or vinegar. These ingredients work wonders in tenderizing the meat by breaking down protein structures, especially when combined with vacuum sealing.
To ensure optimal flavor, season your chicken at least 15-30 minutes before cooking, or longer if vacuum-sealed. This waiting period allows spices and herbs to thoroughly penetrate the meat.
For a balanced flavor profile, use a combination of dry and wet ingredients. The dry spices will adhere better to the chicken’s surface when vacuum sealed, creating a perfect harmony of flavors.
Vacuum Sealing Benefits
Three key benefits make vacuum sealing an essential technique for preparing juicy chicken.
First, it enhances flavor penetration, allowing marinades to infuse the meat more effectively in less time. You’ll achieve the same level of flavor in just 30 minutes that traditionally takes hours or overnight.
Second, vacuum sealing preserves moisture and texture during storage by removing air, preventing freezer burn and keeping your chicken fresh. This airtight environment also reduces the risk of bacteria growth, ensuring safer food preparation.
Lastly, vacuum-sealed chicken is perfect for sous-vide cooking, a method that guarantees precise temperature control. This innovative approach results in perfectly tender and juicy chicken without the risk of overcooking.
By embracing vacuum sealing, you’re not just preserving your food; you’re elevating your culinary game. The process allows for more efficient marinating, better storage, and opens up new cooking possibilities.
With these benefits, you’ll consistently achieve mouthwatering results that will impress even the most discerning palates. Vacuum sealing is more than a storage solution; it’s a gateway to juicier, more flavorful chicken every time.
Timing for Tender Results
The key to perfectly tender chicken lies in precise timing. To ensure your chicken is both safe and juicy, you’ll need to master the art of cooking time. When you bake chicken, aim for an internal temperature of 165°F (74°C). This sweet spot guarantees food safety while preserving the meat’s tenderness.
Your cooking strategy should adapt to the thickness of your chicken pieces. Thin breasts typically require 30-35 minutes in a 375°F (190°C) oven, while thicker cuts may need up to 45 minutes. Don’t rely on guesswork; invest in a meat thermometer for accuracy. This tool is your secret weapon against overcooking, which can lead to a rubbery texture.
For tender results, remember that timing extends beyond the oven. After cooking, let your chicken rest for 5-10 minutes. This crucial step allows juices to redistribute, enhancing overall moisture and tenderness.
Searing for Added Flavor
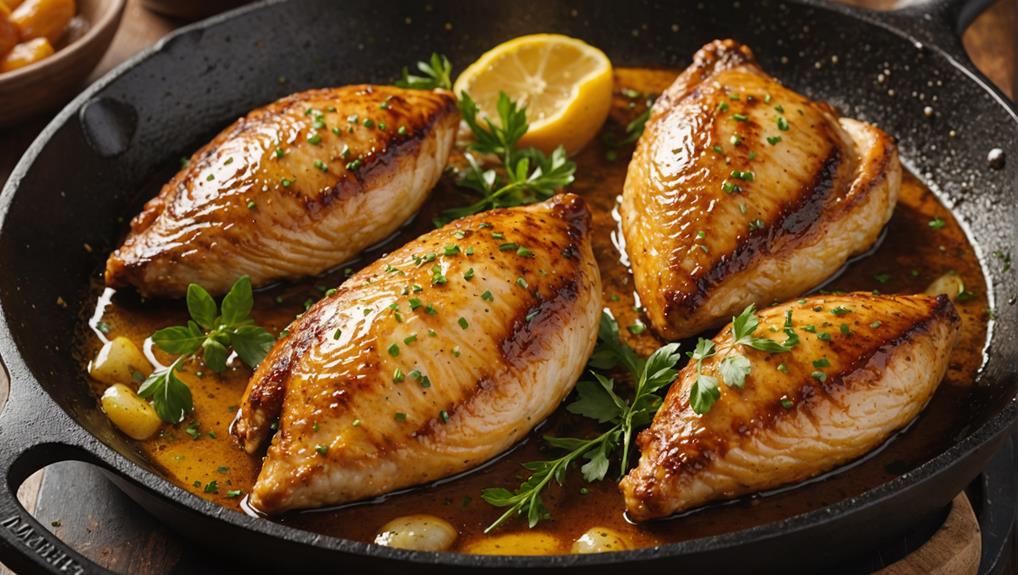
Searing your chicken before baking is a game-changer for flavor and texture. This innovative technique creates a flavorful crust that locks in moisture, ensuring your Melt In Your Mouth Chicken lives up to its name.
To achieve this, you’ll want to use medium-high heat and quickly brown both sides of the chicken for 2-3 minutes before transferring it to the oven.
The searing process triggers the Maillard reaction, caramelizing surface sugars and proteins. This results in a rich, savory flavor that adds depth to your dish, while also creating an appealing golden-brown color that’ll make your chicken look as good as it tastes.
To maximize the effectiveness of searing, pat your chicken dry before cooking. This step prevents steaming and ensures you achieve that perfect, crispy exterior.
Serving Your Sous Vide Masterpiece
After perfecting your sous vide chicken, it’s time to showcase your culinary masterpiece. You’ve achieved that coveted melt-in-your-mouth texture through precise temperature control and optimal cooking duration.
Now, let’s focus on presenting your juicy creation with finesse.
First, remember to let your chicken rest for a few minutes after cooking. This crucial step allows the juices to redistribute, ensuring maximum succulence. While it rests, prepare your serving platter and any accompanying sides. If you’ve vacuum-sealed your chicken with seasonings or a marinade, you’re in for an extra flavor boost.
For that irresistible crispy crust, quickly sear your sous vide chicken in a hot pan for 1-2 minutes per side. This final touch adds depth and complexity to your dish.
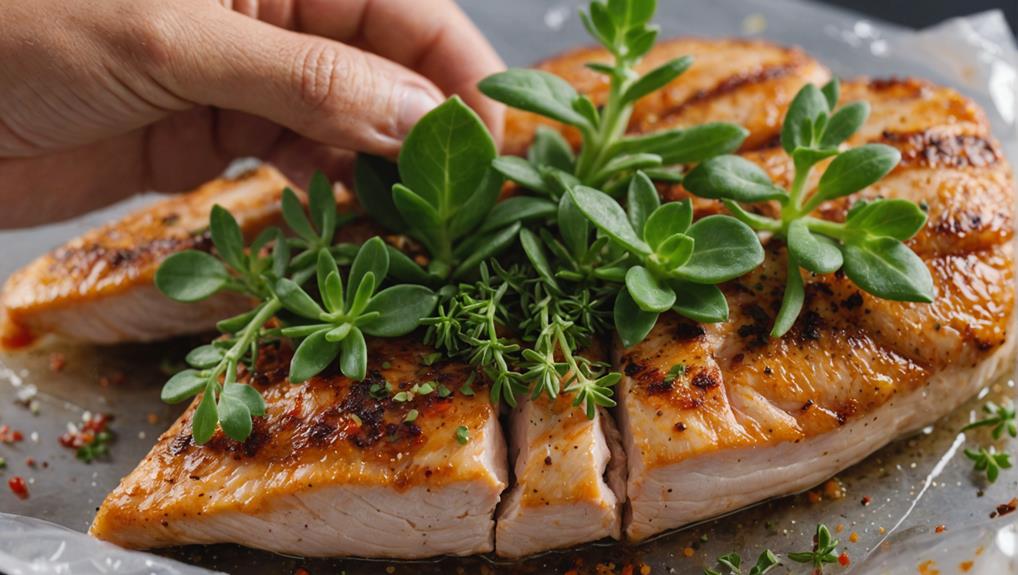
As you plate your chicken, consider garnishing with fresh herbs or a light sauce to complement the flavors you’ve infused during the cooking process.
Slice your chicken against the grain to reveal its tender, perfectly cooked interior. The consistent doneness throughout will impress your guests and demonstrate the precision of sous vide cooking.
Serve immediately to enjoy the full spectrum of textures and flavors you’ve masterfully created.
Frequently Asked Questions
What Is the Secret to the Juiciest Chicken?
You’ll unlock juicy chicken with marinade magic and brining benefits. Master cooking methods and seasoning secrets for flavor. Control temperature, avoid overcooking, and don’t forget the crucial resting period. It’s a game-changing approach to poultry perfection.
How Do You Make Chicken Soft and Juicy?
Prepare for a flavor explosion! You’ll achieve succulent chicken by using brining techniques, marinating methods, and precise cooking temperatures. Don’t forget seasoning blends and basting tips. Finally, allow proper resting time to lock in those mouthwatering juices.
What Makes Chicken More Juicy?
You’ll achieve juicier chicken by employing innovative brining techniques, experimenting with marinating methods, and optimizing cooking temperatures. Don’t forget to leverage resting periods, strategic ingredient combinations, and flavor enhancers to elevate moisture retention and enhance overall juiciness.
How to Make Chicken Meat Tender and Juicy?
You’ll achieve tender, juicy chicken by using brining techniques and marinating methods. Control cooking temperatures, allow for resting periods, and apply seasoning tips. Choose appropriate poultry cuts and you’ll revolutionize your chicken game, creating irresistibly succulent dishes every time.
Final Thoughts
You’ve now unlocked the secret to sous vide chicken mastery, joining the ranks of culinary wizards who transform ordinary poultry into extraordinary meals. With your newfound knowledge, you’ll create chicken dishes that’ll make your taste buds sing like a nightingale. Remember, practice makes perfect, so don’t be afraid to experiment. As you refine your technique, you’ll soon be serving up chicken that’s so tender and juicy, it’ll rival the legendary feasts of kings and queens.